PowerScale OneFS 9.9

Dell PowerScale is already powering up summer with the launch of the innovative OneFS 9.9 release, which shipped today (13th August 2024). This new 9.9 release is an all-rounder, introducing PowerScale innovations in performance, security, serviceability, protocols, and ease of use.

OneFS 9.9 delivers the next version of PowerScale’s common software platform for on-prem and cloud deployments. This can make it a solid fit for traditional file shares and home directories, vertical workloads like M&E, healthcare, life sciences, financial services, and next-gen AI, ML and analytics applications.

PowerScale’s scale-out architecture can be deployed on-site, in co-lo facilities, or as customer managed Amazon AWS and Microsoft Azure deployments, providing core to edge to cloud flexibility, plus the scale and performance and needed to run a variety of unstructured workflows on-prem or in the public cloud.

With data security, detection, and monitoring being top of mind in this era of unprecedented cyber threats, OneFS 9.9 brings an array of new features and functionality to keep your unstructured data and workloads more available, manageable, and secure than ever.

Monitoring and Alerting

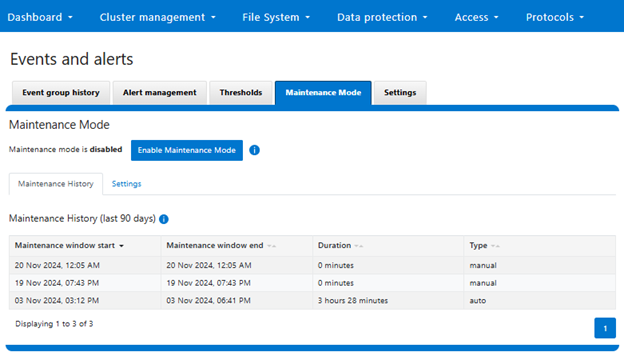
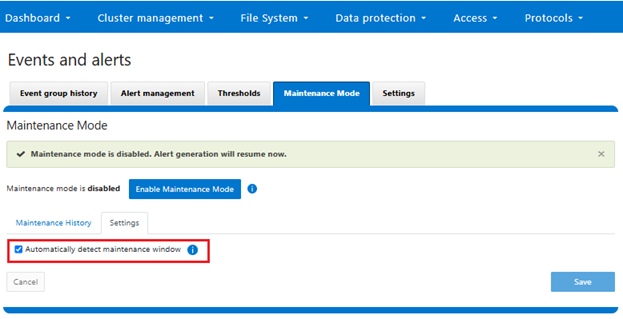
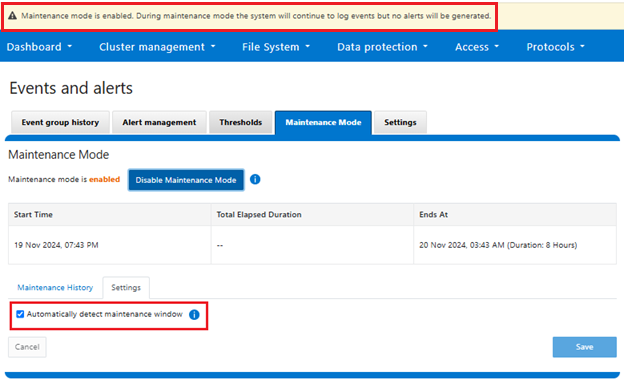
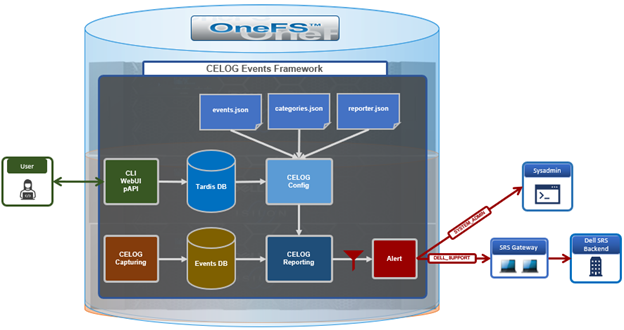
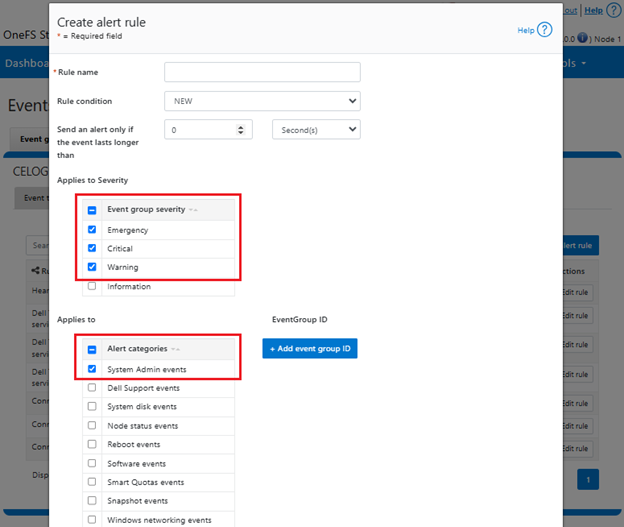
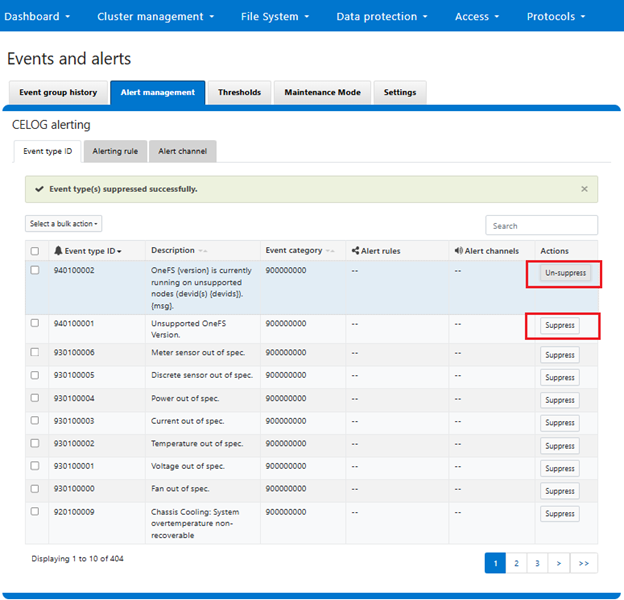
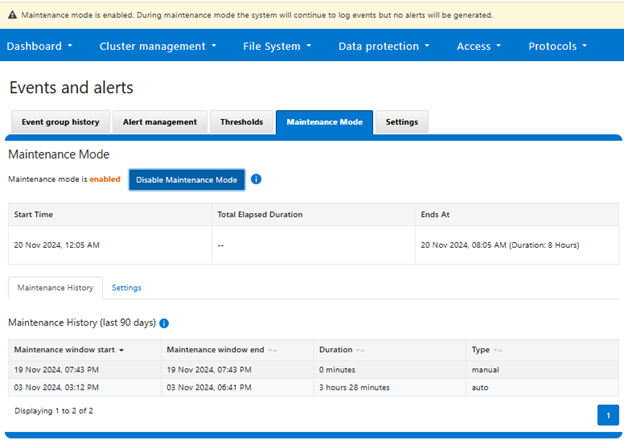
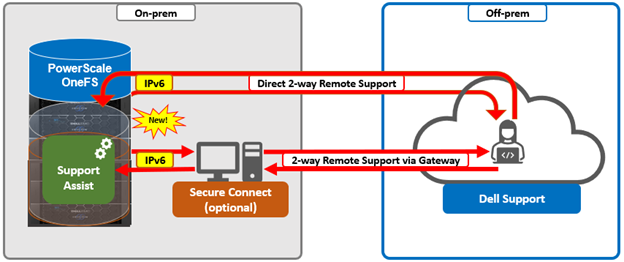
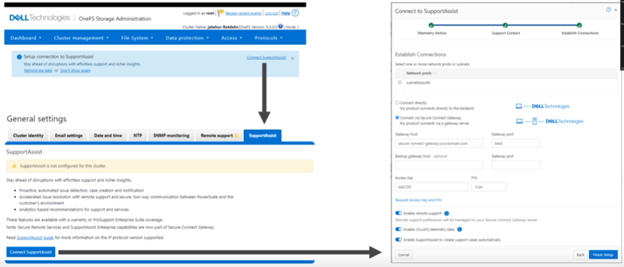
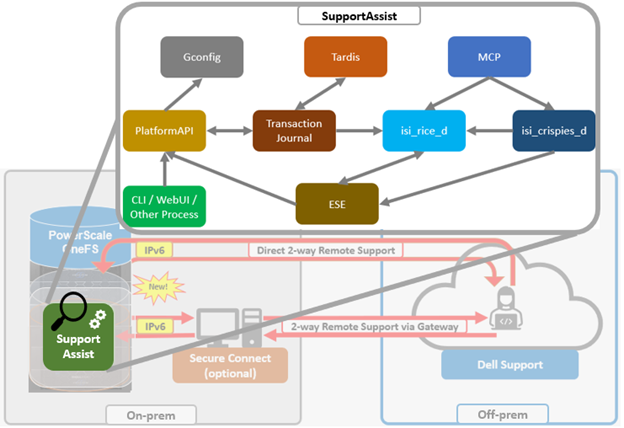
On the monitoring and reporting front, OneFS 9.9 sees the debut of an automatic maintenance mode, allowing a maintenance window to be automatically triggered during an upgrade, node reboot, shutdown, or similarly disruptive event. In concert with this are the ‘noise reduction’ benefits provided by a new superfluous alerting and call-home suppression feature. Additionally, OneFS 9.9 also adds IPv6 networking support to its SupportAssist ‘phone home’ service.

Security

OneFS 9.9 now provides class of service (CoS) and quality of service (QoS) tagging via the introduction of Differentiated Service Code Point (DSCP) support within the OneFS firewall. This allows storage and network administrators to classify and separate network traffic, such as transactional data, management, bulk data, etc, in line with an organization’s security mandate and operational needs.

Upgrading

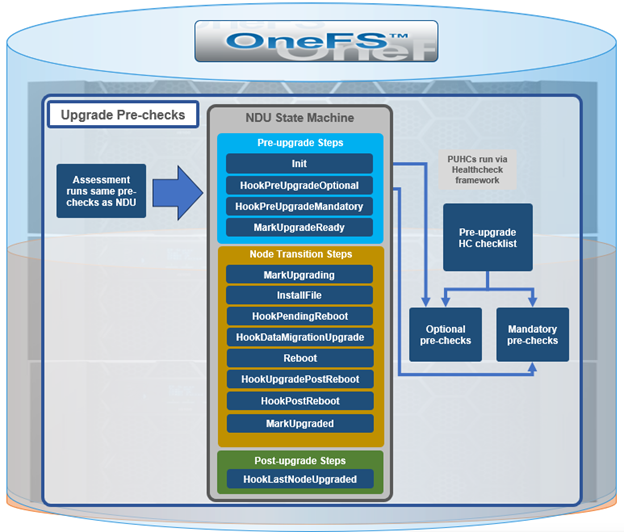
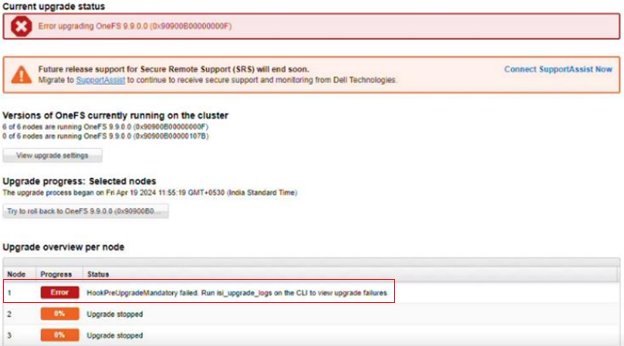
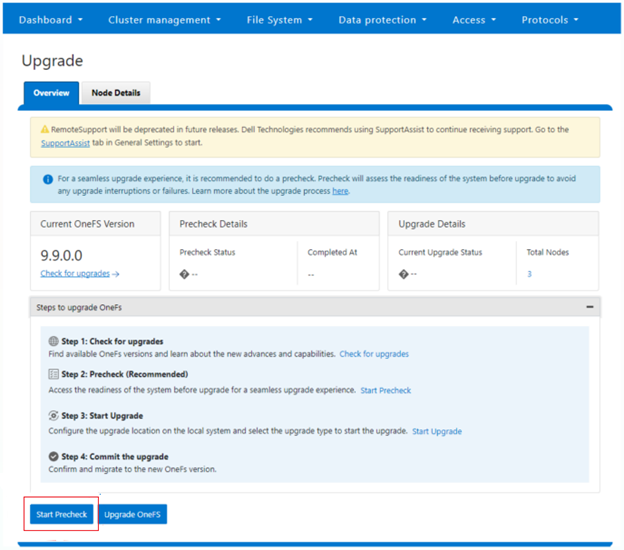
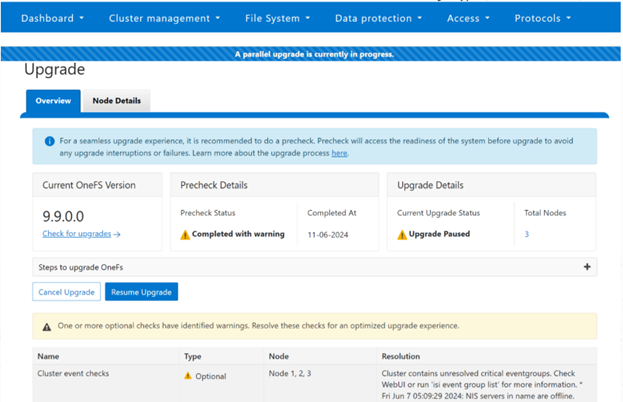
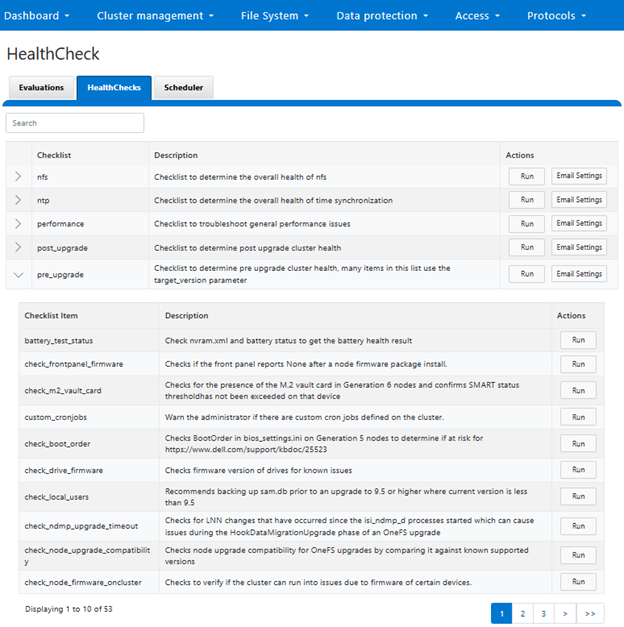
Non-disruptive cluster upgrades (NDU) get a boost in OneFS 9.9 from both enhanced SMB connection management and a new pre-upgrade health check system. The latter identifies potential issues before an upgrade can commence, improving the reliability and efficiency of system updates, and ensuring minimal disruption and optimal system performance post-upgrade.

Hardware Innovation

On the platform hardware front, OneFS 9.9 also unlocks dramatic performance and capacity enhancements – particularly for the all-flash F710, which sees the introduction of support for 61TB QLC SSDs, plus a 200Gb Ethernet backend network.

Performance

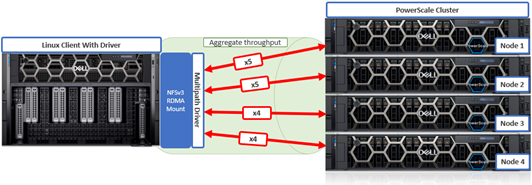
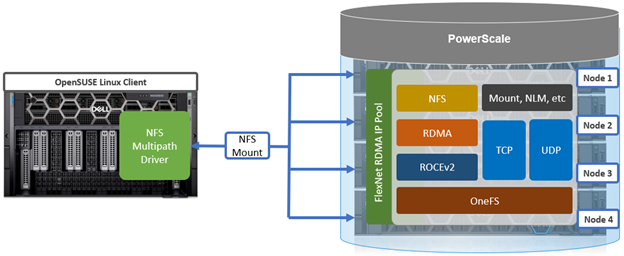
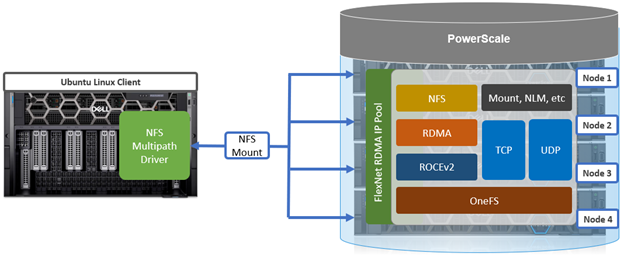
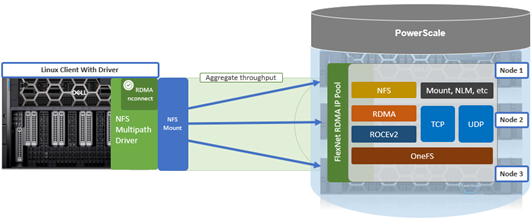
Performance is further boosted in OneFS 9.9 with the release of an NFS multipath client driver. For successful large-scale AI model customization and training, GPUs need data served to them quickly and efficiently. As such, compute and storage must be sized and deployed accordingly to eliminate potential bottlenecks in the infrastructure.

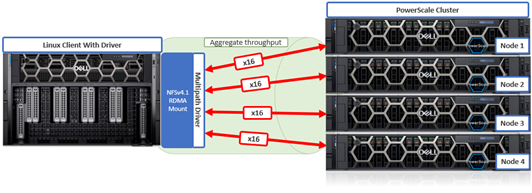
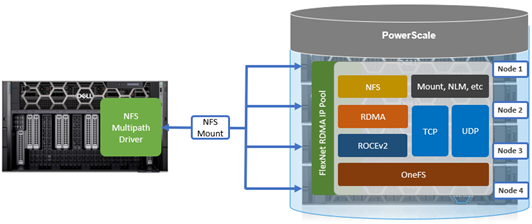
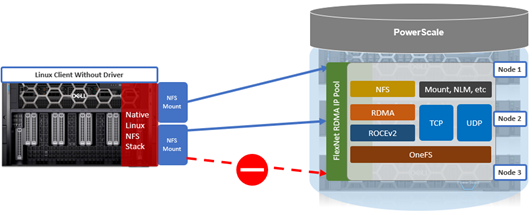
To meet this demand, the new multipath client driver enables performance aggregation of multiple PowerScale nodes through a single NFS mount point to one or many NFS clients, dramatically increasing the I/O to multiple PowerScale nodes through a single NFS mount point, for higher single-client throughput.

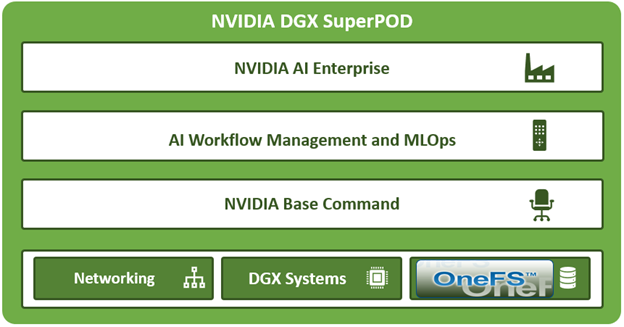
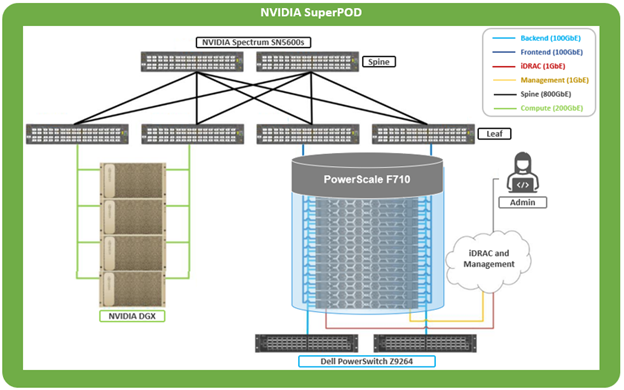
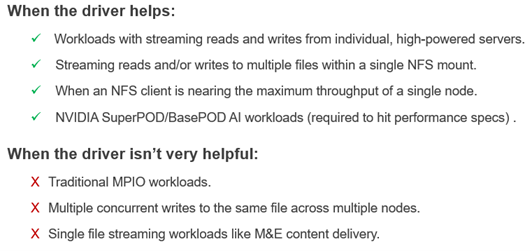
This can directly benefit generative AI and machine learning environments, plus other workloads involving highly concurrent streaming reads and writes of different files from individual, high throughput capable Linux servers. As such, the multipath client driver enables PowerScale to deliver the first Ethernet storage solution validated on the NVIDIA DGX SuperPOD.

In summary, OneFS 9.9 brings the following new features and functionality to the Dell PowerScale ecosystem:

Feature Info
Events and Alerts ·         Automatic maintenance mode.

·         Superfluous alerting suppression.

Upgrade ·         NDU improved pre-upgrade healthchecks

·         SMB disruption reduction.

Protocols ·         Support for a multipath NFS driver for Linux client systems.

·         Complete removal of deprecated SWIFT object protocol.

Networking ·         Nvidia Spectrum-4 switch support for F710 200GbE.

·         Support for in-field Ethernet adapter (NIC) swaps.

CoS / QoS Tagging ·         Class of service and quality of service tagging enabled via the introduction of  Differentiated Service Code Point (DSCP) support.
Platform ·         Infrastructure support for 61TB QLC drives and a 200Gb/s back-end Ethernet network on the all-flash F710 platform.
Support ·         IPv6 networking added for SupportAssist phone home service.

Additionally, since S3 has become the de facto object protocol due to its extensive features, robust performance, and wide industry adoption, while the OpenStack community’s focus has shifted significantly, OneFS 9.9 sees the complete removal of the OpenStack Swift protocol & API. Swift will remain available and supported in OneFS 9.8 and earlier, until their respective end of support dates.

We’ll be taking a deeper look at OneFS 9.9’s new features and functionality in future blog articles over the course of the next few weeks.

Meanwhile, the new OneFS 9.9 code is available on the Dell Support site, as both an upgrade and reimage file, allowing both installation and upgrade of this new release.

For existing clusters running a prior OneFS release, the recommendation is to open a Service Request with to schedule an upgrade. To provide a consistent and positive upgrade experience, Dell EMC is offering assisted upgrades to OneFS 9.9 at no cost to customers with a valid support contract. Please refer to Knowledge Base article KB544296 for additional information on how to initiate the upgrade process.

OneFS Platform API Architecture and Operation

Upon receiving an HTTP request sent through the OneFS API, the cluster’s web server (Apache) verifies the username and password credentials – either through HTTP Basic Authentication for single requests or via an established session to a single node for multiple requests.

Once the user has been successfully authenticated, OneFS role-based access control (RBAC) then verifies the privileges associated with the account and, if sufficient, enables access to either the /ifs file system, or to the cluster configuration, as specified in the request URL.

The request URL that calls the API is comprised of a base URL and end-point:

And the response is usually along the lines of the following:

Or from the CLI using the ‘curl’ utility:

# curl -X GET https://10.224.127.8:8080/platform/21/audit/settings/global --insecure --basic --user <username:password>

{
"settings" :
{
"audited_zones" : [],
"auto_purging_enabled" : false,
"cee_server_uris" : [],
"config_auditing_enabled" : false,
"config_syslog_certificate_id" : "",
"config_syslog_enabled" : false,
"config_syslog_servers" : [],
"config_syslog_tls_enabled" : false,
"hostname" : "",
"protocol_auditing_enabled" : false,
"protocol_syslog_certificate_id" : "",
"protocol_syslog_servers" : [],
"protocol_syslog_tls_enabled" : false,
"retention_period" : 180,
"system_auditing_enabled" : false,
"system_syslog_certificate_id" : "",
"system_syslog_enabled" : false,
"system_syslog_servers" : [],
"system_syslog_tls_enabled" : false
}
}

From the CLI, the ‘curl’ output can be parsed using standard shell commands and utilities. For example, to find the cluster’s OneFS version:

# curl -X GET https://10.224.127.8:8080/platform/21/cluster/config --insecure --basic --user root:a | grep -I release

"release" : "9.8.0.0",

In the event that authentication fails for some reason, a response similar to the following notification will be returned:

When it comes to finding the appropriate platform API endpoint, the following ‘describe’ suffix can be used at the base level (platform) within the URL to list all the available options:

https://<cluster_IP>:8080/platform?describe

For example:

As can be seen above, the endpoints are appropriately named to aid navigation of the API.

When used on an endpoint, rather than a path, the ‘describe’ option returns a collection of JSON of methods and fields. In addition to the supported methods (GET, POST, DELETE), the output also includes all support fields and types. Given the breadth of information, it is best viewed from a web browser using a JSON viewer add-on/extension, such as the popular ‘JSONview’ utility. For example:

In addition to the ‘describe’ syntax, the platform API also recognizes the ‘list’ suffix. This can be used at any point in the API hierarchy, in conjunction with ‘describe’, to report the available endpoint(s) for a particular OneFS feature or function. For example, to show the pAPI options for the S3 protocol:

https://<cluster_IP>:8080/platform/21/protocols/S3?describe&list

For example, we can see that OneFS currently provides seven API endpoints for the S3 protocol:

Note that the numerical ‘protocol version’ must be included in the URL – in this case version 21 (the most current).

Typically, new features and API primitives are added to new releases by incrementing the pAPI version number. As such, the endpoints functionality is consistent in each version. For example, the /1/cluster/config endpoint is not be changed to add new functionality, and any new calls and features are uprev’d and placed into the next version. That said, the version number is not guaranteed to be whole number. For example, an incremental version number (v5.1) was introduced back in OneFS 8.1.0.4 to accommodate the NDU rolling reboot endpoint. Querying a particular version will only report the API endpoints that were available at that point in time. For instance, since the S3 protocol was only added in pAPI v10, querying earlier versions will not return any of the seven current endpoints:

Additionally, if you already know the CLI command for something you can get the REST endpoint etc. by simply running:

# isi --debug <command>

The output from the debug flag contains the HTTP REST traffic in both directions, including both endpoint and payloads. For example, take the following ‘isi dedupe settings view’ CLI command output, both with and without the –debug flag:

# isi dedupe settings view

Dedupe Schedule: -

          Paths: /ifs/data

   Assess Paths: -

And:

# isi --debug dedupe settings view

2024-07-21 21:59:52,488 DEBUG rest.py:80: >>>GET ['1', 'dedupe', 'settings']

2024-07-21 21:59:52,488 DEBUG rest.py:81:    args={}

   body={}

2024-07-21 21:59:52,503 DEBUG rest.py:106: <<<(200, {'content-type': 'application/json', 'allow': 'GET, PUT, HEAD', 'status': '200 Ok'}, b'\n{\n"settings" : \n{\n"assess_paths" : [],\n"dedupe_schedule" : null,\n"paths" : [ "/ifs/data" ]\n}\n}\n')

Dedupe Schedule: -

          Paths: /ifs/data

   Assess Paths: -

The first line of output above shows that the equivalent endpoint for this CLI command is:

/1/dedupe/settings/

From this, the API URL can be inferred:

# curl -X GET https://10.1.10.20:8080/platform/1/dedupe/settings/ --insecure --basic --user <username>:<password>

{

"settings" :

{

"assess_paths" : [],

"dedupe_schedule" : null,

"paths" : [ "/ifs/data" ]

}

}

In addition to ‘curl’, OneFS also offers an ‘isi_papi_tool’ CLI utility for querying a node’s platform API endpoints. For example,  the following syntax can be used to view the status of a node’s SMB sessions via the ’16/protocols/smb/sessions’ endpoint:

# isi_papi_tool GET 16/protocols/smb/sessions | egrep "computer|client_type|encryption"

Or to see all the SMB sessions across the entire cluster with ‘isi_papi_tool’:

# for node in $(isi_nodes %{lnn}); do echo Sessions on Node $node:; isi_papi_tool GET 16/protocols/smb/sessions\?lnn=$node | egrep "computer|client_type|encryption";done

Sessions on Node 1:

Sessions on Node 2:

"client_type" : "SMB 3.1.1",

"computer" : "10.1.10.22",

"encryption" : false,

Sessions on Node 3:

Sessions on Node 4:

Sessions on Node 5:

"client_type" : "SMB 3.1.1",

"computer" : "10.1.10.25",

"encryption" : true,

Sessions on Node 9:

In the next article in this series, we’ll turn our attention to OneFS RAN, the RESTful namespace access API.

OneFS Web APIs

In addition to the OneFS WebUI and CLI administrative management interfaces, a PowerScale cluster can also be accessed, queried and configured via a representative state transfer (RESTful) API. This API includes a superset of the Web and CLI interfaces and provides the additional benefit of being easily programmable. As such, it allows most of the cluster’s administrative tasks to be scripted and automated.

RESTful APIs are web based (HTTP or HTTPS) interfaces that use the HTTP methods, combined with the URL (uniform resource locator), to undertake a predefined action. The URL can describe either a collection of objects (eg. ‘https://papi.isln.com:8080/<resources>/’) or an individual object from a collection (eg. ‘https://papi.isln.com:8080/<resources>/<object>’).

There are typically six principal HTTP operations, or ‘methods’:

Method Object Collection
Get Retrieve a representation of the addressed member of the collection. List the URIs and (optionally) additional details of a collection’s members.
Put Replace or create the addressed member of a collection. Replace the entire collection with another collection.
Post Infrequently used to promote an element to a collection in its own right, creating a new object within it. Create a new entry in the collection. The new entry’s URI is typically automatically assigned and usually returned by the operation.
Patch Update the addressed member of a collection. Rarely used.
Delete Delete the addressed member of a collection. Delete an entire collection.
Head Returns response header metadata without the response body content. Returns response header metadata without the response body content.

For a given application programming interface (API), its path component typically conveys specific meaning, or ‘representative state’, to the RESTful spec. The ‘human readability’ of a RESTful endpoint can be seen, for example, by looking at a request for a cluster’s SMB shares information:

As shown above, the URL is clearly comprised of distinct parts:

Component Description
Scheme Essentially the HTTP protocol version
Authority IP address (<cluster_ip>) and TCP port (<port>) of the cluster.
Path HTTP path to the endpoint
Query The specific endpoint and data requested.
Fragment Occasionally the query is subdivided, such as ‘query#fragment’.

Additionally, OneFS also uses the following API definitions, which are worth understanding:

Item Description
Access point Root path of the URL to the file system. An access point can be defined for any directory in the file system.
Collection Group of objects of a similar type. For example, all the user-defined quotas on a cluster make up a collection of quotas.
Data object An object that contains content data, such as a file on the system
Endpoint Point of access to a resource, comprising a path, query, and sometimes fragment(s).
Namespace The file system structure on the cluster.
Object Containers or data objects. Also known as system configuration data that a user creates, or a global setting on the system.

·         user-created object: snapshot, quota, share, export, replication policy, etc.

·         global settings:  default share settings, HTTP settings, snapshot settings, etc.

Platform Indicates pAPI and the OneFS configuration hierarchy.
Resource An object, collection, or function that you can access by a URI.
Version The version of the OneFS API. It is an optional component, as OneFS automatically uses the latest API.

At a high level, the overall OneFS API is divided into two distinct sections:

Section API Description
Namespace RAN Enables operations on files and directories on the cluster.
Platform pAPI Provides endpoints for cluster configuration, management, and monitoring functionality.

As such, the general topology is as follows:

The Platform API (pAPI) provides a variety of endpoints for managing the administrative aspects of a PowerScale cluster. Indeed, the OneFS CLI and WebUI both use these pAPI handlers to facilitate their cluster config and management functionality, so pAPI represents a superset of both user interfaces.

For file system configuration API requests, the resource URI is composed of the following components:

 https://<cluster_ip>:<port>/<api><version>/<path>/<query>

For example, a GET request sent to the following platform URI will return all the SMB shares on a cluster. Where ‘platform’ indicates pAPI, ’17’ is the API version, ‘protocols’ is the configuration area, ‘SMB’ is the collection name, and ‘shares’ is the object ID:

GET https://10.1.10.20:8080/platform/17/protocols/smb/shares

By way of contrast, file system access APIs requests are served by the RESTful Access to Namespace (RAN) API. RAN uses resource URIs, which are composed of the following components:

https://<cluster_ip>:<port>/<access_point>/<resource_path>

For example, a GET request to the following RAN URI will return the files that are stored within the namespace under /ifs/data/dir1:

GET https://10.1.10.20:8080/namespace/ifs/data/dir1

The response will look something like the following:

In the next couple of articles in this series we’ll dig into the architecture and details of the platform (pAPI) and namespace (RAN) APIs in more depth.

OneFS IceAge and Automated Core File Analysis

The curious and observant may have noticed the appearance of a new service in OneFS 9.8, namely isi_iceage_d.

For example:

# isi services -a | grep -i iceage

isi_iceage_d         Ice Age Monitor Daemon                   Enabled

So what exactly is this new IceAge process and what does it do, you may ask?

Well, OneFS IceAge is a python tool based on lldb, which automatically extracts, optimizes, compresses, and disseminates information from OneFS core files. The goal of this is to streamline the detection and diagnosis of issues and bugs and improve time to resolution.

The IceAge service (IceAge monitor) performs the following core functions:

Function Description
Detection Monitoring the /var/crash directory for fresh core files.
Extraction Extraction (and subsequent removal) of IceAge reports and headers from cores.
Upload Uploading reports to Dell Backend Services .

The IceAge service runs on a cluster, immediately extracting IceAge reports from any core dumps as they are generated, and outputting to a JSON report file, which is suitable for further processing. Reports also include a stack trace to show the potential crash cause. Information can be extracted without the presence of debug symbols  and can also be retroactively annotated with further useful information (such source code line numbers, etc) once symbols are available. Additional information can also be extracted from debug symbols in order to help debug application-specific data structures from a core.

Once a core has been detected, optimized, and processed, IceAge then uses two principal methods of transmission for the report and header:

Uploader Description
isi_gather_info In addition to OneFS logsets, the isi_gather_info utility in OneFS 9,8 and later can collect and transmit JSON IceAge reports and headers as a default option and retain sending cores by request from command line options.
SupportAssist Secure Remote Services (SRS) is used for sending alerts, log_gathers, usage intelligence, managed device status to the backend. OneFS uses SRS to communicate with Dell Support’s backend systems. OneFS 9.8 introduces the ability to collect and send JSON IceAge reports and retain sending cores by request from specific command.

The isi_gather_info command on the cluster gathers various files, including dumps and the output of various commands and uploads them to Dell Support. The /usr/bin/remotesupport directory contains a set of gather and remote support scripts which are designed to collate specific log information about the cluster. Under  this directory is the ‘get_data_iceage’ script which, in conjunction with ‘GetData.sh’, gather and upload data about IceAge reports and headers. These scripts are typically called from the Remote Support Shell, which is a simple, limited shell, solely for running these support scripts.

To aid identification, the header files are generated with the following nomenclature:

YYYYMMDD_HHMMSS_$(SWID)_$(RANDOM_GUID)_IceAgeHeader.tgz

For example:

20240712_173427_ELMISL0121YLVD_4793e5ec-3605-41a6-b72c-d3c404059988_IceAgeHeader.tgz

The header also includes backtrace information and several important sections from the IceAge JSON report.

When IceAge headers have been created and written out to a temporary file, the temporary file is renamed to match the ESRS backend requirements and is uploaded to Dell (ie. CloudIQ). If the upload succeeds the file is removed. However, if the upload fails for any reason, the file is placed into a ‘retry’ state, and a subsequent upload attempted at the beginning of the next interval. Upload retry files are stored in the ‘/ifs/.ifsvar/iceage-reports/headers/retries’ directory.

Architecturally, IceAge looks and operates as follows:

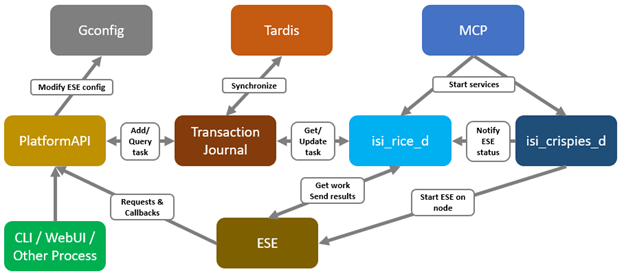
The core isi_iceage_d daemon spawns several additional process, which run on each node in the cluster. These include:

  • IceAge monitor upload
  • Cluster queue watcher
  • Local core watcher
  • Local core timer

For example:

# ps -auxw | grep -i iceage

root    4668    0.0  0.0  99976  50480  -  S    Sat12        1:34.52 /usr/libexec/isilon/isi_iceage_d /usr/local/lib/python3.8/site

root    4688    0.0  0.0 126200  51996  -  I    Sat12        0:06.87 iceage_monitor_upload (isi_iceage_d)

root   63440    0.0  0.0  99976  50480  -  S    18:33        0:00.00 iceage_monitor: cluster queue watcher (isi_iceage_d)

root   63459    0.0  0.0 102384  50656  -  S    18:33        0:00.00 iceage_monitor: local core watcher (isi_iceage_d)

root   63462    0.0  0.0  99976  50480  -  S    18:33        0:00.00 iceage_monitor: local core timer (isi_iceage_d)

When a OneFS component or service fails and a core file is written to /var/crash, IceAge enters it into a queue under /ifs/.ifsvar/iceage-cores/, in which cores awaiting processing are held. To facilitate this, OneFS creates a temporary crash space on the cluster’s existing drives and provisions an ephemeral UFS file system for IceAge to use. IceAge plug-ins are also provided for several OneFS protocols and data services, such as NFS, SMB, etc, in order to generate more detailed reports from the often large and complex cores derived from issues with these processes.

Additionally, the IceAge cluster monitor service watches for cores in the queue and processes them one by one. This generates a report with a summary of information from the core. These reports can then be transmitted to Dell Support by the isi_gather_info process, or via SupportAssist (ESE).

Enabled by default in OneFS 9.8 and later, the IceAge service is managed by MCP, and can be enabled and disabled via the ‘isi services’ CLI command.

# isi services -a isi_iceage_d

isi: Service 'isi_iceage_d' is enabled.

# isi services -a isi_iceage_d disable

The service 'isi_iceage_d' has been disabled.

# isi services -a isi_iceage_d enable

The service 'isi_iceage_d' has been enabled.

Integration with SupportAssist/ESE and isi_gather_info allows IceAge to automatically and securely send the generated report text files back.

Configuration-wise, the IceAge monitor uses a gconfig file in which parameters such as log level can be specified. For example:

# isi_gconfig -t iceage_monitor

[root] {version:1}

iceage_monitor.queue_max_size_gb (int) = 20

iceage_monitor.retention_period_min (int) = 43800

iceage_monitor.log_level (char*) = INFO

iceage_monitor.header_dispatch (bool) = true

iceage_monitor.min_core_create_time_supported (int) = 1715245735

The above configuration is also exposed via the OneFS PlatformAPI, and any modifications are recorded in the /ifs/.ifsvar/ iceage_monitor_config_changes.log file.

The basic flow of the IceAge service and SupportAssist transport is as follows:

  1. First, ensure that SupportAssist is configured and running on the cluster:
# isi supportassist settings view | grep -i enabled

Service enabled:  Yes

If not, SupportAssist can be activated as follows:

# isi supportassist settings modify --connection-mode gateway --gateway-host <host_FQDN> --gateway-port 9443 --backup-gateway-host <backup_FQDN> --backup-gateway-port 9443 --network-pools="subnet0.pool0"

Note that the changes made to SupportAssist settings may take some time to take effect.

  1. Next, generate one or more cores. This can be done with the following CLI syntax:
# isi_noatime isi_kcore <PID> /var/crash/<PID>.<service>.cor.gz

For example, creating two NFS core files for processes with PIDs ‘22120 and ‘22121 in the following output:

# ps -aux | grep nfsroot   22109   0.0  0.5  54840  30356  -  Ss   17:21     0:00.01 /usr/sbin/isi_netgroup_d -P isi_netgroup_d_nfsroot   22120   0.0  0.4  55000  26652  -  Ss   17:21     0:00.04 /usr/libexec/isilon/nfs proxy nfs /var/run/nfs.pidroot   22121   0.0  0.7 111340  42812  -  S<   17:21     0:00.13 lw-container nfs (nfs)root   22175   0.0  0.0  14208   2896  0  S+   17:21     0:00.00 grep nfs# isi_noatime isi_kcore 22120 /var/crash/22120.nfs.core.gz# isi_noatime isi_kcore 22121 /var/crash/22121.nfs.core.gz# ls -ltr /var/crash | grep -i core-rw-------      1 root  daemon     716005 Jul  9 17:22 22120.nfs.core.gz-rw-------      1 root  daemon    1211863 Jul  9 17:22 22121.nfs.core.gz
  1. Next, the monitor log shows the location of the report file for each cores:
# cat /var/log/isi_iceage_monitor.log

For example:

# cat /var/log/isi_iceage_monitor.log

tme2: 2024-07-09T17:23:30.541904+00:00 <3.6> tme-2(id2) isi_iceage_d[4327]: INFO:cluster.py:176 -- Run ClusterProcess with cores: ['/ifs/.ifsvar/iceage-cores/tme-1-1707499378.08631-22121.nfs.core.gz']tme2: INFO:__main__.py:569 -- IceAge startedtme2: INFO:__main__.py:320 -- Detected information for /ifs/.ifsvar/iceage-cores/tme-1-1707499378.08631-22121.nfs.core.gz:tme-2: INFO:__main__.py:360 --              build : b.main.4102rtme-2: INFO:__main__.py:360 --              domain : usertme-2: INFO:__main__.py:360 --              executable : /usr/likewise/sbin/lwsmdtme-2: INFO:__main__.py:360 --              handler : lldbtme-2: INFO:__main__.py:232 -- Calculating space needed...tme-2: INFO:__main__.py:250 -- 379992064 bytes.tme-2: INFO:__main__.py:254 -- Setting up scratch space...tme-2: INFO:__main__.py:259 -- Ready.tme-2: INFO:__main__.py:385 -- Set vmem limit to 2147483648 for pid 15640tme-2: INFO:__main__.py:389 -- Loading core...tme-2: INFO:__main__.py:391 -- Core /ifs/.ifsvar/iceage-cores/tme-1-1707499378.08631-22121.nfs.core.gz loaded.tme-2: INFO:__main__.py:394 -- Extracting...<snip>isi_iceage_d[15637]: INFO:makedigest.py:124 -- Written tgz file: '/ifs/.ifsvar/iceage-reports/headers/20240209_172334_DEFAULTSWID_db3bb260-88ce-4619-9f48-b9828eddccd5_IceAgeHeader.tgz'tme-2: 2024-07-09T17:23:34.318304+00:00 <3.6> tme-2(id2) isi_iceage_d[15637]: INFO:makedigest.py:124 -- Written tgz file: '/ifs/.ifsvar/iceage-reports/20240709_172334_DEFAULTSWID_db3bb260-88ce-4619-9f48-b9828eddccd5_IceAgeHeader.tgz'
  1. The IceAge JSON files are located under /ifs/.ifsvar/iceage-cores, and contain a wealth of information, including OneFS versions and paths, etc. For example:
# cat tme-2-1720811519.5973-59660.nfs.core.json | grep -i core

  "core-file": "/ifs/.ifsvar/iceage-cores/tme-2-1720811519.5973-59660.nfs.core.gz",

        "set_core_hook": 18446744071587293992,

    "corefile_build": "B_9_8_0_0_003(RELEASE)",

    "corefile_version": "Isilon OneFS 9.8.0.0 (Release, Build B_9_8_0_0_003(RELEASE), 2024-03-11 09:27:38, 0x909005000000003)",
  1. Finally, if SupportAssist is configured on the cluster, the ESE logs can be used verify that the reports have been successfully transmitted back to Dell Support with the following CLI command:
# cat /usr/local/ese/var/log/ESE.log | grep -I iceage

For example:

"path": "/ifs/.ifsvar/iceage-reports/headers/20240709_172303_ELMISL0224SM54_0740a853-517c-4fc5-b162-64991d9494b9_IceAgeHeader.tgz",
20067 2024-07-09 17:26:41,235 CP Server Thread-7 INFO     DellESE.ese.threads.web.cherrypydata LN:  61 /ifs/.ifsvar/iceage-reports/headers/20240709_172303_ELMISL0224SM54_0740a853-517c-4fc5-b162-64991d9494b9_IceAgeHeader.tgz is a file

20067 2024-07-09 17:26:43,696 Web Dispatcher DEBUG    urllib3.connectionpool LN: 474 https://eng-sea-v4scg-01.west.isilon.com:9443 "PUT /esrs/v1/devices/ISILON-GW/ELMISL0224SM54/mft/BINARY-ELMISL0224SM54-20240709T172642Z-33MJ9WiT5Swt4mcLdEwSkMA-20240709_172303_ELMISL0224SM54_0740a853-517c-4fc5-b162-64991d9494b9_IceAgeHeader.tgz HTTP/1.1" 200 0
20067 2024-07-09 17:26:43,699 Web Dispatcher DEBUG    DellESE.ese.srs.srswebapi LN:  89 Sending ESE binary file [20240709_172303_ELMISL0224SM54_0740a853-517c-4fc5-b162-64991d9494b9_IceAgeHeader.tgz], Workitem [33MJ9WiT5Swt4mcLdEwSkMA], sent to url https://eng-sea-v4scg-01.west.isilon.com:9443/esrs/v1/devices/ISILON-GW/ELMISL0224SM54/mft/BINARY-ELMISL0224SM54-20240709T172642Z-33MJ9WiT5Swt4mcLdEwSkMA-20240209_172303_ELMISL0224SM54_0740a853-517c-4fc5-b162-64991d9494b9_IceAgeHeader.tgz.  Date: 2024-02-09T17:26:43.282+0000.   Status: 200

  "path": "/ifs/.ifsvar/iceage-reports/headers/20240209_172334_ELMISL0224SM54_db3bb260-88ce-4619-9f48-b9828eddccd5_IceAgeHeader.tgz",
20067 2024-07-09 17:26:47,235 CP Server Thread-8 INFO     DellESE.ese.threads.web.cherrypydata LN:  61 /ifs/.ifsvar/iceage-reports/headers/20240709_*172334_ELMISL0224SM54_db3bb260-88ce-4619-9f48-b9828eddccd5_IceAgeHeader.tgz* is a file

20067 2024-07-09 17:26:58,632 Web Dispatcher DEBUG    urllib3.connectionpool LN: 474 https://eng-sea-v4scg-01.west.isilon.com:9443 "PUT /esrs/v1/devices/ISILON-GW/ELMISL0224SM54/mft/BINARY-ELMISL0224SM54-20240709T172658Z-3hJcHU9hEomZYyWLCkqh5Jj-20240709_172334_ELMISL0224SM54_db3bb260-88ce-4619-9f48-b9828eddccd5_IceAgeHeader.tgz HTTP/1.1" 200 0
20067 2024-07-09 17:26:58,636 Web Dispatcher DEBUG    DellESE.ese.srs.srswebapi LN:  89 Sending ESE binary file [20240709_172334_ELMISL0224SM54_db3bb260-88ce-4619-9f48-b9828eddccd5_IceAgeHeader.tgz], Workitem [3hJcHU9hEomZYyWLCkqh5Jj], sent to url https://eng-sea-v4scg-01.west.isilon.com:9443/esrs/v1/devices/ISILON-GW/ELMISL0224SM54/mft/BINARY-ELMISL0224SM54-20240709T172658Z-3hJcHU9hEomZYyWLCkqh5Jj-20240709_172334_ELMISL0224SM54_db3bb260-88ce-4619-9f48-b9828eddccd5_IceAgeHeader.tgz.  Date: 2024-07-09T17:26:58.362+0000.   Status: 200

There are some caveats to be aware of with IceAge, and it may not be able to process every core in all situations. As such, it is considered ‘best effort’ relative to security and performance constraints.

Specifically, the scenarios under which IceAge monitor will not automatically process cores include:

Component Condition Details
Filesystem During unavailability of ifs
On-disk encryption On SED Nodes, because IceAge uses the band on SEDs that is not encrypted for scratch.
Drive maintenance During drive distmirror rebalancing and drive firmware upgrade
Capacity If OneFS is unable to find sufficient free space on drives.
Memory If it would require too much memory that could cause instability. The vmem limit is determined by the amount of scratch space needed as well as system memory.
Version For any cores generated on OneFS versions older than the running build, IceAge may struggle to interpret them accurately using the debug symbols from the current build.


OneFS NFS over RDMA Client Configuration

The final article in this series focuses on the Linux client-side configuration that’s required when connecting to a PowerScale via the NFS over RDMA protocol.

Note that there are certain client hardware prerequisites which must be met in order use NFSv3 over RDMA service on a PowerScale cluster. These include:

Prerequisite Details
RoCEv2 capable NICs NVIDIA Mellanox ConnectX-3 Pro, ConnectX-4, ConnectX-5, and ConnectX-6
NFS over RDMA Drivers NVIDIA Mellanox OpenFabrics Enterprise Distribution for Linux (MLNX_OFED) or OS Distributed inbox driver. For best performance, the recommendation is to install the OFED driver.

Alternatively, if these hardware requirements cannot be met, basic NFS over RDMA functionality can be verified using a Soft-RoCE configuration on the client. However, Soft-RoCE should not be used in a production environment.

The following procedure can be used to configure a Linux client for NFS over RDMA:

The example below uses a Dell PowerEdge R630 server running CentOS 7.9 with an NVIDIA Mellanox ConnectX-3 Pro NIC as the NFS over RDMA client system.

  1. First, verify the OS version by running the following command:
# cat /etc/redhat-release

CentOS Linux release 7.9.2009 (Core)
  1. Next, check the network adapter model and spec. The following example involves a ConnectX-3 Pro NIC with two interfaces: 40gig1 and 40gig2:
# lspci | egrep -i 'network|ethernet'

01:00.0 Ethernet controller: Intel Corporation 82599ES 10-Gigabit SFI/SFP+ Network Connection (rev 01)

01:00.1 Ethernet controller: Intel Corporation 82599ES 10-Gigabit SFI/SFP+ Network Connection (rev 01)

03:00.0 Ethernet controller: Mellanox Technologies MT27520 Family [ConnectX-3 Pro]

05:00.0 Ethernet controller: Intel Corporation I350 Gigabit Network Connection (rev 01)

05:00.1 Ethernet controller: Intel Corporation I350 Gigabit Network Connection (rev 01)

# lshw -class network -short

H/W path       Device      Class      Description

=================================================

/0/100/15/0    ens160      network    MT27710 Family [ConnectX-4 Lx Virtual Function]

/0/102/2/0     40gig1      network    MT27520 Family [ConnectX-3 Pro]

/0/102/3/0                 network    82599ES 10-Gigabit SFI/SFP+ Network Connection

/0/102/3/0.1               network    82599ES 10-Gigabit SFI/SFP+ Network Connection

/0/102/1c.4/0   1gig1       network    I350 Gigabit Network Connection

/0/102/1c.4/0.1 1gig2       network    I350 Gigabit Network Connection

/3              40gig2      network    Ethernet interface
  1. Add the prerequisite RDMA packages (‘rdma-core’ and ‘libibverbs-utils’) for the Linux version using the appropriate package manager for the distribution:
Linux Distribution Package Manager Package Utility
OpenSUSE RPM Zypper
RHEL RPM Yum
Ubuntu Deb Apt-get / Dpkg

For example, to install both the above packages on a CentOS/RHEL client:

# sudo yum install rdma-core libibverbs-utils
  1. Locate and download the appropriate OFED driver version from the NVIDIA website. Be aware that, as of MLNX_OFED v5.1, ConnectX-3 Pro NICs are no longer supported. For ConnectX-4 and above, the latest OFED version will work.

Note that the NFSoRDMA module was removed from the OFED 4.0-2.0.0.1 version, then re-added in OFED 4.7-3.2.9.0 version. Please refer to Release Notes Change Log History for the details.

  1. Extract the driver package and use the ‘mlnxofedinstall’ script to install the driver. As of MLNX_OFED v4.7, NFSoRDMA driver is no longer installed by default. In order to install it on a Linux client with a supported kernel, include the ‘–with-nfsrdma’ option for the ‘mlnxofedinstall’ script. For example:
# ./mlnxofedinstall --with-nfsrdma --without-fw-update                                                                  

Logs dir: /tmp/MLNX_OFED_LINUX.19761.logs

General log file: /tmp/MLNX_OFED_LINUX.19761.logs/general.log

Verifying KMP rpms compatibility with target kernel...

This program will install the MLNX_OFED_LINUX package on your machine.

Note that all other Mellanox, OEM, OFED, RDMA or Distribution IB packages will be removed.

Those packages are removed due to conflicts with MLNX_OFED_LINUX, do not reinstall them.

Do you want to continue?[y/N]:y

Uninstalling the previous version of MLNX_OFED_LINUX

rpm --nosignature -e --allmatches --nodeps mft

Starting MLNX_OFED_LINUX-4.9-2.2.4.0 installation ...

Installing mlnx-ofa_kernel RPM

Preparing...                          ########################################

Updating / installing...

mlnx-ofa_kernel-4.9-OFED.4.9.2.2.4.1.r########################################

Installing kmod-mlnx-ofa_kernel 4.9 RPM
...
...
...

Preparing...                          ########################################
mpitests_openmpi-3.2.20-e1a0676.49224 ########################################

Device (03:00.0):

        03:00.0 Ethernet controller: Mellanox Technologies MT27520 Family [ConnectX-3 Pro]

        Link Width: x8

        PCI Link Speed: 8GT/s

Installation finished successfully.

Preparing...                          ################################# [100%]

Updating / installing...

   :mlnx-fw-updater-4.9-2.2.4.0      ################################# [100%]

Added 'RUN_FW_UPDATER_ONBOOT=no to /etc/infiniband/openib.conf

Skipping FW update.
  1. Load the new driver by restarting the ‘openibd’ driver.
# /etc/init.d/openibd restart

Unloading HCA driver:

Loading HCA driver and Access
  1. Check the driver version to ensure that the installation was successful.
# ethtool -i 40gig1

driver: mlx4_en

version: 4.9-2.2.4

firmware-version: 2.36.5080

expansion-rom-version:

bus-info: 0000:03:00.0

supports-statistics: yes

supports-test: yes

supports-eeprom-access: no

supports-register-dump: no

supports-priv-flags: yes
  1. Verify that the NFSoRDMA module is also installed.
# yum list installed | grep nfsrdma

kmod-mlnx-nfsrdma.x86_64&nbsp;&nbsp;&nbsp;&nbsp;&nbsp;&nbsp;&nbsp;&nbsp;&nbsp;&nbsp;&nbsp;&nbsp; 5.0-OFED.5.0.2.1.8.1.g5f67178.rhel7u8

Note that if using a vendor-supplied driver for the Linux client system (eg. Dell PowerEdge), the NFSoRDMA module may not be included in the driver package. If this is the case, download and install the NFSoRDMA module directly from the NVIDIA driver package, per the instructions in step 4 above.

  1. Finally, mount the desired NFS export(s) from the cluster with the appropriate version and RDMA options.

For example, for NFSv3 over RDMA:

# mount -t nfs -vo vers=3,proto=rdma,port=20049 myserver:/ifs/data /mnt/myserver

Similarly, to mount with NFSv4.0 over RDMA:

# mount –t nfs –o vers=4,minorvers=0,proto=rdma myserver:/ifs/data /mnt/myserver

And for NFSv4.1 over RDMA:

# mount –t nfs –o vers=4,minorvers=1,proto=rdma myserver:/ifs/data /mnt/myserver

For NFSv4.2 over RDMA:

# mount –t nfs –o vers=4,minorvers=2,proto=rdma myserver:/ifs/data /mnt/myserver

And finally for NFSv4.1 over RDMA across an IPv6 network:

# mount –t nfs –o vers=4,minorvers=1,proto=rdma6 myserver:/ifs/data /mnt/myserver

Note that RDMA is a non-assumable mount option, safeguarding any existing NFSv3 clients. For example:

# mount –t nfs –o vers=3,proto=rdma myserver:/ifs/data /mnt/myserver

The above mount cannot automatically ‘upgrade’ itself to NFSv4, nor can an NFSv4 connection upgrade itself from TCP to RDMA.

Performance-wise, NFS over RDMA can deliver impressive results. That said, RDMA is not for everything. For highly concurrently workloads with high thread and/or connection counts, other cluster resource bottlenecks may be encountered first, so RDMA often won’t provide much benefit over TCP. However, for workloads like high bandwidth streams, NFS over RDMA can often provide significant benefits.

For example, in media content creation and post-production, RDMA can enable workflows that TCP-based NFS is unable to sustain. Specifically, Dell’s M&E solutions architects determined that:

  • With FileStream on PowerScale F600 nodes, RDMA doubled performance compared to TCP. 8K DCI DPX image sequence playback, 24 frames per second 6K PIZ compressed EXR image sequence playback, 24 frames per second 4K DCI DPX image sequence playback, 60 frames per second Conclusions 14 PowerScale OneFS: NFS over RDMA for Media
  • Using Autodesk Flame 2022 with 59.94 frames per second 4K DCI video, the number of dropped frames from the broadcast output was reduced from 6000 with TCP to 11 with RDMA.
  • Using DaVinci Resolve 16 with RDMA enabled workstations to play uncompressed 8K DCI, PIZ compressed 6K, and 60 frames per second 4K DCI content. None of this media would play using NFS over TCP.

In such cases, often the reduction in the NFS client’s CPU load that RDMA offers is equally importantly. Even when the PowerScale cluster can easily support a workload, freeing up the workstation’s compute resources is vital to sustain smooth playback.

OneFS NFS over RDMA Cluster Configuration

In this article in the series, we turn our attention to the specifics of configuring a PowerScale cluster for NFS over RDMA.

On the OneFS side, the PowerScale cluster hardware must meet certain prerequisite criteria in order to use NFS over RDMA. Specifically:

Requirement Details
Node type F210, F200, F600, F710, F900, F910, F800, F810, H700, H7000, A300, A3000
Network card (NIC) NVIDIA Mellanox ConnectX-3 Pro, ConnectX-4, ConnectX-5, ConnectX-6 network adapters which support 25/40/100 GigE connectivity.
OneFS version OneFS 9.2 or later for NFSv3 over RDMA, and OneFS 9.8 for NFSv4.x over RDMA.

The following procedure can be used to configure the cluster for NFS over RDMA:

  1. First, from the OneFS CLI, verify which of the cluster’s front-end network interfaces support the ROCEv2 capability. This can be determined by running the following CLI command to find the interfaces that report ‘SUPPORTS_RDMA_RRoCE’. For example:
# isi network interfaces list -v

        IP Addresses: 10.219.64.16, 10.219.64.22

                 LNN: 1

                Name: 100gige-1

            NIC Name: mce3

              Owners: groupnet0.subnet0.pool0, groupnet0.subnet0.testpool1

              Status: Up

             VLAN ID: -

Default IPv4 Gateway: 10.219.64.1

Default IPv6 Gateway: -

                 MTU: 9000

         Access Zone: zone1, System

               Flags: SUPPORTS_RDMA_RRoCE

    Negotiated Speed: 40Gbps

--------------------------------------------------------------------------------

<snip>

Note that there is currently no WebUI equivalent for this CLI command.

  1. Next, create an IP pool that contains the ROCEv2 capable network interface(s) from the OneFS CLI. For example:
# isi network pools create --id=groupnet0.40g.40gpool1 --ifaces=1:40gige- 1,1:40gige-2,2:40gige-1,2:40gige-2,3:40gige-1,3:40gige-2,4:40gige-1,4:40gige-2 --ranges=172.16.200.129-172.16.200.136 --access-zone=System --nfs-rroce-only=true

Or via the OneFS WebUI by navigating to Cluster management > Network configuration:

Note that, when configuring the ‘Enable NFSoRDMA’ setting, the following action confirmation warning will be displayed informing that any non-RDMA-capable NICs will be automatically removed from the pool:

  1. Enable the cluster NFS service, the NFSoRDMA functionality (transport), and the desired protocol versions, by running the following CLI commands.
# isi nfs settings global modify –-nfsv3-enabled=true -–nfsv4-enabled=true -–nfsv4.1-enabled=true -–nfsv4-enabled=true --nfs-rdma-enabled=true
# isi services nfs enable

In the example above, all the supported NFS protocol versions (v3, v4.0, v4.1, and v4.2) have been enabled in addition to RDMA transport.

Similarly, from the WebUI under Protocols > UNIX sharing (NFS) > Global settings.

Note that OneFS checks to ensure that the cluster’s NICs are RDMA-capable before allowing the NFSoRDMA setting to be enabled.

  1. Finally, create the NFS export via the following CLI syntax:
# isi nfs exports create --paths=/ifs/export_rdma

Or from the WebUI under Protocols > UNIX sharing (NFS) > NFS exports.

Note that NFSv4.x over RDMA will only work after an upgrade to OneFS 9.8 has been committed. Also, if the NFSv3 over RDMA ‘nfsv3-rdma-enabled’ configuration option was already enabled before upgrading to OneFS 9.8 , this will be automatically converted with no client disruption to the new ‘nfs-rdma-enabled=true’ setting, which applies to both NFSv3 and NFSv4.

OneFS and NFS over RDMA Support

Over the last couple of decades, the ubiquitous network file system (NFS) protocol has become near synonymous with network attached storage. Since its debut in 1984, the technology has matured to such an extent that NFS is now deployed by organizations large and small across a broad range of critical production workloads. Currently, NFS is the OneFS file protocol with the most stringent performance requirements, serving key workloads such as EDA, artificial intelligence, 8K media editing and playback, financial services, and other branches of commercial HPC.

At its core, NFS over Remote Direct Memory Access (RDMA), as spec’d in RFC8267, enables data to be transferred between storage and clients with better performance and lower resource utilization than the standard TCP protocol. Network adapters with RDMA support, known as RNICs, allow direct data transfer with minimal CPU involvement, yielding increased throughput and reduced latency. For applications accessing large datasets on remote NFS, the benefits of RDMA include:

Benefit Detail
Low CPU utilization Leaves more CPU cycles for other applications during data transfer.
Increased throughput Utilizes high-speed networks to transfer large data amounts at line speed.
Low latency Provides fast responses, making remote file storage feel more like directly attached storage.
Emerging technologies Provides support for technologies such as NVIDIA’s GPUDirect, which offloads I/O directly to the client’s GPU.

Network file system over remote direct memory access, or NFSoRDMA, provides remote data transfer directly to and from memory, without CPU intervention. PowerScale clusters have offered NFSv3 over RDMA support, and its associated performance benefits, since its introduction in OneFS 9.2. As such, enabling this functionality under OneFS allows the cluster to perform memory-to-memory transfer of data over high speed networks, bypassing the CPU for data movement and helping both reduce latency and improve throughput.

Because OneFS already had support for NFSv3 over RDMA, extending this to NFSv4.x in OneFS 9.8 focused on two primary areas:

  • Providing support for NFSv4 compound operations.
  • Enabling native handling of the RDMA headers which NFSv4.1 uses.

So with OneFS 9.8 and later, clients can connect to PowerScale clusters using any of the current transport protocols and NFS versions – from v3 to v4.2:

Protocol RDMA TCP UDP
NFS v3 x x x
NFS v4.0 x x
NFS v4.1 x x
NFS v4.2 x x

The NFS over RDMA global configuration options in both the WebUI and CLI have also been simplified and genericized, negating the need to specify a particular NFS version:

And from the CLI:

# isi nfs settings global modify --nfs-rdma-enabled=true

A PowerScale cluster and client must meet certain prerequisite criteria in order to use NFS over RDMA.

Specifically, from the cluster side:

Requirement Details
Node type F210, F200, F600, F710, F900, F910, F800, F810, H700, H7000, A300, A3000
Network card (NIC) NVIDIA Mellanox ConnectX-3 Pro, ConnectX-4, ConnectX-5, ConnectX-6 network adapters which support 25/40/100 GigE connectivity.
OneFS version OneFS 9.2 or later for NFSv3 over RDMA, and OneFS 9.8 or later for NFSv4.x over RDMA.

Similarly, the OneFS NFSoRDMA implementation requires any NFS clients using RDMA to support ROCEv2 capabilities. This may be either client VMs on a hypervisor with RDMA network interfaces, or a bare-metal client with RDMA NICs. OS-wise, any Linux kernel supporting NFSv4.x and RDMA (Kver 5.3+) can be used, but RDMA-related packages such as ‘rdma-core’ and ‘libibvers-utils’ will also need to be installed. Package installation is handled via the Linux distribution’s native package manager.

Linux Distribution Package Manager Package Utility
OpenSUSE RPM Zypper
RHEL RPM Yum
Ubuntu Deb Apt-get / Dpkg

For example, on an OpenSUSE client:

# zypper install rdma-core libibvers-utils

Plus additional client configuration is also required, and this procedure is covered in detail below.

In addition to a new ‘nfs-rdma-enabled’ NFS global config setting (deprecating the prior ‘nfsv3-rdma-enabled setting), OneFS 9.8 also adds a new ‘nfs-rroce-only’ network pool setting. This allows the creation of an RDMA-only network pool that can only contain RDMA-capable interfaces. For example:

# isi network pools modify <pool_id> --nfs-rroce-only true

This is ideal for NFS failover purposes because it can ensure that a dynamic pool will only fail over to an RDMA-capable interface.

OneFS 9.8 also introduces a new NFS over RDMA CELOG event:

# isi event types list | grep -i rdma

400140003  SW_NFS_CLUSTER_NOT_RDMA_CAPABLE             400000000  To use the NFS-over-RDMA feature, the cluster must have an RDMA-capable front-end Network Interface Card.

This event will fire if the cluster transitions from being able to support RDMA to not, or if attempting to enable RDMA on a non-capable cluster. The previous ‘SW_NFSV3_CLUSTER_NOT_RDMA_CAPABLE’ in OneFS 9.7 and earlier is also deprecated.

When it comes to TCP/UDP port requirements for NFS over RDMA, any environments with firewalls and/or packet filtering deployed should ensure the following ports are open between PowerScale cluster and NFS client(s):

Port Description
4791 RoCEv2 (UDP) for RDMA payload encapsulation.
300 Used by NFSv3 mount service.
302 Used by NFSv3 network status monitor (NSM).
304 Used by NFSv3 network lock manager (NLM).
111 RPC portmapper for locating services like NFS and mountd.

NFSv4 over RDMA does not add any new ports or outside cluster interfaces or interactions to OneFS, and RDMA should not be assumed to be more or less secure than any other transport type. For maximum security, NFSv4 over RDMA can be configured to use a central identity manager such as Kerberos.

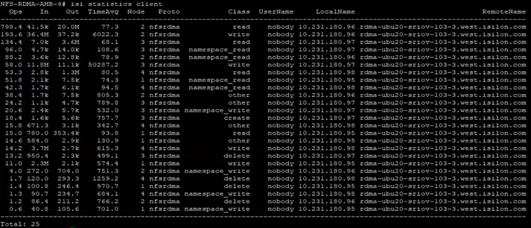
Telemetry-wise, the ‘isi statistics’ configuration in OneFS 9.8 includes a new ‘nfsv4rdma’ switch for v4, in addition to the legacy ‘nfsrdma’ (where ‘nfs4rdma’ includes all the 4.0, 4.1 and 4.2 statistics).

The new NFSv4 over RDMA CLI statistics options in OneFS 9.8 include:

Command Syntax Description
isi statistics client list –protocols=nfs4rdma Display NFSv4oRDMA cluster usage statistics organized according to cluster hosts and users.
isi statistics protocol list –protocols=nfs4rdma Display cluster usage statistics for NFSv4oRDMA
isi statistics pstat list –protocol=nfs4rdma Generate detailed NFSv4oRDMA statistics along with CPU, OneFS, network and disk statistics.
isi statistics workload list –dataset= –protocols=nfs4rdma Display NFSv4oRDMA workload statistics for specified dataset(s).

For example:

# isi statistics client list --protocols nfs4rdma  Ops     In    Out  TimeAvg  Node    Proto           Class   UserName     LocalName                    RemoteName------------------------------------------------------------------------------------------------------------------629.8  13.4k  62.1k    711.0     8 nfs4rdma  namespace_read    user_55  10.2.50.65   10.2.50.165605.6  16.9k  59.5k    594.9     4 nfs4rdma  namespace_read    user_254 10.2.50.66  10.2.50.166451.0   3.7M  41.5k   1948.5     1 nfs4rdma           write    user_74  10.2.50.72  10.2.50.172240.7 662.8k  18.1k    279.4     8 nfs4rdma          create    user_55  10.2.50.65 10.2.50.165

Additionally, session-level visibility and additional metrics can be gleaned from the ‘isi_nfs4mgmt’ utility, provides insight on a client’s cache state. The command output shows which clients are connected via RDMA or TCP from the server, in addition to their version. For example:

# isi_nfs4mgmt

ID                  Vers   Conn     SessionId   Client Address      Port  O-Owners Opens    Handles  L-Owners

1196363351478045825  4.0   tcp        -         10.1.100.110      856   1        7        10       0

1196363351478045826  4.0   tcp        -         10.1.100.112      872   0        0        0        0

2940493934191674019  4.2   rdma   3         10.2.50.227      40908 0       0         0         0

2940493934191674022  4.1   rdma    5        10.2.50.224      60152 0       0          0        0

The output above indicates two NFSv4.0 TCP sessions, plus one NFSv4.1 RDMA session and one NFSv4.1 RDMA session.

Used with the ‘—dump’ flag and client ID, isi_nfs4mgt will provide detailed information for a particular session:

# isi_nfs4mgmt --dump 2940493934191674019

Dump of client 2940493934191674019

Open Owners (0):

Session ID: 3

Forward Channel Connections: Remote: 10.2.50.227.40908 Local: 10.2.50.98.20049
....

Note that the ‘isi_nfs4mgmt’ tool is specific to stateful NFSv4 sessions and will not list any stateless NFV3 activity.

In the next article in this series, we’ll explore the procedure for enabling NFS over RDMA on a PowerScale cluster.

OneFS Routing and SBR – Part 2

As we saw in the previous article in this series, the primary effect of OneFS source-based routing (SBR) is helping to ensure that the cluster replies on the same interface as the ingress packet came in on. This happens automatically in conjunction with FlexNet’s NIC affinity.

Each of a cluster’s front-end subnets contains one or more pools of IP addresses which can be bound to external interfaces of nodes in the cluster. Pools also bind to a groupnet and associated access zone for multi-tenant authentication management, etc.

A cluster’s network pools each include a range of addresses, a list of interfaces, an aggregation mode, and a list of static routes. Static Routes can be configured on a per-pool basis. Unlike SBR, static routes provide a mechanism to force all traffic for a specific destination to use a specific address and a specific gateway. This means static routes, unlike SBR, can support client services without making those services zone-aware.

OneFS SBR will often simply just do the right thing with little or no additional configuration required. Therefore it is generally the preferred option, and indeed is the default for new clusters running OneFS 9.8 or later. That said, in order for SBR to create its IPFW  rule for a gateway, there must have been a session initiated from the source subnet in order to initiate it. If no traffic has been originated or received from a network that’s unreachable via the default gateway, OneFS will transmit traffic it originates through the default gateway. Static routes are an option in this case.

Static routes are also an alternative when SBR cannot do what is required – for example, if different subnets must be treated differently, or a customer actually requires the route from A to B to be different from the route from B to A.

Static routes can be easily added from the CLI with the following syntax:

 # isi network pools <pool> --static-routes<subnet_ip_address>/<CIDR_netmask>-<gateway_ip_address>

Where the first address and the integer form a netmask, and the second address is a gateway. Static routes are configured on a per-pool basis. For example:

# isi network pools groupnet0.subnet0.pool0 -–static-routes 10.30.1.0/22-10.30.1.1

Similarly, an individual static route can be removed as follows:

# isi network pools groupnet0.subnet0.pool0 –-remove-static-routes 10.30.1.0/22-10.30.1.1

Static routes are not mutually exclusive to SBR, but they do operate slightly differently when SBR is enabled. SBR just changes the way an egress packet is handled. Instead of matching a packet to a route based off the destination IP in the packet header, SBR uses the source IP of the packet instead.

Before changing the current SBR state on a cluster, the following CLI syntax can be used to confirm whether there are static routes configured in any IP address pools:

# isi network pools list –v | grep -i routes

If needed, all or a pool’s static routes can be easily removed as follows:

# isi network pools modify <pool_id> --clear-static-routes

When SBR parses the ipfw rule list in order to set the route, static routes take priority and are evaluated first. Under SBR, the narrowest route is preferred. This means that a CIDR /30 route that matches will be selected before a matching /28, etc. If no match is found, SBR then tries the subnet routes.

Clearly, static routes do have some notable limitations. By definition, they would need to include every destination address range in order to properly direct traffic – and this may be a large and changing set of information. Additionally, static routes can only direct traffic based on remote IP address. If multiple workflows use the same remote IP addresses, static routing cannot treat them differently.

Take the following multi-subnet topology example, where a client is three hops from a PowerScale cluster:

If the source IP address and the destination IP address both reside within the same subnet (ie. within the same ‘layer 2’ broadcast domain), the packet goes directly to the client’s IP address. Conversely, if the destination IP address is in a different subnet from the source, the packet is sent to the next-hop gateway.

In the above example, the client initiates a connection to the cluster at IP address 10.30.1.200:

First, the client determines that the destination IP address is not on its local network, and that it does not have a static route defined for that address. It then sends the packet to its default gateway (Gateway C) for more processing.

Next, the router at gateway C receives the client’s packet, examines the destination IP in the packet header, and determines that it has a route to the destination through router A at 10.30.1.1.

Since Router A has a direct connection on the 100GbE subnet to the destination IP address, it sends the packet directly to the cluster’s 10.30.1.200 interface.

At this point, OneFS must send a response packet to the client.

1. If SBR is disabled, the node determines that the client (10.2.1.50) is not on the same subnet and does not have a static route defined for that address. OneFS determines which gateway it must send the response packet to based upon the routing table.

Gateways with higher priority (lower value) have precedence over those with lower priority (higher value). For example, 1 has a higher priority than 10. The PowerScale node has one default gateway, which is the highest priority subnet the node is configured in. Since there is no static route configured on the node, OneFS chooses the default gateway 10.10.1.1 (router B) via the 10GbE interface.

The reply packet sent by the 10GbE interface has a source IP header of 10.30.1.200. Note that some firewalls or packet filters may interpret this as packet ‘spoofing’ and automatically block this type of behavior. Additionally, perceived performance asymmetry may also be an issue, since the connection may be bandwidth constrained because of the 10GbE link. In this case, a user may anticipate 100GbE performance but in actuality will limited to only a 10GbE connection.

2. Conversely, if SBR is enabled, the cluster node’s routing decisions are no longer predicated on the client’s destination IP address. Instead, OneFS parses the egress packet source IP header, then sends the packet via the gateway associated with the source IP subnet.

The node’s reply packet has a source IP address of 10.30.1.200 and, as such, the SBR routing rules indicate the preferred gateway is A (10.30.1.1) on the 100GbE subnet. When the response reaches gateway A, it is routed back to Gateway C across the core network to the client.

Note, however, that SBR will not override any statically configured routes. If SBR is enabled and a static route is created, a new ipfw rule is added. Since SBR only acts upon ‘reply’ packets, any traffic initiated by the node is unaffected. For example, when a node contacts a DNS or AD server, traditional routing rules (as though SBR is disabled) apply. Also, be aware that enabling SBR is a global (cluster-wide) action, and OneFS does not currently allow for SBR configuration at a groupnet, subnet, or pool-level granularity.

In addition to SBR, a number of other FlexNet networking configurations are either cluster-wide, or effectively amount to it:

Networking Component Description
DNS DNS, including the DNS caching daemon, operates cluster-wide.
Default gateway While the default gateway as a routing mechanism may appear to be subnet-specific in the UI, it behaves globally.
NTP The network time protocol (NTP) is configured and runs global to maintain time synchronization between the cluster’s nodes, domain controllers, and other servers and networked devices.
SBR While SBR is a cluster-wide setting, the routing changes will be specific to the routing tables on each individual node (each node’s routing table will be specific to the network pools it is a part of).

Note that, being global configuration, enabling SBR can affect other workflows as well.

Within Flexnet, each subnet has its own address space, with is specified by a base and netmask, gateway, VLAN tag, SmartConnect service address, and aggregation options (DSR return addresses).

While SBR is a cluster-wide setting, though the routing changes will be specific to the rules/routing tables on each individual node (each node’s routing table will be specific to the network pools it is a part of).

One quirk of subnet configuration is that, while each subnet can have a different default gateway configured, normally OneFS only uses the highest priority gateway configured in any of its subnets – falling back to lower-priority only if it is unreachable.

SBR aims to mitigate this idiosyncrasy, enforcing subnet settings by automatically creating IPFW rules based on subnet settings. This allows connections associated with a given subnet to use the specified gateway for that subnet, but only for connections bound to a specific local address within that subnet. This means they work only for incoming connections or outgoing connections that are made in a tenant-aware way; the common practice of clients binding to INADDR_ANY and letting the network stack choose which local address to use prevents SBR from working. Most client services running under OneFS (e.g. integration with authentication servers like LDAP and AD) therefore cannot currently use SBR.

OneFS Routing and SBR

The previous article on this topic generated several questions, which suggested that a more thorough exploration of OneFS source-based routing (SBR) is likely warranted. So here goes…

At its essence, network routing is the process of selecting a path for data traffic, either within a network or traversing multiple networks. The aim is to endure efficient data flow across subnets, while maintaining bandwidth and minimizing congestion. Routers, layer 3 switches, multi-homed system, etc, make routing decisions based on packet header addresses and routing tables, which record the paths packets should take to reach their destinations.

IP packet headers have the following form, with the source and destination addresses located towards the end of the header section, before the packet’s payload.

Routing is typically either static, using manually enter routing statements and rules, or dynamic, via routing protocols such as RIP, OSPF, etc.

While the nomenclature might suggest that OneFS source-based routing would route traffic based on a source IP address, instead SBR actually operates by dynamically creating per-subnet default routes. The gateway is derived from the subnet configuration, and, as such, gateways need to be defined for each subnet.

New cluster deployments running OneFS 9.8 and automatically have SBR enabled, whereas legacy clusters upgrading to 9.8 preserve their existing SBR configuration, whether on or off. While SBR is disabled by default in OneFS 9.7 and earlier releases, it can, if desired, be easily enabled from either the CLI or WebUI.

SBR is configured globally and, as such, is either on or off across the entire cluster and its network pools and subnets. OneFS 9.7 and earlier supports only the IPv4 protocol, whereas OneFS 9.8 and later also accommodate IPv6 subnets.

SBR can be instantly enabled on a PowerScale cluster by running the following CLI command:

# isi network external modify --sbr 1

# isi network external view | grep -i source

Source Based Routing: True

Or from the WebUI under Cluster management > Network configuration > Settings:

Similarly, SBR can be disabled as follows:

# isi network external modify --sbr 0

# isi network external view | grep -i source

Source Based Routing: False

Under the hood, SBR uses the FreeBSD ‘ipfw’ utility (as does the OneFS firewall) to record and manage its routing rules.

For example, with SBR disabled, querying ipfw on a cluster shows a single ‘any to any’ rule:

# isi network external view | grep -i source

Source Based Routing: False

# ipfw show

65535 11839927994 7560033188891 allow ip from any to any

By way of contrast, when SBR is enabled, a number of new, higher priority ‘allow’ rules for each NIC and gateway ‘fwd’ rules are added above the ‘any to any’ rule:

# isi network external view | grep -i source

Source Based Routing: True

# ipfw show

60000          16         33391 allow ip from any to any via lo0 out

60001           0             0 allow ip from any to ff02::1:ff00:0/104 out

60002      116082     112914089 allow ip from any to any via mce0 out

60003      217150     138771611 allow ip from any to any via mce1 out

60004           0             0 allow ip from any to any via ue0 out

60005           0             0 allow ip from any to fe80::/10 out

60006           0             0 allow ip from any to ff02::1 out

62000           0             0 fwd 2620:0:170:7c0f::1 ip from 2620:0:170:7c0f::/64 to not 2620:0:170:7c0f::/64 out

62001         121         94788 fwd 10.30.1.1 ip from 10.30.1.0/22 to not 10.30.1.0/22 out

65535 11842048952 7561181109905 allow ip from any to any

In this example node’s case, on a cluster running OneFS 9.8, there is one IPv4 subnet and one IPv6 subnet:

# isi network subnets list

ID                Subnet    Gateway|Priority      Pools     SC Service Addrs     Firewall Policy

------------------------------------------------------------------------------------------------

groupnet0.subnet0 10.30.1.0/22   10.30.1.1|10     pool0     10.30.1.100-10.30.1.110               default_subnets_policy

groupnet0.subnet1 2620:0:170:7c0f::/64 2620:0:170:7c0f::1|20 ipv6pool  2620:0:170:7c0f::4-2620:0:170:7c0f::4 default_subnets_policy

------------------------------------------------------------------------------------------------

Total: 2

So enabling SBR on this cluster results in the creation of a ‘fwd’ rule for each subnet:

# ipfw show | grep fwd

62000          33          2640 fwd 2620:0:170:7c0f::1 ip from 2620:0:170:7c0f::/64 to not 2620:0:170:7c0f::/64 out

62001      145794     140490002 fwd 10.30.1.1 ip from 10.30.1.0/22 to not 10.30.1.0/22 out

Please note that the ‘ipfw’ command should not be used to modify the OneFS routing rules (or firewall table) directly!

By way of a OneFS packet routing example, take the following network topology where three clients, each on separate subnets, are connecting to a PowerScale cluster:

The default gateway is the path for all traffic intended for clients not on the local subnet and not covered by a routing table entry. Utilizing SBR does not negate the need for a default gateway, since SBR effectively overrides the default gateway (but not static routes).

Note that SBR is not simple packet reflection. Instead, it’s the dynamic creation of per-subnet default routes. The router used as the gateway is derived from the FlexNet subnet definitions within the subnet configuration. As such, a gateway needs to be specified for each subnet.

 In addition to a gateway address, each subnet also has a defined priority. For example:

Or via the CLI:

# isi network subnets modify groupnet0.subnet1 --gateway 10.30.1.1 --gateway-priority 10

With SBR disabled, the highest priority gateway (ie. the gateway with the lowest reachable value) is used as the default route.

Once SBR is enabled, OneFS examines the FlexNet config for each subnet, and then creates ipfw rules that look at the source IP address from the cluster side and force the next-hop to be the gateway IP defined for the subnet which contains that IP address.

In the previous example with three clients on separate subnets connecting to a cluster, when traffic arrives from a subnet that is unreachable via the default gateway, the following routing rules will be added via ipfw:

The mechanism for adding ipfw rules is stateless, and SBR relies on the source IP address that transmits traffic to the cluster.

A session must be initiated from the source subnet for a corresponding ipfw rule to be created. Also, unless the cluster has received traffic that originated from a subnet has no route to the default gateway, OneFS transmits traffic it originates through the default gateway.

In the next article in this series. We’ll take a look at SBR and its interrelationship with static routes and other OneFS networking components.

OneFS Source Based Routing for IPv6 Networks

Tucked amongst the OneFS 9.8 feature payload were a couple of significant enhancements to source-based routing (SBR). Specifically, the introduction of:

  • IPv6 network support.
  • SBR enabled by default for fresh OneFS 9.8 installs.

Source-based routing was first introduced into OneFS back in 9.2. At its core, OneFS source base routing is essentially ‘per-subnet default routes’. OneFS parses the Flexnet configuration for each subnet, and then creates routing rules corresponding to the IP address from the cluster side, forcing the next-hop to be the router IP defined for the subnet which contains that IP address.

Until OneFS 9.8, SBR was disabled by default, and so required manual configuration in order to run it. Additionally, in OneFS 9.7 and earlier, SBR only supported IPv4 networks. With the release of OneFS 9.8, both IPv4 and IPv6 networks are now fully supported. Plus, for new clusters and fresh installs, SBR is now enabled by default. However, existing clusters that are upgraded to OneFS 9.8 will retain their existing configuration. So SBR will remain disabled unless it had already been configured to run.

When SBR is disabled and a request comes in from a client and is routed to a node in the cluster, when the return traffic is sent it will typically traverse the cluster’s default route.

With a large number of clients connected, there is a possibility of overloading the default route with a deluge of traffic. However, when SBR is enabled, each subnet has a defined priority gateway and return traffic is sent over the path that the request came from rather than the default route.

If traffic arrives from a subnet that isn’t reachable through the default gateway, routing rules are added for it. These rules are stateless and depend entirely on the source IP that sends traffic to the cluster.

So, with a well-balanced client network topology, client connects will follow their source routes and load will be automatically distributed more evenly and bi-directionally over the source paths, rather than returning across the cluster’s default route. This has the potential benefit of network performance improvements in addition to a more even distribution.

From the OneFS CLI, the ‘isi network external view’ command can be used to check the state of the external network configuration, as well as configure SBR.

For example:

# isi network external view

    Client TCP Ports: 2049, 445, 20, 21, 80

    Default Groupnet: groupnet0

  SC Rebalance Delay: 0

Source Based Routing: False

       SC Server TTL: 900


IPv6 Settings:

                   IPv6 Enabled: True

IPv6 Auto Configuration Enabled: False

       IPv6 Generate Link Local: False

          IPv6 Accept Redirects: False

                       IPv6 DAD: Disabled

          IPv6 SSIP Perform DAD: False

In the example above, SBR is disabled, but can be easily enabled as follows:

# isi network external modify --sbr=true

# isi network external view | grep -i source

Source Based Routing: True

Similarly the following syntax will disable SBR:

# isi network external modify --sbr=false

# isi network external view | grep -i source

Source Based Routing: False

SBR can also be configured from the OneFS WebUI by navigating to Cluster management > Network configuration > Settings:

Under the hood, SBR uses ipfw, to create and manage its routing rules. For example,  the following CLI output shows the two corresponding ipfw rules (62000 and 62001) that are created for IPv4 and IPv6 respectively when SBR is enabled: