OneFS Pre-upgrade Healthchecks – Management and Monitoring

In this second article in this series, we take a closer look at the management and monitoring of OneFS Pre-upgrade Healthchecks.

When it comes to running pre-upgrade checks, there are two execution paths: Either as the precursor to an actual upgrade, or as a stand-alone assessment. As such, the general workflow for the upgrade pre-checks in both assessment and NDU modes is as follows:

The ‘optional’ and ‘mandatory’ hooks of the Upgrade framework queue up a pre-check evaluation request to the HealthCheck framework. The results are then stored in an assessment database, which allows a comprehensive view of the pre-checks.

As of OneFS 9.9, the list of pre-upgrade checks include:

Checklist Item Description
battery_test_status Check nvram.xml and battery status to get the battery health result
check_frontpanel_firmware Checks if the front panel reports None after a node firmware package install.
check_m2_vault_card Checks for the presence of the M.2 vault card in Generation 6 nodes and confirms SMART status threshold has not been exceeded on that device
custom_cronjobs Warn the administrator if there are custom cron jobs defined on the cluster.
check_boot_order Checks BootOrder in bios_settings.ini on Generation 5 nodes to determine if at risk for https://www.dell.com/support/kbdoc/25523
check_drive_firmware Checks firmware version of drives for known issues
check_local_users Recommends backing up sam.db prior to an upgrade to 9.5 or higher where current version is less than 9.5
check_ndmp_upgrade_timeout Checks for LNN changes that have occurred since the isi_ndmp_d processes started which can cause issues during the HookDataMigrationUpgrade phase of an OneFS upgrade
check_node_upgrade_compatibility Checks node upgrade compatibility for OneFS upgrades by comparing it against known supported versions
check_node_firmware_oncluster Checks to verify if the cluster can run into issues due to firmware of certain devices.
check_security_hardening Check if the security hardening (FIPS and STIG mode) is applied on the cluster.
check_services_monitoring Checks that enabled services are being monitored.
check_upgrade_agent_port Checks the port used by the isi_upgrade_agent_d daemon to ensure it is not in use by other processes
check_upgrade_network_impact Checks for the risk of inaccessible network pools during a parallel upgrade
check_cfifo_thread_locking Checks if node may be impacted by DTA000221299, cluster deadlocking from Coalescer First In First Out (CFIFO) thread contention
ftp_root_permissions Checks if FTP is enabled and informs users about potential FTP login issues after upgrading.
flex_protect_fail Warns if the most recent FlexProtect or FlexProtectLin job failed.
files_open Checks for dangerous levels of open files on a node.
ifsvar_acl_perms Checks ACL permissions for ifsvar and ifsvar/patch directory
job_engine_enabled Service isi_job_d enabled
mediascan_enabled Determines if MediaScan is enabled.
mcp_running_status Status of MCP Process.
smartconnect_enabled Determines if SmartConnect enabled and running.
flexnet_running Determines if Flexnet is running.
opensm_masters Determines if backend fabric has proper number of opensm masters.
duplicate_gateway_priorities Checks for subnets with duplicate gateway priorities.
boot_drive_wear Boot drive wear level.
dimm_health_status Warns if there are correctable DIMM Errors on Gen-4 and Gen-6.
node_capacity Check the cluster and node pool capacity.
leak_freed_blocks Check if the sysctl ‘efs.lbm.leak_freed_blocks’ is set to 0 for all nodes.
reserve_blocks Check if the sysctl ‘efs.bam.layout.reserved_blocks’ is set to the default values of 32000 for all nodes.
root_partition_capacity Check root (/) partition capacity usage.
var_partition_capacity Check ‘/var’ partition capacity usage.
smb_v1_in_use Check to see if SMBv1 is enabled on the cluster. If it is enabled, provide an INFO level alert to the user. Also check if any current clients are usingSMBv1 if it is enabled and provide that as part of the alert.
synciq_daemon_status Check if all SyncIQ daemons are running.
synciq_job_failure Check if any latest SyncIQ job report shows failed and gather the failure infos.
synciq_job_stalling Checks if any running SyncIQ jobs are stalling.
synciq_job_throughput Check if any SyncIQ job is running with non-throughput.
synciq_pworker_crash Check if any pworker crash, related stack info, generates when the latest SyncIQ jobs failed with worker crash errors.
synciq_service_status Check if SyncIQ service isi_migrate is enabled.
synciq_target_connection Check SyncIQ policies for target connection problems.
system_time Check to warn if the system time is set to a time in the far future.
rpcbind_disabled Checks if rpcbind is disabled, which can potentially cause issues on startup
check_ndmp Checks for running NDMP sessions
check_flush Checks for running flush processes / active pre_flush screen sessions
battery_test_status Check nvram.xml and battery status to get the battery health result
checkKB516613 Checks if any node meets criteria for KB 000057267
check_flush Checks for running flush processes / active pre_flush screen sessions
upgrade_blocking_jobs Checks for running jobs that could impact an upgrade
patches_infra Warns if INFRA patch on the system is out of date
check_flush Checks for running flush processes / active pre_flush screen sessions
cloudpools_account_status Cloud Accounts showing unreachable when installing 9.5.0.4(PSP-3524) or 9.5.0.5 (PSP-3793) patch
nfs_verify_riptide_exports Verify the existence of nfs-exports-upgrade-complete file.
upgrade_version Pre-upgrade check to warn about lsass restart.

In OneFS 9.8 and earlier, the upgrade pre-check assessment CLI command set did not provide a method for querying the details.

To address this, OneFS 9.9 now includes the ‘isi upgrade assess view’ CLI syntax, which displays a detailed summary of the error status and resolution steps for any failed pre-checks. For example:

# isi upgrade assess view

PreCheck Summary:
Status: Completed with warnings
Percentage Complete: 100%
Started on: 2024-11-05T00:27:50.535Z
Check Name Type LNN(s) Message
----------------------------------------------------------------------------------------------------------------------------------------------------------------
custom_cronjobs Optional 1,3     Custom cron jobs are defined on the cluster. Automating
tasks on a PowerScale cluster is most safely done
with a client using the PowerScale OneFS API to
access the cluster. This is particularly true if you
are trying to do some type of monitoring task. To
learn more about the PowerScale OneFS API, see the
OneFS API Reference for your version of OneFS.
Locations of modifications found: /usr/local/etc/cron.d/
----------------------------------------------------------------------------------------------------------------------------------------------------------------
Total: 1

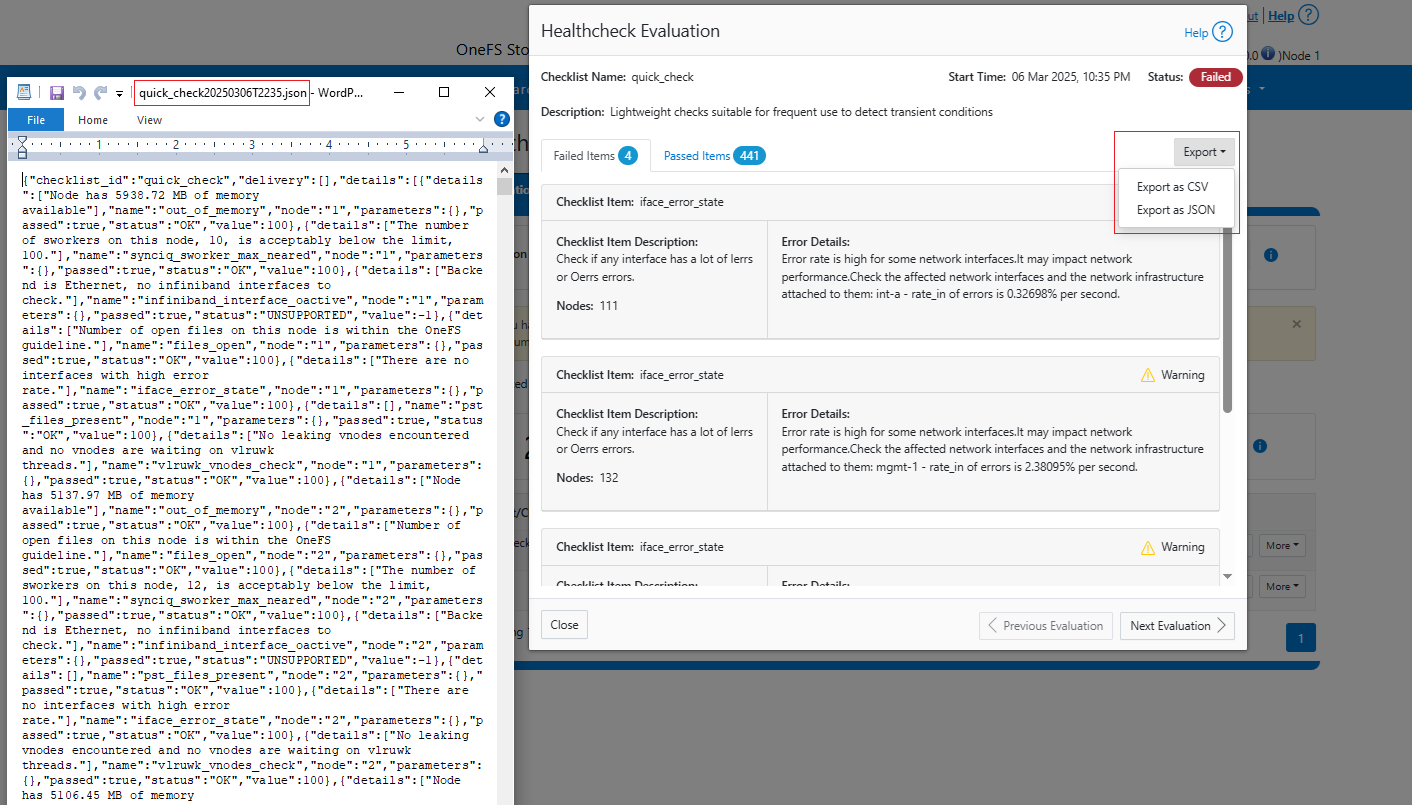
In the example above, the assessment view of a failed optional precheck is flagged as a warning. Whereas a failed mandatory precheck is logged as an error and upgrade blocked with the following ‘not ready to upgrade’ status. For example:
# isi upgrade assess view

PreCheck Summary:
             Status: Completed with errors - not ready for upgrade
Percentage Complete: 100%
       Completed on: 2024-11-02T21:44:54.938Z

Check Name       Type      LNN(s)  Message
----------------------------------------------------------------------------------------------------------------------------------------------------------------
ifsvar_acl_perms Mandatory -     An underprivileged user (not in wheel group) has
access to the ifsvar directory. Run 'chmod -b 770
/ifs/.ifsvar' to reset the permissions back to
the default permissions to resolve the security risk.
Then, run 'chmod +a# 0 user ese allow traverse
                                 /ifs/.ifsvar' to add the system-level SupportAssist
User back to the /ifs/.ifsvar ACL.
----------------------------------------------------------------------------------------------------------------------------------------------------------------
Total: 1

Here, the pre-check summary both alerts to the presence of insecure ACLs on a critical OneFS directory, while also provides comprehensive remediation instructions. The upgrade could not proceed in this case due to a mandatory pre-check failure.

A OneFS upgrade can be initiated with the following CLI syntax:

# isi upgrade cluster start --parallel -f /ifs/install.isi

If a pre-check fails, the upgrade status can be checked with the ‘isi upgrade view’ CLI command. For example:

# isi upgrade view

Upgrade Status:

Current Upgrade Activity: OneFS upgrade
   Cluster Upgrade State: error
                           (see output of  isi upgrade nodes list)
   Upgrade Process State: Stopped
      Upgrade Start Time: 2024-11-03T15:12:20.803000
      Current OS Version: 9.9.0.0_build(1)style(11)
      Upgrade OS Version: 9.9.0.0_build(4299)style(11)
        Percent Complete: 0%

Nodes Progress:

     Total Cluster Nodes: 3
       Nodes On Older OS: 3
          Nodes Upgraded: 0
Nodes Transitioning/Down: 0

A Pre-upgrade check has failed please run “isi upgrade assess view” for results.
If you would like to retry a failed action on the required nodes, use the command
“isi upgrade cluster retry-last-action –-nodes”. If you would like to roll back
the upgrade, use the command “isi upgrade cluster rollback”.

LNN                                                        Version   Status
------------------------------------------------------------------------------
9.0.0  committed

Note that, in addition to retry and rollback options, the above output recommends running the ‘isi upgrade assess view’ CLI command to see the specific details of the failed pre-check(s). For example:

# isi upgrade assess view

PreCheck Summary:
Status: Warnings found during upgrade
Percentage Complete: 50%
Completed on: 2024-11-02T00:11:21.705Z
Check Name Type LNN(s) Message
----------------------------------------------------------------------------------------------------------------------------------------------------------------

custom_cronjobs Optional 1-3 Custom cron jobs are defined on the cluster. Automating
tasks on a PowerScale cluster is most safely done with a
client using the PowerScale OneFS API to access the
cluster. This is particularly true if you are trying to do
some type of monitoring task. To learn more about the
PowerScale OneFS API, see the OneFS API Reference for
your version of OneFS. Locations of modifications found:
/usr/local/etc/cron.d/
----------------------------------------------------------------------------------------------------------------------------------------------------------------
Total: 1

In the above, the pre-check summary alerts of a failed optional check, due to the presence of custom (non default) crontab entries in the cron job’s schedule. In this case, the upgrade can still proceed, if desired.

While OneFS 9.8 and earlier releases do have the ability to skip the optional pre-upgrade checks, this can only be configured prior to the upgrade commencing:

# isi upgrade start –skip-optional ...

However, OneFS 9.9 provides a new ‘skip optional’ argument for the ‘isi upgrade retry-last-action’ command, allowing optional checks to also be avoided while an upgrade is already in process:

# isi upgrade retry-last-action –-skip-optional ...

The ‘isi healthcheck evaluation list’ CLI command can also be useful for reporting pre-upgrade checking completion status. For example:

# isi healthcheck evaluation list

ID State Failures Logs --------------------------------------------------------------------------------------------------------------------------------------------------- ------------------------
pre_upgrade_optional20240508T1932 Completed - Fail WARNING: custom_cronjobs (1-4) /ifs/.ifsvar/modules/health check/results/evaluations/pre_upgrade_optional20240508T1932

pre_upgrade_mandatory20240508T1935 Completed - Pass - /ifs/.ifsvar/modules/healthcheck/results/evaluations/pre_upgrade_mandatory20240508T1935
--------------------------------------------------------------------------------------------------------------------------------------------------- ------------------------
Total: 2

In the above example, the mandatory pre-upgrade checks all pass without issue. However, a warning is logged, alerting of an optional check failure due to the presence of custom (non default) crontab entries. More details and mitigation steps for this check failure can be obtained by running  ‘isi assess view’ CLI command. In this case, the upgrade can still proceed, if desired.

OneFS Pre-upgrade Healthchecks

Another piece of useful functionality that debuted in OneFS 9.9 is the enhanced integration of pre-upgrade healthchecks (PUHC) with the PowerScale non-disruptive upgrade (NDU) process.

Specifically, this feature complements the OneFS NDU framework by adding the ability to run pre-upgrade healthchecks as part of the NDU state machine, while providing a comprehensive view and control of the entire pre-check process. This means that OneFS 9.9 and later can now easily and efficiently include upgrade pre-checks by leveraging the existing healthcheck patch process.

These pre-upgrade healthchecks (PUHC) can either be run as an independent assessment (isi upgrade assess) or as an integral part of a OneFS upgrade. In both scenarios, the same pre-upgrade checks are run by the assessment and the actual upgrade process.

Prior to OneFS 9.9, there was no WebUI support for a pre-upgrade healthcheck assessment. This meant that an independent assessment had to be run from the CLI:

# isi upgrade assess

Additionally, there was no ‘view’ option for this ‘isi upgrade assess’ command. So after starting a pre-upgrade assessment, the only way to see which checks were failing was to parse the upgrade logs in order to figure out what was going on. For example, with the ‘isi_upgrade_logs’ CLI utility:

# isi_upgrade_logs -h

Usage: isi_upgrade_logs [-a|--assessment][--lnn][--process {process name}][--level {start level,end level][--time {start time,end time][--guid {guid} | --devid {devid}]

 + No parameter this utility will pull error logs for the current upgrade process

 + -a or --assessment - will interrogate the last upgrade assessment run and display the results

 Additional options that can be used in combination with 'isi_upgrade_logs' command:

  --guid     - dump the logs for the node with the supplied guid

  --devid    - dump the logs for the node/s with the supplied devid/s

  --lnn      - dump the logs for the node/s with the supplied lnn/s

  --process  - dump the logs for the node with the supplied process name

  --level    - dump the logs for the supplied level range

  --time     - dump the logs for the supplied time range

  --metadata - dump the logs matching the supplied regex

  --get-fw-report - get firmware report

                    =nfp-devices : Displays report of devices present in NFW package

                    =full        : Displays report of all devices on the node

                    Default value for No option provided is "nfp-devices".

When run with the ‘-a’ flag, ‘isi_upgrade_logs’ queries the archived logs from the latest assessment run:

# isi_upgrade_logs -a

Or by node ID or LNN:

# isi_upgrade_logs --lnn

# isi_upgrade_logs --devid

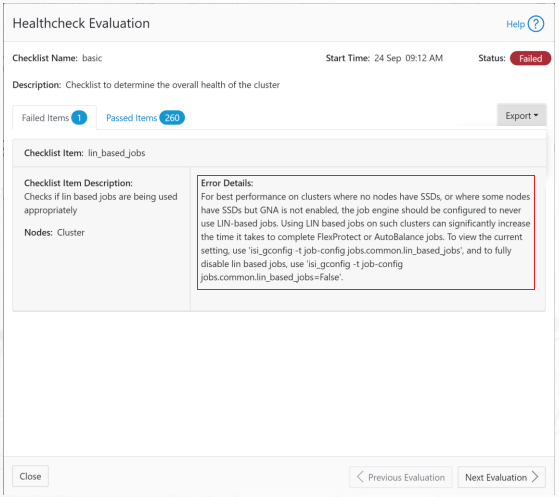
So, when running healthchecks as part of an upgrade in OneFS 9.8 or earlier, whenever any check failed, typically all that was reported was a generic check ‘hook fail’ alert. For example, a mandatory pre-check failure was reported as follows:

As can be seen, only general pre-upgrade insight was provided, without details such as which specific check(s) were failing.

Similarly from the upgrade logs:

Identifying in upgrade logs that PUHC hook scripts ran: 18 2024-11-05T02:19:21 /usr/sbin/isi_upgrade_agent_d Debug Queueing up hook script: /usr/share/upgrade/event-actions/pre-upgrade-mandatory/isi_puhc_mandatory 18 2024-11-05T02:12:21 /usr/sbin/isi_upgrade_agent_d Debug Queueing up hook script: /usr/share/upgrade/event-actions/pre-upgrade-optional/isi_puhc_optional

Additionally, when starting an upgrade in OneFS 9.8 or earlier, there was no opportunity to either skip any superfluous optional checks or quiesce any irrelevant or unrelated failing checks.

By way of contrast, OneFS 9.9 now includes the ability to run a pre-upgrade assessment (Precheck) directly from the WebUI via Cluster management > Upgrade > Overview > Start Precheck.

Similarly, a ‘view’ option is also added to the ‘isi upgrade assess’ CLI command syntax in OneFS 9.9. For example:

# isi upgrade assess view

PreCheck Summary:

             Status: Completed with errors - not ready for upgrade
Percentage Complete: 100%
       Completed on: 2024-11-4T21:44:54.938Z

Check Name       Type      LNN(s)  Message
----------------------------------------------------------------------------------------------------------------------------------------------------------------
ifsvar_acl_perms Mandatory -       An underprivileged user (not in wheel group) has access to the ifsvar directory. Run 'chmod -b 770 /ifs/.ifsvar' to reset the permissions back to the default permissions to resolve the security risk. Then, run 'chmod +a# 0 user ese allow traverse /ifs/.ifsvar' to add the system-level SupportAssist User back to the /ifs/.ifsvar ACL.
----------------------------------------------------------------------------------------------------------------------------------------------------------------

Total: 1

Or from the WebUI:

This means that the cluster admin now gets a first-hand view of explicitly which check(s) are failing, plus their appropriate mitigation steps. As such, the time to resolution can often be drastically improved by avoiding the need to manually comb the log files in order to troubleshoot cluster pre-upgrade issues.

OneFS delineates between mandatory (blocking) and optional (non-blocking) pre-checks:

Evaluation Type Description
Mandatory PUHC These checks will block an upgrade on failure. As such, the option are to either fix the underlying issue causing the check to fail, or to roll-back the upgrade.
Optional PUHC These can be treated as a warning. On failure, either the underlying condition can be resolved, or skipped the check skipped, allowing the upgrade to continue.

Also provided is the ability to pick and choose which specific optional checks are run prior to an upgrade. This can also alleviate redundant effort and save considerable overhead.

Architecturally, pre-upgrade health checks operate as follows:

The ‘optional’ and ‘mandatory’ hooks of the Upgrade framework queue up a pre-check evaluation request to the HealthCheck framework. The results are then stored in an assessment database, which allows a comprehensive view of the pre-checks.

The array of upgrade pre-checks is pretty extensive and are tailored to a target OneFS version.

# isi healthcheck checklists list | grep -i pre_upgrade

pre_upgrade         Checklist to determine pre upgrade cluster health, 
many items in this list use the target_version parameter

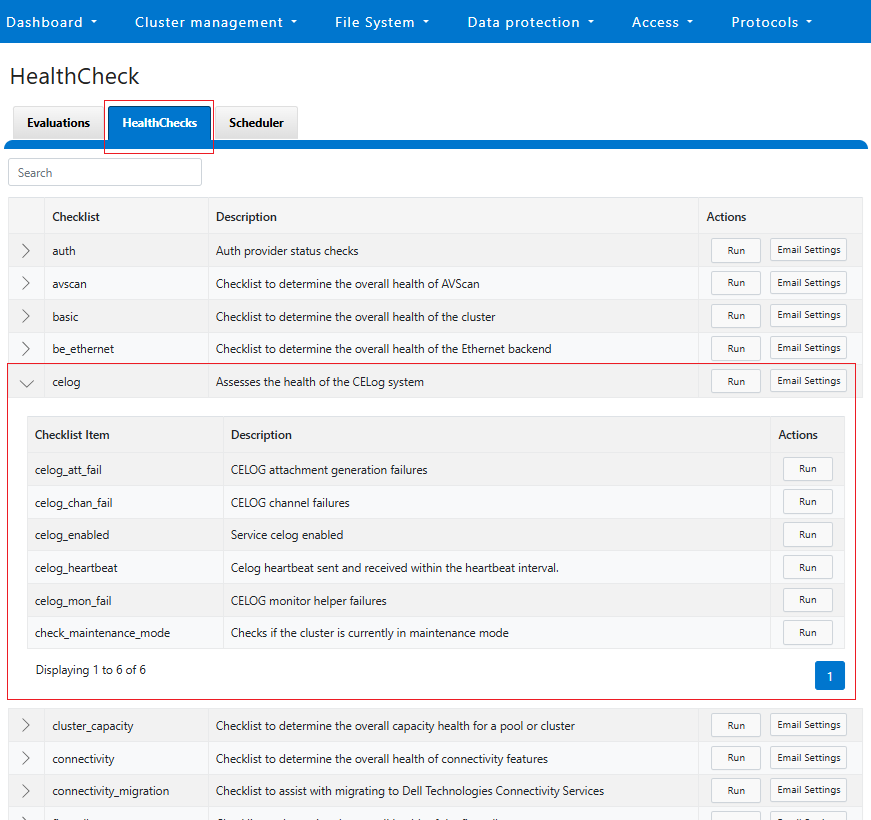
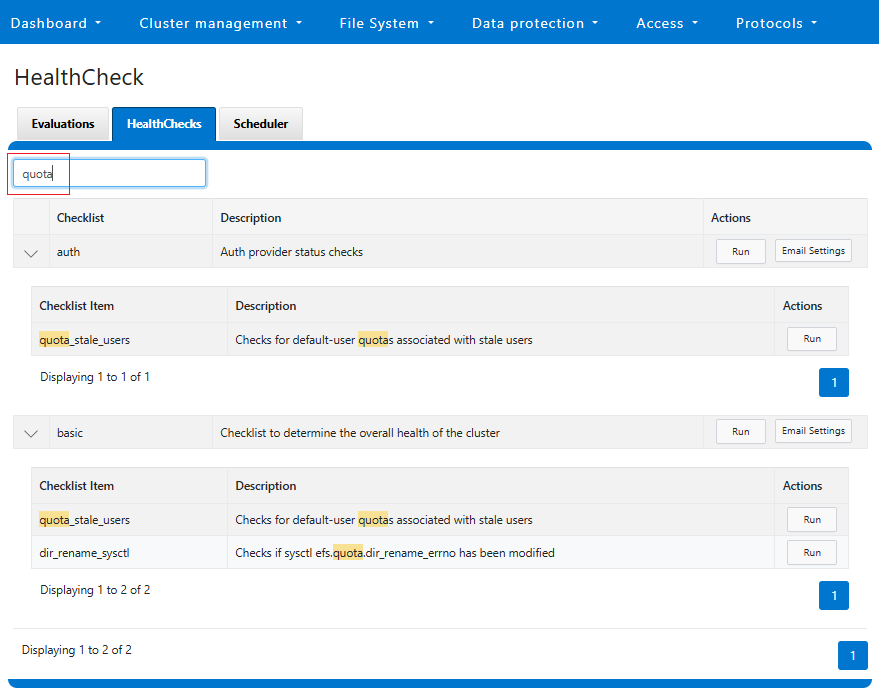
A list of the individual checks can be viewed from the WebUI under Cluster management > Healthcheck > Healthchecks > pre_upgrade:

In the next article in this series, we’ll take a closer look at the management and monitoring of OneFS Pre-upgrade Healthchecks.

OneFS SupportAssist for IPv6 Networks

SupportAssist, Dell’s remote connectivity system, gets an enhancement in OneFS 9.9 with the addition of support for IPv6 network environments.

Within OneFS, SupportAssist is intended for transmitting events, logs, and telemetry from PowerScale to Dell support. Helping to rapidly identify, diagnose, and resolve cluster issues, SupportAssist drives productivity improvements by replacing manual routines with automated support. Improved time to resolution, or entire avoidance, is boosted by predictive issue detection and proactive remediation. Additionally, SupportAssist is included with all PowerScale support plans – although the features may vary based on service level agreement (SLA).

Delivering a consistent remote support experience across the Dell storage portfolio, SupportAssist can be of considerable benefit to any site that can send telemetry off-cluster to Dell over the internet.

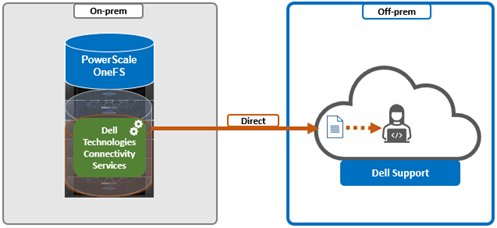
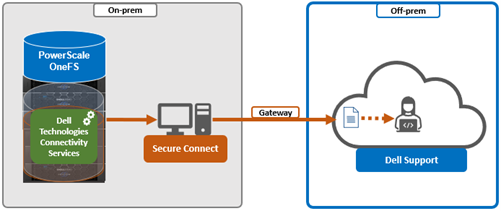
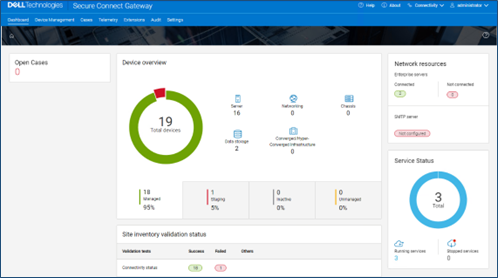
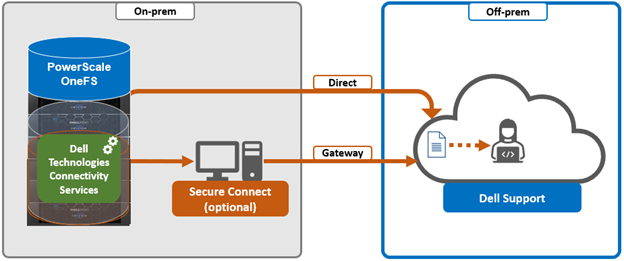
SupportAssist’s remote information connectivity engine, or RICE, integrates the Dell Embedded Service Enabler (ESE) into OneFS along with a suite of daemons to allow its use on a distributed system. SupportAssist uses the Dell Connectivity Hub and can either interact directly, or through a Secure Connect gateway.

At its core, SupportAssist comprises a variety of components that gather and transmit various pieces of OneFS data and telemetry to Dell Support, via the Embedded Service Enabler (ESE).  These workflows include CELOG events, In-product activation (IPA) information, CloudIQ telemetry data, isi-gather-info (IGI) logsets, and provisioning, configuration and authentication data to ESE and the various backend services.

Workflow Details
CELOG SupportAssist can be configured to send CELOG events and attachments via ESE to CLM.   CELOG has a ‘supportassist’ channel that, when active, will create an EVENT task for SupportAssist to propagate.
License Activation The isi license activation start command uses SupportAssist to connect.

Several pieces of PowerScale and OneFS functionality require licenses, and to register and must communicate with the Dell backend services in order to activate those cluster licenses.  SupportAssist is the preferred mechanism to send those license activations via the Embedded Service Enabler(ESE) to the Dell backend. License information can be generated via the ‘isi license generate’ CLI command, and then activated via the ‘isi license activation start’ syntax.

Provisioning SupportAssist must register with backend services in a process known as provisioning.  This process must be executed before the Embedded Service Enabler(ESE) will respond on any of its other available API endpoints.  Provisioning can only successfully occur once per installation, and subsequent provisioning tasks will fail. SupportAssist must be configured via the CLI or WebUI before provisioning.  The provisioning process uses authentication information that was stored in the key manager upon the first boot.
Diagnostics The OneFS isi diagnostics gather and isi_gather_info logfile collation and transmission commands have a –supportassist option.
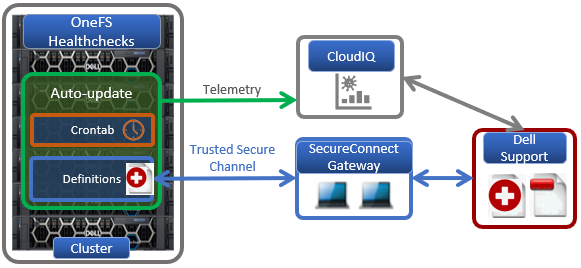
Healthchecks HealthCheck definitions are updated using SupportAssist.
Telemetry CloudIQ Telemetry data is sent using SupportAssist.
Remote Support Remote Support uses SupportAssist and the Connectivity Hub to assist customers with their clusters.

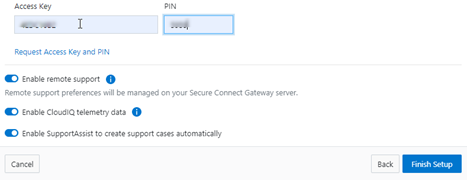
SupportAssist requires an access key and PIN, or hardware key, in order to be enabled, and secure keys are held in a secure key manager under the RICE domain.

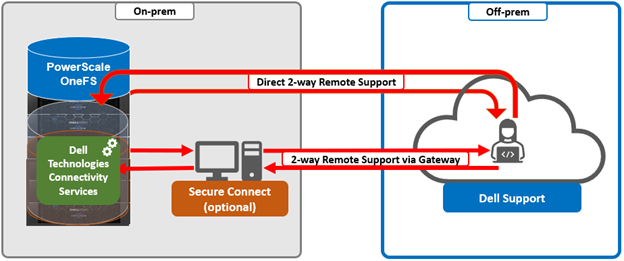
In addition to the transmission of data from the cluster to Dell, Connectivity Hub also allows inbound remote support sessions to be established for remote cluster troubleshooting.

In OneFS 9.9, SupportAssist adds the ability to set IPv6 addresses for a gateway host and backup gateway host via the gateway connectivity option. It also allows the selection of one or more IPv6-family subnets and pools.

From the OneFS command line interface, SupportAssist is configured through the ‘isi supportassist’ command set, to which OneFS 9.9 adds additional parameters and options in support of IPv6 networking.

To configure SupportAssist for IPv6 from the CLI, select one or more static IPv6 subnets/pools for outbound communication:

# isi supportassist settings modify --network-pools="ipv6subnet.ipv6pool"

A direct connection to Support can be configured with the following syntax:

# isi supportassist settings modify --connection-mode direct

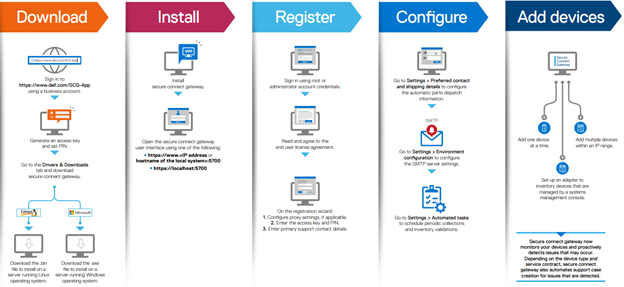
Alternatively, connectivity can be configured via a Secure Connect Gateway as follows:

# isi supportassist settings modify --connection-mode gateway

# isi supportassist settings modify --gateway-host <IPv6 or FQDN>

Similarly for a backup gateway:

# isi supportassist settings modify –-backup-gateway-host <IPv6 or FQDN>

The following CLi syntax can be used to provision SupportAssist using a hardware key (if present):

# isi supportassist provision start

Note that new cluster nodes shipped after January 2023 should already have a built-in hardware key

For older clusters containing nodes without hardware keys, SupportAssist can be provisioned using an access key and pin as follows:

# isi supportassist provision start –access-key <key> --pin <pin>

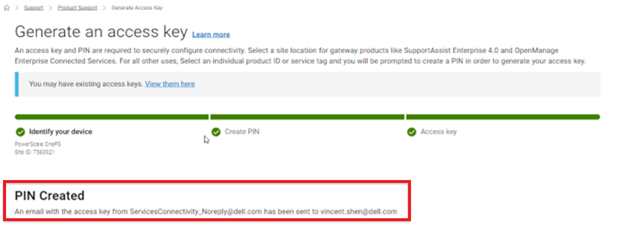
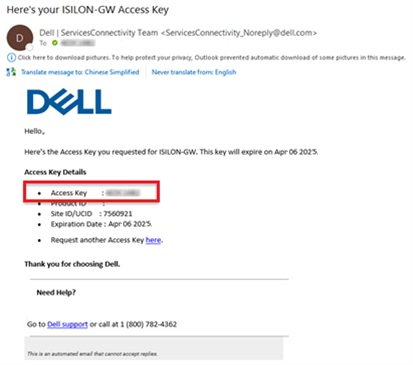
The access key and pin can be obtained from the self-service E-support portal on the Dell Support site.

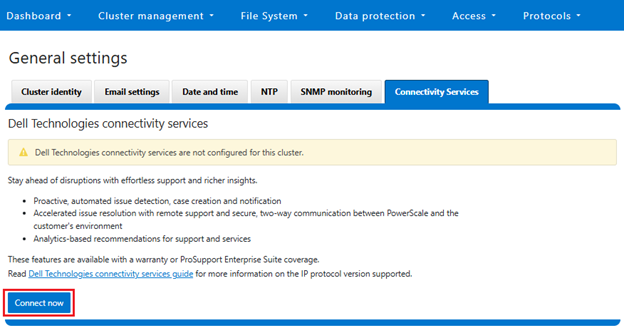
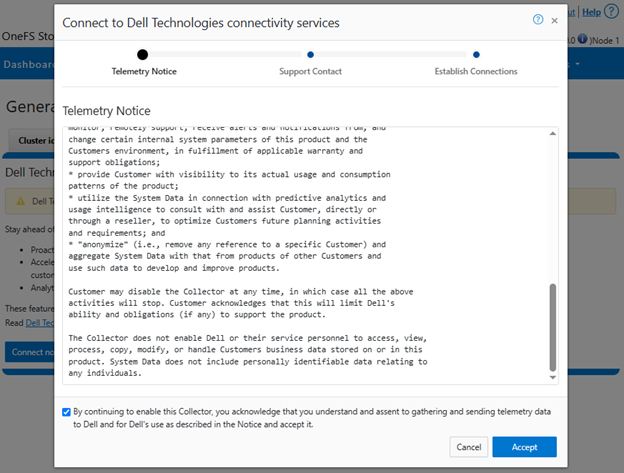
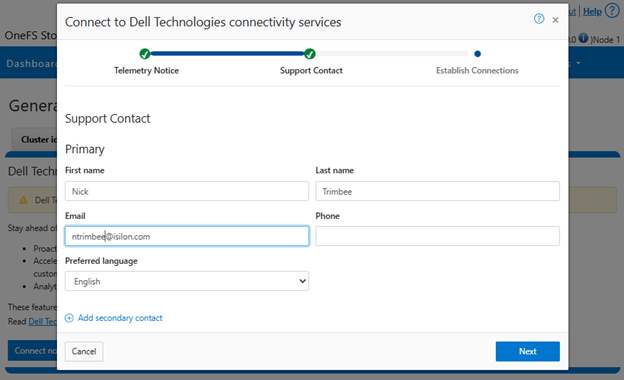
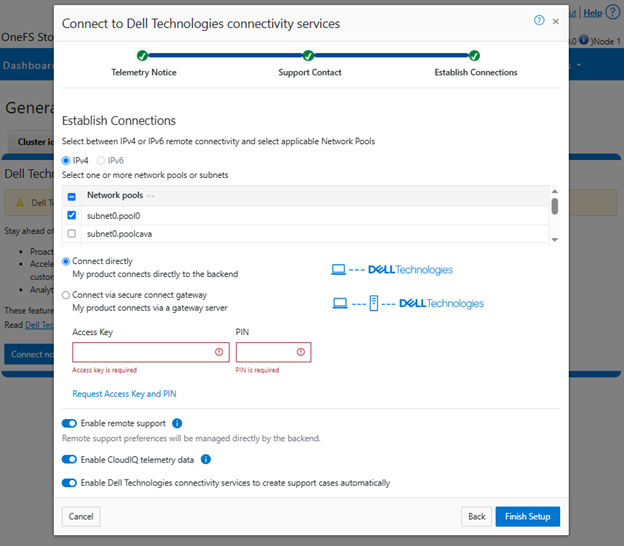
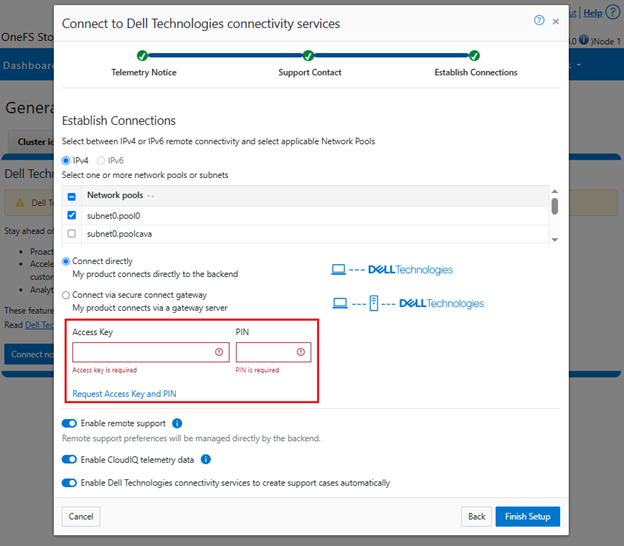
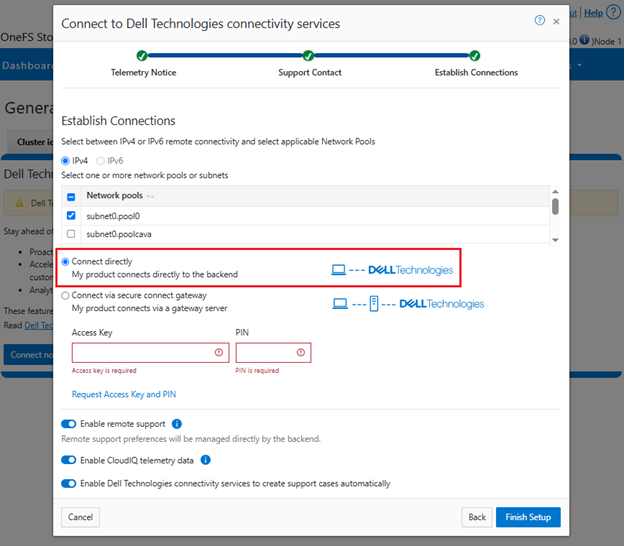
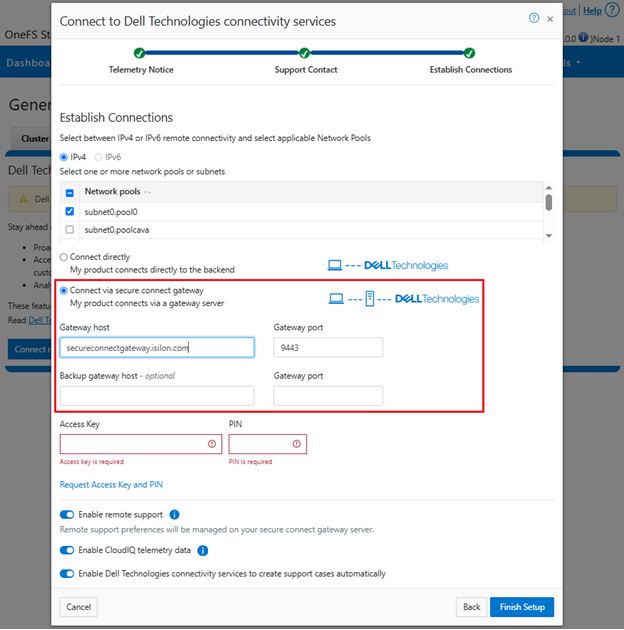
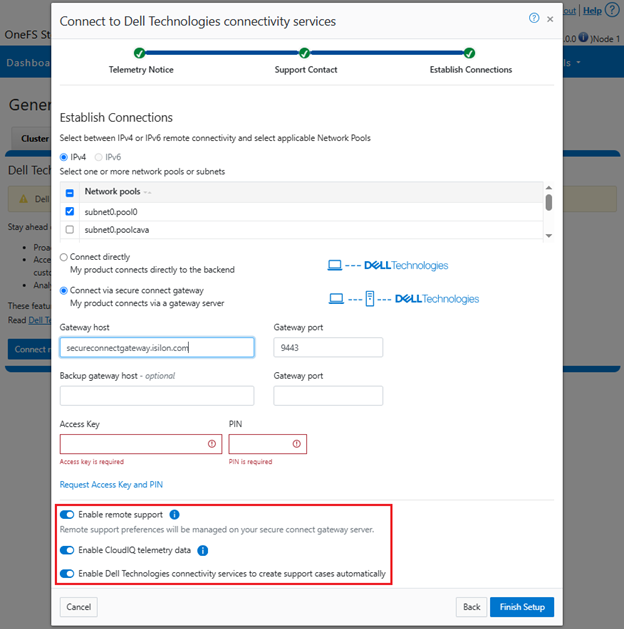
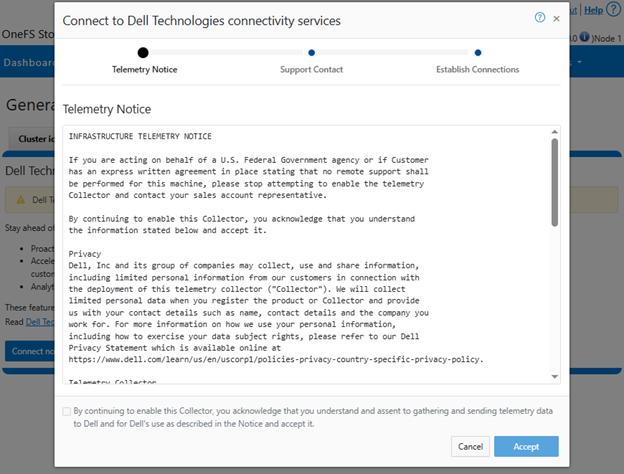
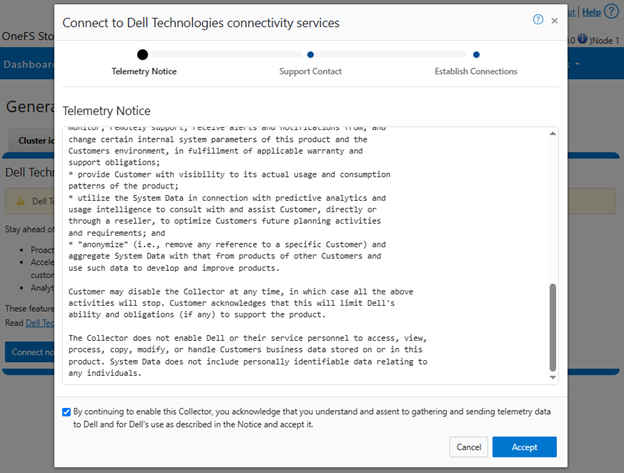
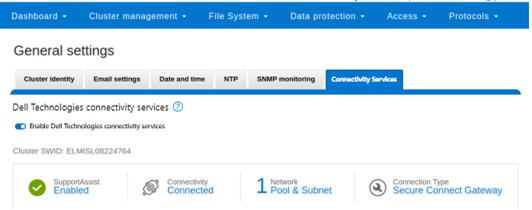
Alternatively, SupportAssist provisioning can also be performed via the WebUI wizard by navigating to Cluster Management > General Settings > SupportAssist > Connect SupportAssist:

Finally, there are a few SupportAssist IPv6 caveats and considerations that are worth noting. These include:

Area Caveat / Consideration
Networking • Cannot mix IPv4-family and IPv6-family subnets and pools

• Either use all-IPv4 or all-IPv6 networking, with the possibility to switch network families later

• Choosing subnets and pools enforces FQDN hostnames or IPv4/IPv6 address validation for gateway host and backup gateway host

Security • SupportAssist with direct connectivity requires network ports 443 and 8443 to be open between the cluster and Dell Support.
Compatibility • ESRS is permanently disabled once SupportAssist is enabled on a cluster.
Enablement • SupportAssist for IPv6 networks becomes ready to provision after OneFS 9.9 upgrade commit.

• OneFS 9.8 and earlier releases only allow IPv4 networking for SupportAssist.

• On-cluster health checks inform on the best way to migrate to SupportAssist

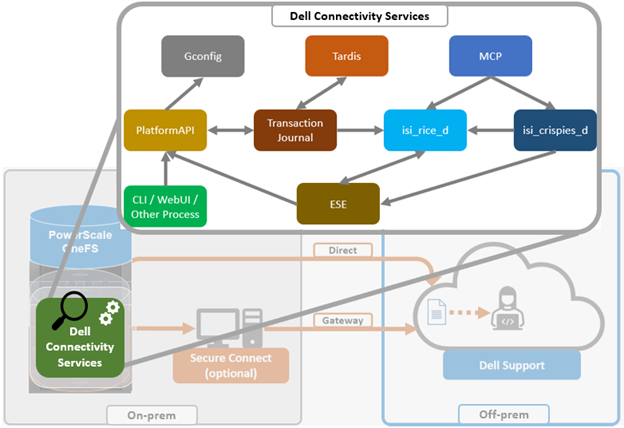
Under the hood, the OneFS SupportAssist relies on the following infrastructure and services:

Service Name
ESE Embedded Service Enabler.
isi_rice_d Remote Information Connectivity Engine (RICE).
isi_crispies_d Coordinator for RICE Incidental Service Peripherals including ESE Start.
Gconfig OneFS centralized configuration infrastructure.
MCP Master Control Program – starts, monitors, and restarts OneFS services.
Tardis Configuration service and database.
Transaction journal Task manager for RICE.

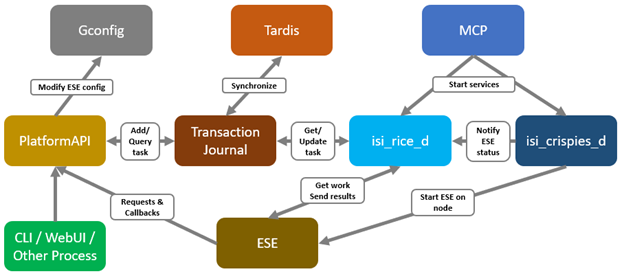
ESE, isi_crispies_d, isi_rice_d, and the Transaction Journal are exclusive to SupportAssist, whereas gconfig, MCP, and tardis are used by multiple other OneFS components.

The remote information connectivity engine (RICE) represents the SupportAssist ecosystem for OneFS to connect to the Dell backend, and the basic architecture is as follows:

The Embedded Service Enabler (ESE) is at the core of the connectivity platform and acts as a unified communications broker between the PowerScale cluster and Dell Support. ESE runs as a OneFS service and, on startup, looks for an on-premises gateway server, such as SupportAssist Enterprise. If none is found, it connects back to the connectivity pipe (SRS). The collector service then interacts with ESE to send telemetry, obtain upgrade packages, transmit alerts and events, etc.

Depending on the available resources, ESE provides a base functionality with optional capabilities to enhance serviceability as appropriate. ESE is multithreaded, and each payload type is handled by different threads. For example, events are handled by event threads, and binary and structured payloads are handled by web threads. Within OneFS, ESE gets installed to /usr/local/ese and runs as the ese user in the ese group.

The responsibilities of isi_rice_d include listening for network changes, getting eligible nodes elected for communication, monitoring notifications from CRISPIES, and engaging Task Manager when ESE is ready to go.

The Task Manager is a core component of the RICE engine. Its responsibility is to watch the incoming tasks that are placed into the journal and assign workers to step through the tasks state machine until completion. It controls the resource utilization (python threads) and distributes tasks that are waiting on a priority basis.

The ‘isi_crispies_d’ service exists to ensure that ESE is only running on the RICE active node, and nowhere else. It acts, in effect, like a specialized MCP just for ESE and RICE-associated services, such as IPA. This entails starting ESE on the RICE active node, re-starting it if it crashes on the RICE active node, and stopping it and restarting it on the appropriate node if the RICE active instance moves to another node. We are using ‘isi_crispies_d’ for this, and not MCP, because MCP does not support a service running on only one node at a time.

The core responsibilities of ‘isi_crispies_d’ include:

  • Starting and stopping ESE on the RICE active node
  • Monitoring ESE and restarting, if necessary. ‘isi_crispies_d’ restarts ESE on the node if it crashes. It will retry a couple of times and then notify RICE if it’s unable to start ESE.
  • Listening for gconfig changes and updating ESE. Stopping ESE if unable to make a change and notifying RICE.
  • Monitoring other related services.

The state of ESE, and of other RICE service peripherals, is stored in the OneFS tardis configuration database so that it can be checked by RICE. Similarly, ‘isi_crispies_d’ monitors the OneFS Tardis configuration database to see which node is designated as the RICE ‘active’ node.

The ‘isi_telemetry_d’ daemon is started by MCP and runs when SupportAssist is enabled. It does not have to be running on the same node as the active RICE and ESE instance. Only one instance of ‘isi_telemetry_d’ will be active at any time, and the other nodes will be waiting for the lock.

So there you have it – PowerScale SupportAssist and it’s newly minted IPv6 networking enhancement in OneFS 9.9.

PowerScale Multipath Client Driver Configuration and Management

As discussed earlier in this series of articles, the multipath driver allows Linux clients to mount a PowerScale cluster’s NFS exports over NFS v3, NFS v4.1, or NFS v4.2 over RDMA.

The principal NFS mount options of interest with the multipath client driver are:

Mount option Description
nconnect Allows the admin to specify the number of TCP connections the client can establish between itself and the NFS server. It works with remoteports to spread load across multiple target interfaces.
localports Mount option that allows a client to use its multiple NICs to multiplex I/O.
localports_failover Mount option allowing transports to temporarily move from local client interfaces that are unable to serve NFS connections.
proto The underlying transport protocol that the NFS mount will use. Typically, either TCP or RDMA.
remoteports Mount option that allows a client to target multiple servers/ NICS to multiplex I/O. Remoteports spreads the load to multiple file handles instead of taking a single file handle to avoid thrashing on locks.
version The version of the NFS protocol that is to be used. The multipath driver supports NFSv3, NFSv4.1, and NFSv4.2. Note that NFSv4.0 is unsupported.

These options allow the multipath driver to be configured such that an IO stream to a single NFS mount can be spread across a number of local (client) and remote (cluster) network interfaces (ports). Nconnect allows you to specify how many socket connections you want to open to each combination of local and remote ports.

Below are some example topologies and NFS client configurations using the multipath driver.

  1. Here, NFSv3 with RDMA is used to spread traffic across all the front-end interfaces (remoteports) on the PowerScale cluster:
# mount -o proto=rdma,port=20049,vers=3,nconnect=18,remoteports=10.231.180.95- 10.231.180.98 10.231.180.98:/ifs/data /mnt/test

The above client NFS  mount configuration would open 5 socket connections to two of the ‘remoteports’ (cluster node) IP address specified and 4 socket connections to the other two.

As you can see, this driver can be incredibly powerful given its ability to multipath comprehensively. Clearly, there are many combinations of local and remote ports and socket connections that can be configured.

  1. This next example uses NFSv3 with RDMA across three ‘localports’ (client) and with 8 socket connections to each:
# mount -o proto=rdma,port=20049,vers=3,nconnect=24,localports=10.219.57.225- 10.219.57.227, remoteports=10.231.180.95-10.231.180.98 10.231.180.98:/ifs/data /mnt/test

  1. This final config specifies NFSv4.1 with RDMA using a high connection count to target multiple nodes (remoteports) on the cluster:
# mount -t nfs –o proto=rdma,port=20049,vers=4.1,nconnect=64,remoteports=10.231.180.95- 10.231.180.98 10.231.180.98:/ifs/data /mnt/test

In this case, 16 socket connections will be opened to each of the four specified remote (cluster) ports for a total of 64 connections.

Note that the Dell multipath driver has a hard-coded limit of 64 nconnect socket connections per mount.

Behind the scenes, the driver uses a network map to store the local and remote port and nconnect socket configuration.

The multipath driver supports both IPv4 and IPv6 addresses for local and remote port specification. If a specified IP address is unresponsive, the driver will remove the offending address from its network map.

Note that the Dell multipath driver supports NFSv3, NFSv4.1, and NFSv4.2 but is incompatible with NFSv4.0.

On Ubuntu 20.04, for example, NFSv3 and NFSv4.1 are both fully-featured. In addition, the ‘remoteports’ behavior is more obvious with NFSv4.1 because the client state is tracked:

# mount -t nfs -o vers=4.1,nconnect=8,remoteports=10.231.180.95-10.231.180.98 10.231.180.95:/ifs /mnt/test

And from the cluster:

cluster# isi_for_array 'isi_nfs4mgmt'

ID                Vers   Conn   SessionId     Client Address Port   O-Owners      Opens  Handles L-Owners

2685351452398170437  4.1    tcp    5           10.219.57.229  872    0     0     0     0

5880148330078271256   4.1    tcp    11          10.219.57.229  680    0     0     0     0

2685351452398170437   4.1    tcp    5           10.219.57.229  872    0     0     0     0

6230063502872509892   4.1    tcp    1           10.219.57.229  895    0     0     0     0

6786883841029053972   4.1    tcp    1           10.219.57.229  756    0     0     0     0

With a single mount, the client has created many connections across the server.

This also works with RDMA:

# mount -t nfs -o vers=4.1,proto=rdma,nconnect=4 10.231.180.95:/ifs /mnt/test

# isi_for_array 'isi_nfs4mgmt’

ID                 Vers   Conn   SessionId     ClientAddress  Port   O-Owners      Opens  Handles L-Owners

6786883841029053974   4.1    rdma   2           10.219.57.229  54807  0     0     0     0

6230063502872509894   4.1    rdma   2           10.219.57.229  34194  0     0     0     0

5880148330078271258   4.1    rdma   12          10.219.57.229  43462  0     0     0     0

2685351452398170443  4.1    rdma   8           10.219.57.229  57401  0     0     0     0


0

Once the Linux client NFS mounts have been configured, their correct functioning can be easily verified by generating read and/or write traffic to the PowerScale cluster and viewing the OneFS performance statistics. Running a load generator like ‘iozone’ is a useful way to generate traffic on the NFS mount. The iozone utility can be invoked with its ‘-a’ flag to select full automatic mode. This produces output that covers all tested file operations for record sizes of 4k to 16M for file sizes of 64k to 512M.

# iozone -a

For example:

From the PowerScale cluster, if the multipath driver is working correctly the ‘isi statistics client’ CLI command output will show the Linux client connecting and generating traffic to all of the cluster’s nodes that are specified in the’ –remoteports’ option for the NFS mount.

# isi statistics client

For example:

Alternatively, from the client, the ‘netstat’ CLI command can be used from the Linux client to query the number of TCP connections established:

# netstat -an | grep 2049 | grep EST | sort -k 5

On Linux systems, the ‘netstat’ command line utility typically requires the ‘net-tools’ package to be installed.

Since NFS is a network protocol, when it comes to investigating, troubleshooting, and debugging multipath driver issues, one of the most useful and revealing troubleshooting tools is a packet capturing device or sniffer. These provide visibility into the IP packets as they are transported across the Ethernet network between the Linux client and the PowerScale cluster nodes.

Packet captures (PCAPs) of traffic between client and cluster can be filtered and analyzed by tools such as Wireshark to ensure that requests, authentication, and transmission are occurring as expected across the desired NICs.

Gathering PCAPs is best performed on the Linux client-side and on the multiple specified interfaces if the client is using the ‘–localports’ NFS mount option.

In addition to PCAPs, the following three client-side logs are another useful place to check when debugging a multipath driver issue:

Log file Description
/var/log/kern.log Most client logging is written to this log file
/var/log/auth.log Authentication logging
/var/log/messages Error level message will appear here


Verbose logging can be enabled on the Linux client with the following CLI syntax:

# sudo rpcdebug -m nfs -s all

Conversely, the following command will revert logging back to the default level:

# sudo rpcdebug -m nfs -c all


Additionally, a ‘dellnfs-ctl’ CLI tool comes packaged with the multipath driver module and is automatically available on the Linux client after the driver module installation.

The command usage syntax for the ‘dellnfs-ctl’ tool is as follows:

# dellnfs-ctl

syntax: /usr/bin/dellnfs-ctl [reload/status/trace]

Note that to operate it in trace mode, the ‘dellnfs-ctl’ tool requires the ‘trace-cmd’ package to be installed.

For example, the trace-cmd package can be installed on an Ubuntu Linux system using the ‘apt install’ package utility command:

# sudo apt install trace-cmd

The current version of the dellnfs-ctl tool, plus the associated services and kernel modules, can be queried with the following CLI command syntax:

# dellnfs-ctl status

version: 4.0.22-dell

kernel modules: sunrpc rpcrdma compat_nfs_ssc lockd nfs_acl auth_rpcgss rpcsec_gss_krb5 nfs nfsv3 nfsv4

services: rpcbind.socket rpcbind rpc-gssd rpc_pipefs: /run/rpc_pipefs

With the ‘reload’ option, the ‘dellnfs-ctl’ tool uses ‘modprobe’ to reload and restart the NFS RPC services. For example:

# dellnfs-ctl reload

dellnfs-ctl: stopping service rpcbind.socket

dellnfs-ctl: umounting fs /run/rpc_pipefs

dellnfs-ctl: unloading kmod nfsv3

dellnfs-ctl: unloading kmod nfs

dellnfs-ctl: unloading kmod nfs_acl

dellnfs-ctl: unloading kmod lockd

dellnfs-ctl: unloading kmod compat_nfs_ssc

dellnfs-ctl: unloading kmod rpcrdma

dellnfs-ctl: unloading kmod sunrpc

dellnfs-ctl: loading kmod sunrpc

dellnfs-ctl: loading kmod rpcrdma

dellnfs-ctl: loading kmod compat_nfs_ssc

dellnfs-ctl: loading kmod lockd

dellnfs-ctl: loading kmod nfs_acl

dellnfs-ctl: loading kmod nfs

dellnfs-ctl: loading kmod nfsv3

dellnfs-ctl: mounting fs /run/rpc_pipefs

dellnfs-ctl: starting service rpcbind.socket

dellnfs-ctl: starting service rpcbind

In the event that a problem is detected, it is important to run the reload script before uninstalling or reinstalling the driver. Because the script runs modprobe, the kernel modules that are modified by the driver will be reloaded.

Note that this will affect existing NFS mounts. As such, any active mounts will need to be re-mounted after a reload is performed.


As we have seen throughout this series of articles, the core benefits of the Dell multipath driver include:

  • Better single NFS mount performance.
  • Increased bandwidth for single NFS mount with multiple R/W streaming files.
  • Improved performance for heavily used NIC’s to a single PowerScale Node.

The Dell multipath driver allows NFS clients to direct I/O to multiple PowerScale nodes through a single NFS mount point for higher single-client throughput. This enables Dell to deliver the first Ethernet storage solution validated on NVIDIA’s DGX SuperPOD.

PowerScale Multipath Client Driver – Compiling on OpenSUSE Linux

The previous article in this series explored building the PowerScale multipath client driver from source on Ubuntu Linux. Now we’ll turn our attention to compiling the driver on the OpenSUSE Linux platform.

Unlike the traditional one-to-one NFS server/client mapping, this multipath client driver allows the performance of multiple PowerScale nodes to be aggregated through a single NFS mount point to one or many compute nodes.

Building the PowerScale multipath client driver from scratch, rather than just installing it from a pre-built Linux package, helps guard against minor version kernel mismatches on the Linux client that would result in the driver not installing correctly.

The driver itself is available for download on the Dell Support Site. There is no license or cost for this driver, either for the pre-built Linux package or source code. The zipped tarfile download contains a README doc which provides basic instruction.

For an OpenSUSE Linux client to successfully connect to a PowerScale cluster using the multipath driver, there are a couple prerequisites that must be met:

  • The NFS client system or virtual machine must be running the following OpenSUSE version:
Supported Linux Distribution Kernel Version
OpenSUSE 15.4 5.14.x
  • If RDMA is being configured, the system must contain an RDMA-capable Ethernet NIC, such as the Mellanox CX series.
  • The ‘trace-cmd’ package should be installed, along with NFS client related packages.

For example,:

# zypper install trace-cmd nfs-common
  • Unless already installed, developer tools may also need to be added. For example:
# zypper install rpmbuild tar gzip git kernel-devel

The following CLI commands can be used to verify the kernel version and other pertinent details of the OpenSUSE client:

# uname -a

Unless all the Linux clients are known to be identical, the best practice is to build and install the driver per-client or you may experience failed installs.

Overall, the driver source code compilation process is as follows:

  1. Download the driver source code from the driver download site.
  2. Unpack the driver source code on the Linux client

Once downloaded, this file can be extracted using the Linux ‘tar’ utility. For example:

# tar -xvf <source_tarfile>
  1. Build the driver source code on the Linux client

Once downloaded to the Linux client, the multipath driver package source can be built with the following CLI command:

# ./build.sh bin

A successful build is underway when the following output appears on the console:

…<build takes about ten minutes>

------------------------------------------------------------------

When the build is complete, a package file is created in the ./dist directory, located under the top level source code directory.

  1. Install the driver binaries on the OpenSUSE client
# zypper in ./dist/dellnfs-4.0.22-kernel_5.14.21_150400.24.97_default.x86_64.rpm
Loading repository data...
Reading installed packages...
Resolving package dependencies...

The following NEW package is going to be installed:
dellnfs

1 new package to install.
  1. Check installed files
# rpm -qa | grep dell
dellnfs-4.0.22-kernel_5.14.21_150400.24.100_default.x86_64
  1. Reboot
# reboot
  1. Check services are started
# systemctl start portmap
# systemctl start nfs
# systemctl status nfs
nfs.service - Alias for NFS client
Loaded: loaded (/usr/lib/systemd/system/nfs.service; disabled; vendor preset: disabled)
Active: active (exited) since Tues 2024-10-15 15:11:09 PST; 2s ago
Process: 15577 ExecStart=/bin/true (code=exited, status=0/SUCCESS)
Main PID: 15577 (code=exited, status=0/SUCCESS)

Oct 15 15:11:09 CLI22 systemd[1]: Starting Alias for NFS client...
Oct 15 15:11:09 CLI22 systemd[1]: Finished Alias for NFS client.
  1. Check client driver is loaded with dellnfs-ctl script
# dellnfs-ctl status
version: 4.0.22
kernel modules: sunrpc
services: rpcbind.socket rpcbind
rpc_pipefs: /var/lib/nfs/rpc_pipefs

Note, however, that when building and installing on an OpenSUSE virtual instance (VM), additional steps are required.

Since OpenSUSE does not reliably install a kernel-devel kit that matches the running kernel version, this must be forced to happen as follows:

  1. Install dependencies
# zypper install rpmbuild tar gzip git
  1. Install CORRECT kernel-devel package

The recommended way to install kernel-devel package according to OpenSUSE documentation is to use:

# zypper install kernel-default-devel

Beware that the ‘zypper install kernel-default-devel’ command occasionally fails to install the correct kernel-devel package. This can be verified by looking at the following paths:

# ls /lib/modules/

5.14.21-150500.55.39-default

# uname -a

Linux 6f8edb8b881a 5.15.0-91-generic #101~20.04.1-Ubuntu SMP Thu Nov 16 14:22:28 UTC 2023 x86_64 x86_64 x86_64 GNU/Linux

Note that the contents of /lib/modules above does not match the ‘uname’ command output:

‘5.14.21-150500.55.39-default’  vs.  ‘5.15.0-91-generic’

Another issue with installing with ‘kernel-devel’ is that sometimes the /lib/modules/$(uname -r) directory will not include the /build subdirectory.

If this occurs, the client side driver will fail with the following error:

# ls -alh /lib/modules/$(uname -r)/build

ls: cannot access '/lib/modules/5.14.21-150400.24.63-default/build': No such file or directory

....

Kernel root not found

The recommendation is to install the specific kernel-devel package for the client’s Linux version. For example:

# ls -alh /lib/modules/$(uname -r)

total 5.4M

drwxr-xr-x 1 root root  488 Dec 13 19:37 .

drwxr-xr-x 1 root root  164 Dec 13 19:42 ..

drwxr-xr-x 1 root root   94 May  3  2023 kernel

drwxr-xr-x 1 root root   60 Dec 13 19:37 mfe_aac

-rw-r--r-- 1 root root 1.2M May  9  2023 modules.alias

-rw-r--r-- 1 root root 1.2M May  9  2023 modules.alias.bin

-rw-r--r-- 1 root root 6.4K May  3  2023 modules.builtin

-rw-r--r-- 1 root root  17K May  9  2023 modules.builtin.alias.bin

-rw-r--r-- 1 root root 8.2K May  9  2023 modules.builtin.bin

-rw-r--r-- 1 root root  49K May  3  2023 modules.builtin.modinfo

-rw-r--r-- 1 root root 610K May  9  2023 modules.dep

-rw-r--r-- 1 root root 809K May  9  2023 modules.dep.bin

-rw-r--r-- 1 root root  455 May  9  2023 modules.devname

-rw-r--r-- 1 root root  802 May  3  2023 modules.fips

-rw-r--r-- 1 root root 181K May  3  2023 modules.order

-rw-r--r-- 1 root root 1.2K May  9  2023 modules.softdep

-rw-r--r-- 1 root root 610K May  9  2023 modules.symbols

-rw-r--r-- 1 root root 740K May  9  2023 modules.symbols.bin

drwxr-xr-x 1 root root   36 May  9  2023 vdso


# rpm -qf /lib/modules/$(uname -r)/

kernel-default-5.14.21-150400.24.63.1.x86_64 <---------------------

kernel-default-extra-5.14.21-150400.24.63.1.x86_64

kernel-default-optional-5.14.21-150400.24.63.1.x86_64

Take the package name and prefix it with ‘kernel-default-devel’:

====================================================================

# zypper install kernel-default-devel-5.14.21-150400.24.63.1.x86_64

Loading repository data...

Reading installed packages...

The selected package 'kernel-default-devel-5.14.21-150400.24.63.1.x86_64' from repository 'Update repository with updates from SUSE Linux Enterprise 15' has lower version than the installed one. Use 'zypper install --oldpackage kernel-default-devel-5.14.21-150400.24.63.1.x86_64' to force installation of the package.

Resolving package dependencies...

Nothing to do.

# zypper install --oldpackage  kernel-default-devel-5.14.21-150400.24.63.1.x86_64

Loading repository data...

Reading installed packages...

Resolving package dependencies...

The following 2 NEW packages are going to be installed:

kernel-default-devel-5.14.21-150400.24.63.1 kernel-devel-5.14.21-150400.24.63.1

2 new packages to install.

Now the build directory exists:

# ls -alh /lib/modules/$(uname -r)

total 5.4M

drwxr-xr-x 1 root root 510 Dec 13 19:46 .

drwxr-xr-x 1 root root 164 Dec 13 19:42 ..

lrwxrwxrwx 1 root root 54 May 3 2023 build -> /usr/src/linux-5.14.21-150400.24.63-obj/x86_64/default

drwxr-xr-x 1 root root 94 May 3 2023 kernel

drwxr-xr-x 1 root root 60 Dec 13 19:37 mfe_aac

It is less likely you will run into this if you run ‘zypper update’ first. Note that this can take more than fifteen minutes to complete.

Next, reboot the Linux client and then run:

# zypper install kernel-default-devel

In the next and final article of this series, we’ll be looking at the configuration and management of the multipath client driver.

PowerScale Multipath Client Driver – Compiling on Ubuntu Linux

As discussed in the first article in this series, the new PowerScale multipath client driver enables performance aggregation of multiple PowerScale nodes through a single NFS mount point to one or many compute nodes.

There are several good reasons to build the PowerScale multipath client driver from scratch rather than just installing it from a pre-built Linux package. The primary motivation is typically that any minor version kernel mismatch on the Linux client will result in the driver not installing correctly. For example, kernel version 5.4.0-150-generic is incompatible with 5.4.0-167-generic. Both are incompatible with 5.15.0-91-generic, which has an upgraded kernel.

The multipath driver bits are available for download on the Dell Support Site to any customer that has OneFS entitlement:

https://www.dell.com/support/home/en-us/product-support/product/isilon-onefs/drivers

There is no license requirement for this driver, nor charge for it, and it’s provided as both pre-built Linux package, and customer-compliable source code. There’s a README file included with the code that provides basic instruction.

This multipath client driver runs on both physical and virtual machines, and across several popular Linux distros. The following matrix shows the currently supported variants, plus the availability of a pre-compiled driver package and/or self-compilation option.

Linux distribution Kernel version Upstream driver version (minimum) Multipath driver version Package

available

Self-

compile

OpenSUSE 15.4 5.14.x 4.x 1.x Yes Yes
Ubuntu 20.04 5.4.x 4.x 1.x Yes Yes
Ubuntu 22.04 5.15.x 4.x 1.x Yes Yes

While the multipath driver’s major release version—1.x—is correct in the table, the second digit release number will be frequently incremented as updated versions of the multipath client driver are released.

By design, the multipath driver only supports newer and most recent versions of the popular Linux distributions. Older Linux kernel versions often do not support full NFS client functionality, particularly for the ‘–remoteports’ and/or ‘–localports’ mount configuration options. Additionally, older and end-of-life Linux versions can often present significant security risks, especially once current vulnerability patches and hotfixes are no longer being made available.

Both x86 CPU architectures and GPU-based platforms, such as the NVIDIA DGX range, are supported.

Linux system Processor type Example
Physical CPU Dell PE R760
Physical GPU Dell PE XE9680

NVIDIA DGX H100

Virtual machine CPU VMware ESXi
Virtual machine GPU VMware vDGA

While there is no specific NFS or OneFS core configuration required on the PowerScale cluster side when using Linux clients with the Dell multipath driver, there are a couple of basic prerequisites The following OneFS support matrix on the top right of this slide lays out which driver functionality is available in what release, from OneFS 9.5 to current.

Version NFSv3, NFSv4.1 TCP NFSv3 RDMA NFSv4.1 RDMA NVIDIA SuperPOD
OneFS 9.5 Yes Yes No No
OneFS 9.7 Yes Yes Yes No
OneFS 9.9 Yes   Yes  Yes Yes

Also note that OneFS 9.9 is required for any NVIDIA SuperPOD deployments, because there are some performance optimizations in 9.9 specifically for that platform.

The following CLI commands can be run on the PowerScale cluster to verify its compatibility. The cluster’s current OneFS version can be easily determined using the following CLI command:

# uname -or

Isilon OneFS 9.9.0.0

Also, to confirm RDMA is supported and enabled:

# isi nfs settings global view | grep -i RDMA

   NFS RDMA Enabled: Yes

Additionally, both the dynamic and static network pools can be configured on the cluster for use with the multipath driver. If F710 nodes are being deployed in the cluster, OneFS 9.7 or later is required.

Note that when deploying an NVIDIA SuperPOD or BasePOD solution, the reference architecture mandates a PowerScale cluster composed of F710 all-flash nodes running OneFS 9.9 or later.

For a Linux client to successfully connect to a PowerScale cluster using the multipath driver, there are a few prerequisites that must be met:

  • The NFS client system or virtual machine must be running one of the following Linux versions:
Supported Linux Distribution Kernel Version
OpenSUSE 15.4 5.14.x
Ubuntu 20.04 5.4.x
Ubuntu 22.04 5.15.x

By design, the multipath driver only supports newer and most recent versions of the popular Linux distributions. Older Linux kernels often don’t include full NFS client functionality, particularly for the ‘–remoteports’ and ‘–localports’ mount options.

  • If RDMA is being configured, the client must contain an RDMA-capable Ethernet NIC, such as the Mellanox CX series.
  • The Linux client should have the ‘trace-cmd’ package installed, along with NFS client related packages.

For example, on an Ubuntu system:

# sudo apt install trace-cmd nfs-common

The following CLI commands can be used to verify the kernel version, and other pertinent details, of a Linux client:

# uname -a

Similarly, depending on the flavor of Linux, the following commands will show the details of the particular distribution:

# lsb_release -a

Or:

# cat /etc/os-release

 For security purposes, the driver downloads are signed with SHA256. Using Debian linux as an example, the driver components can be accessed as follows:

  1. Verify the SHA256 Checksum Manually

If you have a separate SHA256 checksum file, you can verify the checksum manually as follows:

First, calculate the checksum:

# sha256sum dellnfs-modules_4.0.24-Dell-Technologies.kver.5.4.0-190-generic_amd64.deb.signed

Then compare the output with the checksum provided.

  1. Extract the Signed Package

First, if not already available, install the necessary extraction tools:

# sudo apt-get install ar

Next, extract the signed driver file:

# ar x dellnfs-modules_4.0.24-Dell-Technologies.kver.5.4.0-190-generic_amd64.deb.signed

This should yield multiple extracted files, including the following:

 control.tar.xz, data.tar.xz, and debian-binary.

Unless all the Linux clients are known to be identical, the best practice is to build and install the driver per-client or you may experience failed installs.

Within Ubuntu (and certain other Linux distros) , Dynamic Kernel Module Support (DKMS) can be used to allow kernel modules to be generated from sources outside the kernel source tree. As such, DKMS modules can be automatically rebuilt when a new kernel is installed, enabling drivers to continue operating after a Linux kernel upgrade. Similarly, DKMS can enable a new driver to be installed on a Linux client running a slightly different kernel version, without the need for manual recompilation.

Considerations when building the multipath driver from source include:

  • The recommendation is to build the multipath driver on all supported Linux versions unless all NFS clients have exactly the same kernel versions.
  • Since a multipath driver binary install package is not provided for NVIDIA DGX platforms, the driver must be manually built with DKMS.

Dependent packages that should be added before building and installing the multipath driver include:

OS Dependent package Install command
Ubuntu 20 debhelper sudo apt-get install debhelper
Ubuntu 22 debhelper

nfs-kernel-server

sudo apt-get install debhelper

sudo apt-get install nfs-kernel-server

The driver source code compilation process is as follows:

  1. Download the driver source code from the repository

As mentioned previously, the driver source code can be obtained as a tarfile from the Dell Support driver download site.

  1. Unpack the driver source code on the Linux client

Once downloaded, this file can be extracted using the ‘tar’ utility. For example:

# tar -xvf <source_tarfile>
  1. Build the driver source code on the Linux client

Once downloaded to the Linux client, the multipath driver package source can be built with the following CLI command:

# ./build.sh bin

Note that, in general, a successful build is underway when the following output appears on the console:

…<build takes about ten minutes>

------------------------------------------------------------------

When the build is complete, a package file is created in the ./dist directory, located under the top level source code directory. For example:

# ls -lsia ./dist

total 1048-rw-r--r-- 1 root root 1069868 Mar 24 16:23 dellnfs-modules_4.0.22-dell.kver.5.15.0-89-generic_amd64.deb

If the kernel version, Linux distribution, or OFED are not supported, an error message will be displayed during the build process.

  1. Install the driver binaries on the Linux client

The previous blog article in this series describes the process for adding the driver binary package to a Linux client.

That said, when building the driver on Ubuntu, there are a couple of idiosyncrasies to be aware of.

When running Ubuntu 18.04 or later, the “dellnfs-ctl” script can be used to reload the NFS client modules as follows:

# dellnfs-ctl reload

Also, Ubuntu 22.x clients should also have the ‘nfs-kernel-server’ package installed. For example:

# sudo apt install nfs-kernel-server
  1. Install the *.deb package generated:
# sudo apt-get install ./dist/dellnfs-modules_*-generic_amd64.deb
  1. Regenerate running kernel image:
# sudo update-initramfs -u -k `uname -r`
  1. Check that the package is installed correctly:
# dpkg -l | grep dellnfs-modules

dellnfs-modules   2:4.0.22-dell.kver.5.4.0-150-generic amd64        NFS RDMA kernel modules

# dpkg -S /lib/modules/`uname -r`/updates/bundle/net/sunrpc/xprtrdma/rpcrdma.ko

dellnfs-modules: /lib/modules/5.4.0-150-generic/updates/bundle/net/sunrpc/xprtrdma/rpcrdma.ko
  1. Optionally reboot the Linux client:
# reboot
  1. Verify the module is running:
# dellnfs-ctl status

version: 4.0.22-dell
kernel modules: sunrpc rpcrdma compat_nfs_ssc lockd nfs_acl nfs nfsv3
services: rpcbind.socket rpcbind rpc-gssdrpc_pipefs: /run/rpc_pipefs

For NVIDIA DGX clients in particular, the Mellanox OpenFabrics Enterprise Driver for Linux (MLNX_OFED) is a single Virtual Protocol Interconnect (VPI) software stack that operates across the network adapters in DGX systems. MLNX_OFED is an NVIDIA-tested and packaged version of OFED which supports Ethernet, as well as Infiniband, using RDMA and kernel bypass APIs (OFED verbs).

When building the multipath driver on an DGX platform, or alongside a DKMS install of the Mellanox OFED driver package, there are a few extra steps required beyond the package manager install itself.

If a DKMS install is required by your system (typically NVDIA DGX platforms), the package will be formatted with the term ‘multikernel’ in the package name. For example:

# ls

dellnfs-dkms_4.5-OFED.4.5.1.0.1.1.gb4fdfac.multikel_all.deb

This indicates the package is built for DKMS and therefore must be installed by DKMS. After installing with your package manager, the following files will be present under the /usr/src directory:

# ls /usr/src

dellnfs-99.4.5  kernel-mft-dkms-4.22.1           linux-hwe-5.19-headers-5.19.0-45  mlnx-ofed-kernel-5.8  srp-5.8

iser-5.8        knem-1.1.4.90mlnx3               mlnx-nfsrdma-5.8                  ofa_kernel

isert-5.8       linux-headers-5.19.0-45-generic  mlnx-nvme-5.8                     ofa_kernel-5.8

Next, the following CLI command will install the driver:

# dkms install -m dellnfs -v 99.4.5

Creating symlink /var/lib/dkms/dellnfs/99.4.5/source ->

/usr/src/dellnfs-99.4.5

Kernel preparation unnecessary for this kernel. Skipping...

Building module:

cleaning build area...

./_dkms-run.sh -j8 KVER=5.19.0-45-generic

K_BUILD=/lib/modules/5.19.0-45-generic/build......................................

Once the DKMS installation is complete, either reload the driver with the ‘dellnfs-ctl’ utility, or reboot the client:

# dellnfs-ctl reload

Or:

# reboot

In the next article in this series, we’ll turn our attention to compiling the driver source on the OpenSUSE Linux platform.

PowerScale Multipath Client Driver Pre-built Package Installation

As mentioned in the first article in this series, the PowerScale multipath client driver driver is able to aggregate the performance of multiple PowerScale nodes through a single NFS mount point to one or more Linux clients.

The driver itself is a kernel module, and that means it needs to be installed alongside a corresponding kernel version to that which it was built on. Version matching is strict, right down to the minor build version.

There are two installation options provided for the PowerScale multipath client driver:

  • As a pre-built binary installation package for each of the supported Linux distribution versions listed below.
  • Or via source code under the GPL 2 open source license, which can be compiled at a customer site.

This article covers the first option, and outlines the steps involved with the installation of the pre-built binary driver package for the following, currently supported Linux versions:

Linux distribution Kernel version Upstream driver version (minimum) Multipath driver version Package

available

OpenSUSE 15.4 5.14.x 4.x 1.x ü
Ubuntu 20.04 5.4.x 4.x 1.x ü
Ubuntu 22.04 5.15.x 4.x 1.x ü

Package installation is typically handled best by the client Linux distro’s native package manager. Since it’s a kernel module, installing and updating the driver typically requires a reboot. PowerScale engineering anticipate periodically releasing updated driver packages to keep up with Linux on the supported platforms list, as well as fix bugs and add additional functionality.

This multipath client driver runs on both physical and virtual machines, and both x86 CPU architectures and GPU-based platforms, such as the NVIDIA DGX range, are supported.

While there is no specific NFS or OneFS core configuration required on the PowerScale cluster side when using Linux clients with the Dell multipath driver, there are a couple of basic prerequisites. The following OneFS support matrix on the top right of this slide lays out which driver functionality is available in what release, from OneFS 9.5 to current.

Version NFSv3, NFSv4.1 TCP NFSv3 RDMA NFSv4.1 RDMA NVIDIA SuperPOD
OneFS 9.5 Yes Yes No No
OneFS 9.7 Yes Yes Yes No
OneFS 9.9 Yes Yes Yes Yes

Also note that OneFS 9.9 is required for any NVIDIA SuperPOD deployments, because there are some performance optimizations in 9.9 specifically for that platform.

The following CLI commands can be run on the PowerScale cluster to verify its compatibility. The cluster’s current OneFS version can be easily determined using the following CLI command:

# uname -or

Isilon OneFS 9.9.0.0

Also, to confirm RDMA is supported and enabled:

# isi nfs settings global view | grep -i RDMA

   NFS RDMA Enabled: Yes

Additionally, both the dynamic and static network pools can be configured on the cluster for use with the multipath driver. If F710 nodes are being deployed in the cluster, OneFS 9.7 or later is required.

Note that when deploying an NVIDIA SuperPOD or BasePOD solution, the reference architecture mandates a PowerScale cluster composed of F710 all-flash nodes running OneFS 9.9 or later.

For a Linux client to successfully connect to a PowerScale cluster using the multipath driver, there are a few prerequisites that must be met, in addition to running one of the Linux versions listed above. These include:

  • If RDMA is being configured, the client must contain an RDMA-capable Ethernet NIC, such as the Mellanox CX series.
  • The Linux client should have the ‘trace-cmd’ package installed, along with NFS client related packages.

For example, on an Ubuntu system:

# sudo apt install trace-cmd nfs-common

The following CLI commands can be used to verify the kernel version, and other pertinent details, of a Linux client:

# uname -a

Similarly, depending on the flavor of Linux, the following commands will show the details of the particular distribution:

# lsb_release -a

Or:

# cat /etc/os-release

The multipath client driver is available for download on the Dell Support Site to any customer that has OneFS entitlement: For security purposes, the download files are signed with SHA256. Using Debian linux as an example, the driver components can be accessed as follows:

  1. Verify the SHA256 Checksum Manually

The downloaded driver package’s authenticity can be manually verified via its SHA256 checksum as follows:

First, calculate the checksum on the signed driver package:

# sha256sum dellnfs-modules_4.0.24-Dell-Technologies.kver.5.4.0-190-generic_amd64.deb.signed

Then compare the output with the value in the accompanying checksum file.

  1. Extract the Signed Package

First, if not already available, install the necessary extraction tools:

# sudo apt-get install ar

Next, extract the signed driver file:

# ar x dellnfs-modules_4.0.24-Dell-Technologies.kver.5.4.0-190-generic_amd64.deb.signed

This should yield multiple extracted files, including the following:

 control.tar.xz, data.tar.xz, and debian-binary.
  1. Repackage the File

If needed, the extracted contents can be repackaged into a standard ‘.deb’ package file:

# ar rcs dellnfs-modules_4.0.24-Dell-Technologies.kver.5.4.0-190-generic_amd64.deb debian-binary control.tar.xz data.tar.xz
  1. Install the Repackaged Debian File

Once repackaged, you can install the Debian package using the ‘dpkg’ utility. For example:

# sudo dpkg -i dellnfs-modules_4.0.24-Dell-Technologies.kver.5.4.0-190-generic_amd64.deb

Package installation is handled using the native package manager, and each of the supported Linux distributions uses the following format and package installation utility:

Linux Distribution Package Manager Package Utility
OpenSUSE RPM Zipper
Ubuntu Deb apt-get / dpkg

The RPM and DEB packages can either be obtained from the Dell download site or built manually at the customer site.

The multipath client driver is provided as a pre-built binary installation package for each of the supported Linux distribution versions. The process for package installation varies slightly across the different Linux versions, but the basic process is as follows:

Note that the multipath driver installation does require a reboot of the Linux system.

For Ubuntu, the following procedure describes how to install the multipath driver package:

  1. Download the DEB package.
  2. Verify that DEB package and Kernel Version Match.

Compare the package version and the kernel version to ensure they are an exact match. If they are not an exact  match, do not install the package. Instead, build the driver from source according to the instructions in the “Building and Installing the Driver’ section later in this document.

  1. Install the DEB package.
# sudo apt-get install ./dist/dellnfs-modules_*-generic_amd64.deb
  1. Check package is installed correctly.
# dpkg -l | grep dellnfs-modules

dellnfs-modules   2:4.0.22-dell.kver.5.4.0-150-generic amd64        NFS RDMA kernel modules

# dpkg -S /lib/modules/`uname -r`/updates/bundle/net/sunrpc/xprtrdma/rpcrdma.ko

dellnfs-modules: /lib/modules/5.4.0-150-generic/updates/bundle/net/sunrpc/xprtrdma/rpcrdma.ko

Regenerate the running kernel image.

# sudo update-initramfs -u -k `uname -r`
  1. Reboot the Linux client.
# reboot
  1. Confirm the module and services are running.
# dellnfs-ctl status

version: 4.0.22-dell
kernel modules: sunrpc rpcrdma compat_nfs_ssc lockd nfs_acl nfs nfsv3
services: rpcbind.socket rpcbind rpc-gssdrpc_pipefs: /run/rpc_pipefs

If the services are not up, run the ‘dellnfs-ctl reload’ command to start the services.

  1. Verify an NFS mount

Attempt a mount, since NFS occasionally needs to create a symlink to rpc.statd. For example:

# mount -t nfs -o proto=rdma,port=20049,rsize=1048576,wsize=1048576,vers=3,nconnect=32,remoteports=10.231.180.95-10.231.180.98,remoteports_offset=1 10.231.180.95:/ifs/data/fio /mnt/test/

Created symlink /run/systemd/system/remote-fs.target.wants/rpc-statd.service → /lib/systemd/system/rpc-statd.service.

In the above, a symlink created on the first mount. Perform a reload to confirm the service is running correctly. For example:

# dellnfs-ctl reload

dellnfs-ctl: stopping service rpcbind.socket

dellnfs-ctl: umounting fs /run/rpc_pipefs

dellnfs-ctl: unloading kmod nfsv3

dellnfs-ctl: unloading kmod nfs

dellnfs-ctl: unloading kmod nfs_acl

dellnfs-ctl: unloading kmod lockd

dellnfs-ctl: unloading kmod compat_nfs_ssc

dellnfs-ctl: unloading kmod rpcrdma

dellnfs-ctl: unloading kmod sunrpc

dellnfs-ctl: loading kmod sunrpc

dellnfs-ctl: loading kmod rpcrdma

dellnfs-ctl: loading kmod compat_nfs_ssc

dellnfs-ctl: loading kmod lockd

dellnfs-ctl: loading kmod nfs_acl

dellnfs-ctl: loading kmod nfs

dellnfs-ctl: loading kmod nfsv3

dellnfs-ctl: mounting fs /run/rpc_pipefs

dellnfs-ctl: starting service rpcbind.socket

dellnfs-ctl: starting service rpcbind


Similarly, for OpenSUSE and SLES, the driver package installation steps are as follows:

  1. Download the driver RPM package.
  2. Verify that RPM package and Kernel Version Match.

Compare the package version and the kernel version to ensure they are an exact match. If they are not an exact  match, do not install the package. Instead, build the driver from source according to the instructions in the “Building and Installing the Driver’ section later in this document.

  1. Install the downloaded RPM package.
# zypper in ./dist/dellnfs-4.0.22-kernel_5.14.21_150400.24.97_default.x86_64.rpm
Loading repository data...
Reading installed packages...
Resolving package dependencies...

The following NEW package is going to be installed:
  dellnfs

1 new package to install.
  1. Check the installed files.
# rpm -qa | grep dell
dellnfs-4.0.22-kernel_5.14.21_150400.24.100_default.x86_64
  1. Reboot the Linux client.
# reboot
  1. Verify the services are started.
# systemctl start rpcbind
# systemctl start nfs
# systemctl status nfs
nfs.service - Alias for NFS client
     Loaded: loaded (/usr/lib/systemd/system/nfs.service; disabled; vendor preset: disabled)
     Active: active (exited) since Wed 2023-12-13 15:11:09 PST; 2s ago
    Process: 15577 ExecStart=/bin/true (code=exited, status=0/SUCCESS)
   Main PID: 15577 (code=exited, status=0/SUCCESS)
  1. Verify the client driver is loaded with ‘dellnfs-ctl’ script.
# dellnfs-ctl status
version: 4.0.22
kernel modules: sunrpc
services: rpcbind.socket rpcbind
rpc_pipefs: /var/lib/nfs/rpc_pipefs
  1. Verify an NFS mount

Attempt a mount, since NFS occasionally needs to create a symlink to rpc.statd. For example:

# mount -t nfs -o proto=rdma,port=20049,rsize=1048576,wsize=1048576,vers=3,nconnect=32,remoteports=10.231.180.95-10.231.180.98,remoteports_offset=1 10.231.180.95:/ifs/data/fio /mnt/test/

Created symlink /run/systemd/system/remote-fs.target.wants/rpc-statd.service → /lib/systemd/system/rpc-statd.service.

In the above, a symlink is created on the first mount. Next, perform a reload to confirm the service is running correctly. For example:

# dellnfs-ctl reload

dellnfs-ctl: stopping service rpcbind.socket

dellnfs-ctl: umounting fs /run/rpc_pipefs

dellnfs-ctl: unloading kmod nfsv3

dellnfs-ctl: unloading kmod nfs

dellnfs-ctl: unloading kmod nfs_acl

dellnfs-ctl: unloading kmod lockd

dellnfs-ctl: unloading kmod compat_nfs_ssc

dellnfs-ctl: unloading kmod rpcrdma

dellnfs-ctl: unloading kmod sunrpc

dellnfs-ctl: loading kmod sunrpc

dellnfs-ctl: loading kmod rpcrdma

dellnfs-ctl: loading kmod compat_nfs_ssc

dellnfs-ctl: loading kmod lockd

dellnfs-ctl: loading kmod nfs_acl

dellnfs-ctl: loading kmod nfs

dellnfs-ctl: loading kmod nfsv3

dellnfs-ctl: mounting fs /run/rpc_pipefs

dellnfs-ctl: starting service rpcbind.socket

dellnfs-ctl: starting service rpcbind

Unlike installing the driver, removing it does not typically require a client reboot, and can also be performed via the appropriate package manager for the Linux flavor.

Also, be aware that there are no upgrade or patching systems for the driver. This means that if a client’s kernel version is updated, the module must be re-built or a matching package re-installed. And correspondingly, if there is an update to the dellnfs package, the module must be re-installed.

# sudo update-initramfs -u -k `uname -r`

Next, perform a reload to confirm the service is running correctly. For example:

# dellnfs-ctl reload

dellnfs-ctl: stopping service rpcbind.socket

dellnfs-ctl: umounting fs /run/rpc_pipefs

dellnfs-ctl: unloading kmod nfsv3

dellnfs-ctl: unloading kmod nfs

dellnfs-ctl: unloading kmod nfs_acl

dellnfs-ctl: unloading kmod lockd

dellnfs-ctl: unloading kmod compat_nfs_ssc

dellnfs-ctl: unloading kmod rpcrdma

dellnfs-ctl: unloading kmod sunrpc

dellnfs-ctl: loading kmod sunrpc

dellnfs-ctl: loading kmod rpcrdma

dellnfs-ctl: loading kmod compat_nfs_ssc

dellnfs-ctl: loading kmod lockd

dellnfs-ctl: loading kmod nfs_acl

dellnfs-ctl: loading kmod nfs

dellnfs-ctl: loading kmod nfsv3

dellnfs-ctl: mounting fs /run/rpc_pipefs

dellnfs-ctl: starting service rpcbind.socket

dellnfs-ctl: starting service rpcbind

Note that there are no upgrade or patching systems available for the ‘dellnfs’ multipath driver module. If a Linux client’s kernel version is updated, the module must be rebuilt or a matching package reinstalled. Similarly, if there is an update to the ‘dellnfs’ package, the module must be reinstalled.

Uninstalling the multipath client driver does not require a reboot and can be performed using the standard package manager for the pertinent Linux distribution. This unloads the loaded module and then removes the files. As such, uninstallation is a fairly trivial process.

The package manager commands for each Linux version to remove a package are as follows:

OS Package removal command
Ubuntu sudo apt-get autoremove <package_name>
OpenSUSE/SLES zypper remove -u <package_name>

In the next article in this series, we’ll take a look at the specifics of multipath driver binary package installation.

PowerScale Multipath Client Driver and AI Enablement

In order for success with large AI model customization, inferencing, and training, GPUs require data served to them quickly and efficiently. Compute and storage must be architected and provisioned accordingly, in order to eliminate potential bottlenecks in the infrastructure.

To meet this demand, the new PowerScale multipath client driver enables performance aggregation of multiple PowerScale nodes through a single NFS mount point to one or many compute nodes. As a result, this driver, in conjunction with OneFS GPUDirect support, has enabled Dell to deliver the first Ethernet storage solution to be certified for NVIDIA’s DGX SuperPOD.

SuperPOD is an AI-optimized data center architecture that delivers the formidable computational power required to train deep learning (DL) models at scale, accelerating time to outcomes which drive future innovation.

Using DGX A200, B200, or H200 GPU-based compute in concert with a PowerScale F710 clustered storage layer, NVIDIA’s SuperPOD is able to deliver groundbreaking performance.

Deployed as a fully integrated scalable system, SuperPOD is purpose-built for solving challenging computational problems across a diverse range of AI workloads. These include streamlining supply chains, building large language models, and extracting insights from petabytes of unstructured data.

The performance envelope delivered by DGX SuperPOD enables rapid multi-node training of LLMs at significant scale. This integrated approach of provisioning, management, compute, networking, and fast storage, enables a diverse system that can span data analytics, model development, and AI inferencing, right up to the largest, most complex transformer-based AI workloads, deep learning systems, and trillion-parameter generative AI models.

To drive the throughput required for larger NVIDIA SuperPOD deployments, NFS client connectivity to a PowerScale cluster needs to utilize both RDMA and nconnect, in addition to GPUDirect.

While the native Linux NFS stack supports their use, it does not allow nconnect and RDMA to be configured simultaneously.

To address this, the multipath driver permits Linux NFS clients to use RDMA in conjunction with nconnect mount options, while also increasing the maximum nconnect limit from 16 to 64 connections. Additionally, the SuperPOD solution mandates the use of the ‘localports_failover’ NFS mount option, which only works with RDMA currently.

The Dell multipath client driver can be of considerable performance benefit for workloads with streaming reads and writes to and from individual high-powered servers, particularly to multiple files within a single NFS mount – in addition to SuperPOD and BasePOD AI workloads. Conversely, single file streams, and multiple concurrent writes to the same file across multiple nodes typically don’t benefit substantially from the multipath driver.

Without the multipath client driver, a single NFS mount can only route to one PowerScale storage node IP address.

By way of contrast, the multipath driver allows NFS clients to direct I/O to multiple PowerScale nodes for higher aggregate single-client throughput.

The multipath driver enables a single NFS mount point to route to multiple node IP addresses. A group of IP addresses consists of one logical NFS client with the remote endpoint (cluster) using multiple remote machines (nodes), implementing a distributed server architecture.

The principle NFS mount options of interest with the multipath client driver are:

Mount option Description
nconnect Allows the admin to specify the number of TCP connections the client can establish between itself and the NFS server. It works with remoteports to spread load across multiple target interfaces.
localports Mount option that allows a client to use its multiple NICs to multiplex I/O.
localports_failover Mount option allowing transports to temporarily move from local client interfaces that are unable to serve NFS connections.
proto The underlying transport protocol that the NFS mount will use. Typically, either TCP or RDMA.
remoteports Mount option that allows a client to target multiple servers/ NICS to multiplex I/O. Remoteports spreads the load to multiple file handles instead of taking a single file handle to avoid thrashing on locks.
version The version of the NFS protocol that is to be used. The multipath driver supports NFSv3, NFSv4.1, and NFSv4.2. Note that NFSv4.0 is unsupported.

There are also several advanced mount options which can be useful to squeeze out some extra throughput, particularly with SuperPOD deployments. These options include ‘remoteport offsets’, which can help with loading up L1 cache, and’ spread reads and writes’, which can assist with load balancing.

The Dell multipath driver is available for download on the Dell Support Site to any customer that has OneFS entitlement:

https://www.dell.com/support/home/en-us/product-support/product/isilon-onefs/drivers

There is no license requirement for this driver, nor charge for it, and its provided as both pre-built Linux package, and customer-compliable source code. There’s a README file included with the code that provides basic instruction.

This multipath client driver runs on both physical and virtual machines, and across several popular Linux distros. The following matrix shows the currently supported variants, plus the availability of a pre-compiled driver package and/or self-compilation option.

Linux distribution Kernel version Upstream driver version (minimum) Multipath driver version Package

available

Self-

compile

OpenSUSE 15.4 5.14.x 4.x 1.x ü ü
Ubuntu 20.04 5.4.x 4.x 1.x ü ü
Ubuntu 22.04 5.15.x 4.x 1.x ü ü

While the multipath driver’s major release version—1.x—is correct in the table, the second digit release number will be frequently incremented as updated versions of the multipath client driver are released.

By design, the multipath driver only supports newer and most recent versions of the popular Linux distributions. Older Linux kernel versions often do not support full NFS client functionality, particularly for the ‘–remoteports’ and/or ‘–localports’ mount configuration options. Additionally, older and end-of-life Linux versions can often present significant security risks, especially once current vulnerability patches and hotfixes are no longer being made available.

Both x86 CPU architectures and GPU-based platforms, such as the NVIDIA DGX range, are supported.

Linux system Processor type Example
Physical CPU Dell PE R760
Physical GPU Dell PE XE9680

NVIDIA DGX H100

Virtual machine CPU VMware ESXi
Virtual machine GPU VMware vDGA

While there is no specific NFS or OneFS core configuration required on the PowerScale cluster side for multipath driver support, there are a couple of basic prerequisites The following OneFS support matrix on the top right of this slide lays out which driver functionality is available in what release, from OneFS 9.5 to current.

Version NFSv3, NFSv4.1 TCP NFSv3 RDMA NFSv4.1 RDMA NVIDIA SuperPOD
OneFS 9.5 Yes Yes No No
OneFS 9.7 Yes Yes Yes No
OneFS 9.9 Yes Yes Yes Yes

Also note that OneFS 9.9 is required for any NVIDIA SuperPOD deployments, because there are some performance optimizations in 9.9 specifically for that platform.

Additionally, both the dynamic and static network pools can be configured on the cluster for use with the multipath driver. If F710 nodes are being deployed in the cluster, OneFS 9.7 or later is required.

Note that when deploying an NVIDIA SuperPOD or BasePOD solution, the reference architecture mandates a PowerScale cluster composed of F710 all-flash nodes running OneFS 9.9 or later.


For a Linux client to successfully connect to a PowerScale cluster using the multipath driver it currently must be running one of the following Linux flavors:

Supported Linux Distribution Kernel Version
OpenSUSE 15.4 5.14.x
Ubuntu 20.04 5.4.x
Ubuntu 22.04 5.15.x

By design, the multipath driver only supports newer and most recent versions of the popular Linux distributions. Older Linux kernels often don’t include full NFS client functionality, particularly for the ‘–remoteports’ and ‘–localports’ mount options. You will also likely notice the conspicuous absence of Red Hat Enterprise Linux from this matrix. However, engineering do anticipate supporting both RHEL 8 and 9 in a near-future version.

There are also a couple of additional client prerequisites that must be met:

  • If RDMA is being configured, the client must contain an RDMA-capable Ethernet NIC, such as the Mellanox CX series.
  • The Linux client should have the ‘trace-cmd’ package installed, along with NFS client related packages.

In the next article in this series, we’ll take a look at the specifics of the multipath driver binary package installation.

OneFS QoS and DSCP Tagging – Configuration and Management

As we saw in the previous article in this series, OneFS 9.9 introduces support for DSCP marking, and the configuration is cluster-wide, and based on the class of network traffic. This is performed by the OneFS firewall, which inspects outgoing network traffic on the front-end ports and assigns it to the appropriate QoS class based on a set of DSCP tagging rules:

Configuration-wise, DSCP requires OneFS 9.9 or later, and is disabled by default – both for new installations and legacy cluster upgrades. The QoS feature can be configured through the CLI, WebUI, and pAPI endpoints. And for clusters that are upgrading to OneFS 9.9, the release must be committed before DSCP configuration can proceed.

Before enabling DSCP tagging, verify the current firewall and DSCP settings:

# isi network firewall settings view

Enabled: True

DSCP Enabled: False

Update these as required, remembering that both the firewall and DSCP must be running in order for QoS tagging to work. DSCP is off by default, but can be easily started with the following CLI syntax:

# isi network firewall settings modify dscp-enabled true

The OneFS DCSP implementation includes four default tagging rules:

Class  Traffic   Default DSCP Value  Source Ports  Destination Ports 
Transactional File Access and Sharing Protocols:

NFS, FTP, HTTPS data, HDFS, S3, RoCE

Security and Authentication Protocols:

Kerberos, LDAP, LSASS, DCE/RPC

RPC and Inter-Process Communication Protocols:

rpc.bind, mountd, statd, lockd, quotd, mgmntd

Naming Services Protocols: NetBIOS, Microsoft-DS

18 20, 21, 80, 88, 111, 135 137, 138, 139, 300, 302, 304, 305, 306, 389, 443, 445, 585, 636, 989, 990, 2049, 3268, 3269, 8020, 8082, 8440, 8441, 8443, 9020, 9021 Not defined by default, but administrator may configure.
Network Management WebUI, SSH, SMTP, syslog, DNS, NTP, SNMP, Perf collector, CEE, alerts 16 22, 25, 53, 123, 161, 162, 514, 6514, 6567, 8080, 9443, 12228 Not defined by default, but administrator may configure.
Bulk Data SmartSync, SyncIQ, NDMP 10 2097, 2098, 3148, 3149, 5667, 5668, 7722, 8470, 10000 Not defined by default, but administrator may configure.
Catch-All All other traffic that does not match any of the above 0 all Not defined by default, but administrator may configure.

The ‘isi network firewall dscp list’ command can be used to view all of a cluster’s DSCP firewall rules. For example:

# isi network firewall dscp list
DSCP Rules in Priority Order From High To Low:
ID                      Description                      DSCP Value  Src Ports  Dst Ports
------------------------------------------------------------------------------------------
rule_transactional_data DSCP Rule for transactional data 18          20         -
                                                                     21
                                                                     80
                                                                     88
                                                                    111
                                                                    135
                                                                    137
                                                                    138
                                                                    139
                                                                    300
                                                                    302
                                                                    304
                                                                    305
                                                                    306
                                                                    389
                                                                    443
                                                                    445
                                                                    585
                                                                    636
                                                                    989
                                                                    990
                                                                   2049
                                                                   3268
                                                                   3269
                                                                   8020
                                                                   8082
                                                                   8440
                                                                   8441
                                                                   8443
                                                                   9020
                                                                   9021
                                                                  20049

rule_network_management DSCP Rule for network management 16          22         -
                                                                     25
                                                                     53
                                                                    123
                                                                    161
                                                                    162
                                                                    514
                                                                   6514
                                                                   6567
                                                                   8080
                                                                   9443
                                                                  12228

rule_bulk_data          DSCP Rule for bulk data          10          2097       -
                                                                   2098
                                                                   3148
                                                                   3149
                                                                   5667
                                                                   5668
                                                                   7722
                                                                   8470
                                                                  10000

rule_best_effort        DSCP Rule for best effort        0           all        all
------------------------------------------------------------------------------------------
Total: 4

If desired, the ‘isi network firewall dscp modify’, followed by the appropriate rule name, can be used to modify a rule’s associated DSCP value, source ports, or destination ports. For example:

# isi network firewall dscp modify rule_transactional_data –src-port 123 –dst-ports 456 –dscp-value 10

Note that a ‘–live’ option is also available to effect the changes immediately on active rules. If the –live option is used when DSCP is inactive, the command is automatically rejected.

If needed, all of the DSCP configuration can be easily reset to its OneFS defaults and DSCP disabled as follows:

# isi network firewall reset-dscp-setting

This command will reset the global firewall DSCP setting to the original system defaults. Are you sure you want to continue? (yes/[no]): yes

GUI-wise, DSCP has a new ‘settings’ tab under the WebUI’s firewall section for managing its operation and configuration, and editing the rules:

Again, although the DSCP feature can be configured and enabled with the firewall itself still disabled, DSCP will only activate once the firewall is up and running too.

The WebUI allows modification of a rule’s associated DSCP value, source ports, or destination ports. For example:

Like the CLI, the WebUI also has a ‘Reset Default Settings’ option which clears all the current DSCP configuration parameters and resets them to the OneFS defaults:

Also, there’s a comprehensive set of RESTful platform API endpoints, which include:

  • GET/PUT platform/network/firewall/settings
  • POST platform/network/firewall/reset-dscp-setting?live=true
  • GET platform/network/firewall/dscp
  • PUT platform/network/firewall/dscp/<rule_name>?live=true

All DSCP’s configuration data is stored in gconfig at the cluster level, and all the firewall daemon instances across the nodes work as peers. So if it becomes necessary to troubleshooting QoS and tagging, the following logs and utilities are a great place to start.

  • /var/log/isi_firewall_d.log, which includes information from the Firewall daemon.
  • /var/log/isi_papi_d.log, which covers all the command handlers, including the firewall and DSCP related ones.
  • ‘isi_gconfig -t firewall’ utility, which returns all the firewall’s configuration info.
  • ‘ipfw show’ command, which dumps the kernel’s ipfw table.

Also note that all these logs and command outputs are included in a standard isi_gather_info log collection.

OneFS QoS and DSCP Tagging

As more applications contend for shared network links with finite bandwidth, ensuring Quality of Service (QoS) becomes more critical. Each application or workload can have varying QoS requirements to deliver not only service availability, but also an optimal client experience. Associating each app with an appropriate QoS marking helps provide some traffic policing, by allowing certain packets to be prioritized across a shared network, all while meeting SLAs.

QoS can be implemented using a variety of methods, but the most common is through a Differentiated Services Code Point, or DSCP, which specifies a value in the packet header that maps to a traffic effort level.

OneFS 9.9 introduces support for DSCP marking, and the configuration is cluster-wide, and based on the class of network traffic. Once configured, OneFS inserts the DSCP marking in the Traffic Class or Type of Service fields of the IP packet header, and away you go.

The pertinent part of each IPv4 and IPv6 packet header is as follows:

OneFS QoS tagging separates network traffic into four default classes, each with an associated DSCP value, plus configurable source and destination ports. The four classes OneFS provides are ‘transactional’, ‘network management’, ‘bulk data’, and ‘catch all’:

Class  Traffic   Default DSCP Value  Source Ports  Destination Ports 
Transactional File Access and Sharing Protocols:

NFS, FTP, HTTPS data, HDFS, S3, RoCE

Security and Authentication Protocols:

Kerberos, LDAP, LSASS, DCE/RPC

RPC and Inter-Process Communication Protocols:

rpc.bind, mountd, statd, lockd, quotd, mgmntd

Naming Services Protocols: NetBIOS, Microsoft-DS

18 20, 21, 80, 88, 111, 135 137, 138, 139, 300, 302, 304, 305, 306, 389, 443, 445, 585, 636, 989, 990, 2049, 3268, 3269, 8020, 8082, 8440, 8441, 8443, 9020, 9021 Not defined by default, but administrator may configure.
Network Management WebUI, SSH, SMTP, syslog, DNS, NTP, SNMP, Perf collector, CEE, alerts 16 22, 25, 53, 123, 161, 162, 514, 6514, 6567, 8080, 9443, 12228 Not defined by default, but administrator may configure.
Bulk Data SmartSync, SyncIQ, NDMP 10 2097, 2098, 3148, 3149, 5667, 5668, 7722, 8470, 10000 Not defined by default, but administrator may configure.
Catch-All All other traffic that does not match any of the above 0 all Not defined by default, but administrator may configure.

The default DSCP feature values for each were specifically chosen to meet US government requirements and satisfy the Fed APL needs. While destination ports are undefined in the classes by default, cluster admins can customize the DSCP values, source ports, and destination ports per site requirements.

Under the hood, QoS tagging is built upon the OneFS firewall (ipfw):

As such, QoS tagging is only functional when both the firewall and the DSCP features are enabled.

The firewall inspects outgoing network traffic on the front-end ports and assigns it to the appropriate QoS class. The outbound IP packets are matched to the cluster’s four DSCP rules, one by one, from top to bottom, using the source ports, and destination ports too, if configured.

When a good match is found, the Firewall engine marks the packets’ DSCP bits as specified by that rule. If no match is found, the last ‘Best Effort’ rule will catch all outgoing IP packets which are unmatched with the other 3 DSCP rules.

The firewall assigns the DSCP value based on the QoS class, and the DSCP configuration and values are cluster wide and preserved across upgrades.

Note though, that this DSCP feature does not allow the creation of any additional or custom DSCP rules currently. Additionally, DSCP tagging is disabled by default in both STIG hardening and compliance modes.

Also, consider that in order to provide QoS, the firewall has to inspect and filter the outgoing packets, which obviously comes with a performance cost. Although this overhead should be fairly minimal, the recommendation is to test DSCP tagging in a lab environment first, to confirm workloads are not significantly impacted, before letting it loose on a production cluster.

In the next article in this series, we’ll look at the DSCP configuration and management, plus some basic troubleshooting tools.