In the previous article in this OneFS SupportAssist series, we reviewed the off-cluster prerequisites for enabling OneFS SupportAssist:
- Upgrading the cluster to OneFS 9.5.
- Obtaining the secure access key and PIN.
- Selecting either direct connectivity or gateway connectivity.
- If using gateway connectivity, installing Secure Connect Gateway v5.x.
In this article, we turn our attention to step 5 – provisioning SupportAssist on the cluster.
Note that, as part of this process, we’ll be using the access key and PIN credentials previously obtained from the Dell Support portal in step 2 above.
Provisioning SupportAssist on a cluster

SupportAssist can be configured from the OneFS 9.5 WebUI by navigating to ‘Cluster management > General settings > SupportAssist’. To initiate the provisioning process on a cluster, click on the ‘Connect SupportAssist’ link, as below:

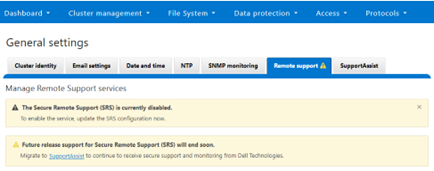
Note that if SupportAssist is unconfigured, the Remote Support page displays the following banner warning of the future deprecation of SRS:
Similarly, when unconfigured, the SupportAssist WebUI page also displays verbiage recommending the adoption of SupportAssist:
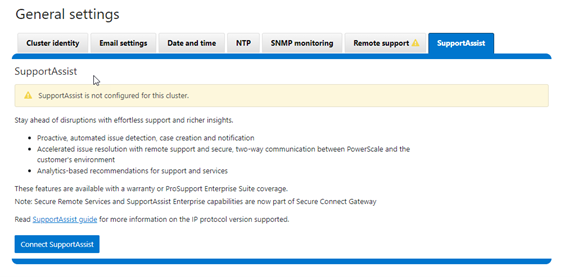
There is also a ‘Connect SupportAssist’ button to begin the provisioning process.
- Accepting the telemetry notice.

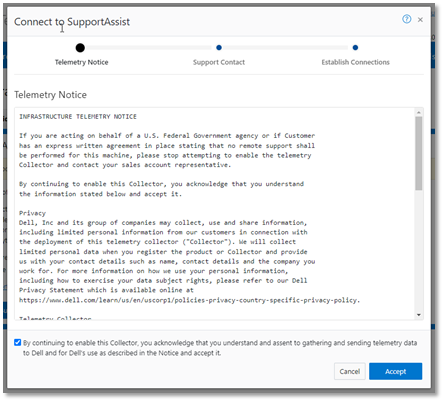
Selecting the ‘Configure SupportAssist’ button initiates the following setup wizard. The first step requires checking and accepting the Infrastructure Telemetry Notice:
- Support Contract.

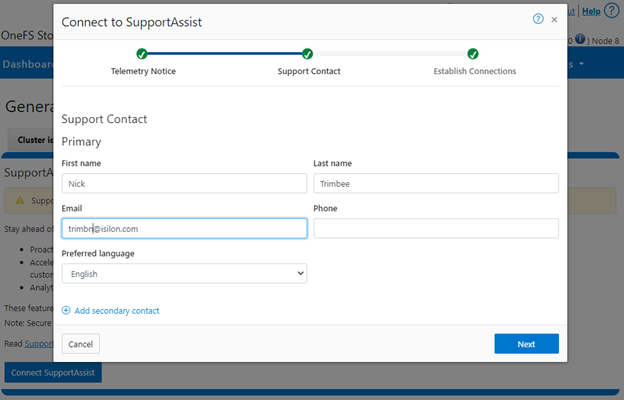
For the next step, enter the details for the primary support contact, as prompted:
Or from the CLI using the ‘isi supportassist contacts’ command set. For example:
# isi supportassist contacts modify --primary-first-name=Nick --primary-last-name=Trimbee --primary-email=trimbn@isilon.com
- Establish Connections.

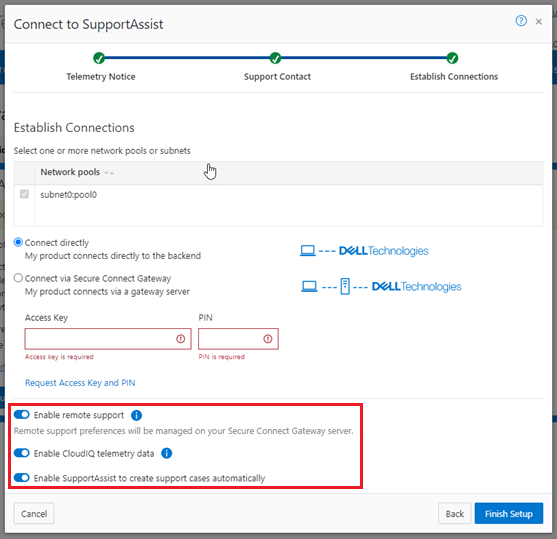
Next, complete the ‘Establish Connections’ page
This involves the following steps:

- Selecting the network pool(s).
- Adding the secure access key and PIN,
- Configuring either direct or gateway access
- Selecting whether to allow remote support, CloudIQ telemetry, and auto case creation.
a. Select network pool(s).

At least one statically-allocated IPv4 network subnet and pool is required for provisioning SupportAssist. As of OneFS 9.5, does not support IPv6 networking for SupportAssist remote connectivity. However, IPv6 support is planned for a future release.
Select one or more network pools or subnets from the options displayed. For example, in this case ‘subnet0pool0’:
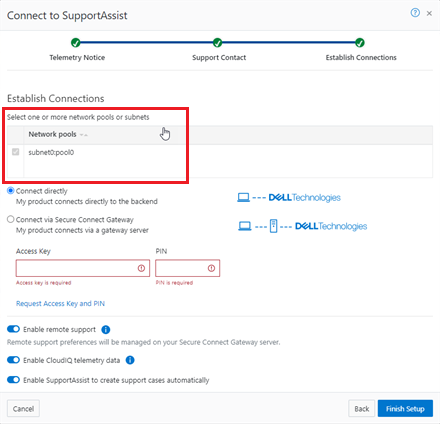
Or from the CLI:
Select one or more static subnet/pools for outbound communication. This can be performed via the following CLI syntax:
# isi supportassist settings modify --network-pools="subnet0.pool0"
Additionally, if the cluster has the OneFS 9.5 network firewall enabled (‘isi network firewall settings’), ensure that outbound traffic is allowed on port 9443.
b. Add secure access key and PIN.

In this next step, add the secure access key and pin. These should have been obtained in an earlier step in the provisioning procedure from the following Dell Support site: https://www.dell.com/support/connectivity/product/isilon-onefs.:
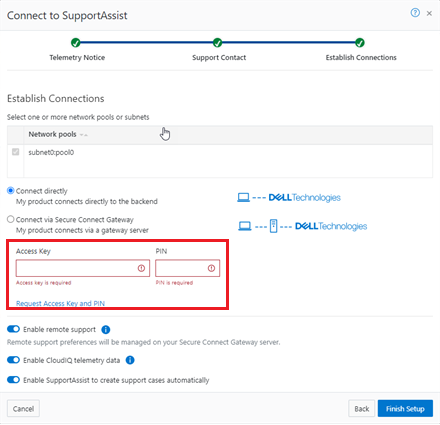
Alternatively, if configuring SupportAssist via the OneFS CLI, add the key and pin via the following syntax:
# isi supportassist provision start --access-key <key> --pin <pin>
c. Configure access.
i. Direct access.

From the WebUI, under ‘Cluster management > General settings > SupportAssist’ select the ‘Connect directly’ button:
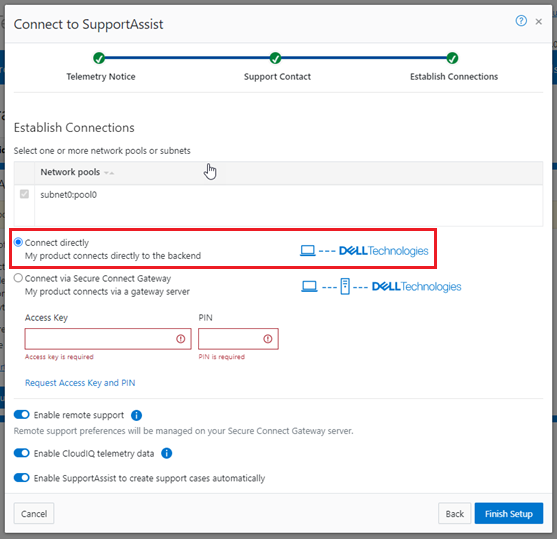
Or from the CLI. For example, to configure direct access (the default), ensure the following parameter is set:
# isi supportassist settings modify --connection-mode direct

# isi supportassist settings view | grep -i "connection mode"

        Connection mode: direct
ii. Gateway access.

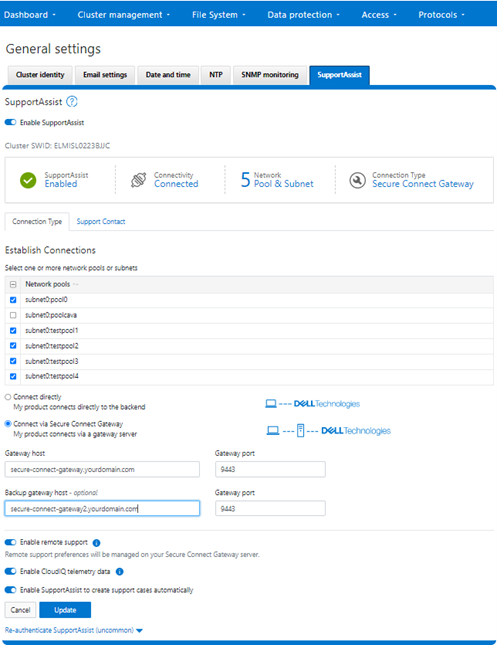
Alternatively, to connect via a gateway, check the ‘Connect via Secure Connect Gateway’ button:
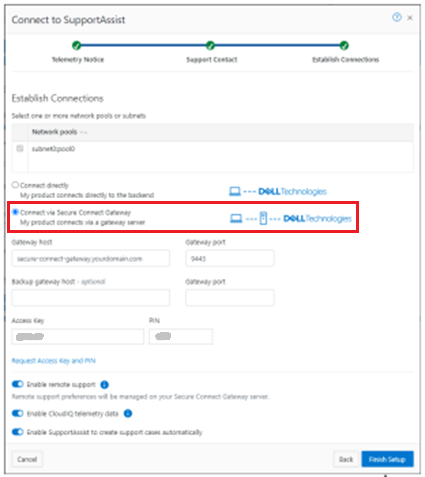
Complete the ‘gateway host’ and ‘gateway port’ fields as appropriate for the environment.
Alternatively, to set up a gateway configuration from the CLI, use the ‘isi supportassist settings modify’ syntax. For example, to configure using the gateway FQDN ‘secure-connect-gateway.yourdomain.com’ and the default port ‘9443’:
# isi supportassist settings modify --connection-mode gateway

# isi supportassist settings view | grep -i "connection mode"

        Connection mode: gateway

# isi supportassist settings modify --gateway-host secure-connect-gateway.yourdomain.com --gateway-port 9443
When setting up the gateway connectivity option, Secure Connect Gateway v5.0 or later must be deployed within the data center. Note that SupportAssist is incompatible with either ESRS gateway v3.52 or SAE gateway v4. However, Secure Connect Gateway v5.x is backwards compatible with PowerScale OneFS ESRS, which allows the gateway to be provisioned and configured ahead of a cluster upgrade to OneFS 9.5.
d. Configure support options.

Finally, configure the desired support options:
When complete, the WebUI will confirm that SmartConnect is successfully configured and enabled, as follows:
Or from the CLI:
# isi supportassist settings view

        Service enabled: Yes

       Connection State: enabled

      OneFS Software ID: ELMISL0223BJJC

          Network Pools: subnet0.pool0, subnet0.testpool1, subnet0.testpool2, subnet0.testpool3, subnet0.testpool4

        Connection mode: gateway

           Gateway host: eng-sea-scgv5stg3.west.isilon.com

           Gateway port: 9443

    Backup Gateway host: eng-sea-scgv5stg.west.isilon.com

    Backup Gateway port: 9443

  Enable Remote Support: Yes

Automatic Case Creation: Yes

       Download enabled: Yes
