The previous article in this series focused on provisioning and configuring a PowerScale cluster to support MetadataIQ. Now, we turn our focus to the server side deployment and setup.
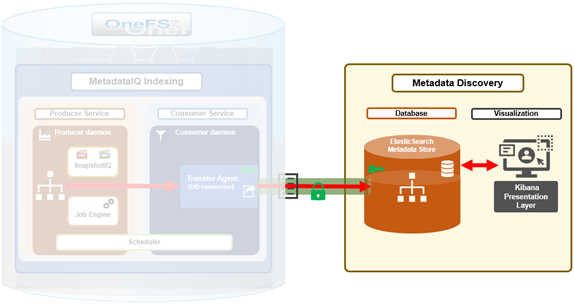
MetadataIQ is introduced in OneFS 9.10 and requires a cluster to be running a fresh install or committed upgrade of 9.10 or later in order to run.
Either a physical Linux client or a virtual machine instance with sufficient disk space (20+GB is recommended) and virtual memory (minimum 256MB) is required to run the ElasticSearch database, which houses the off-cluster metadata, and Kibana visualization dashboard.
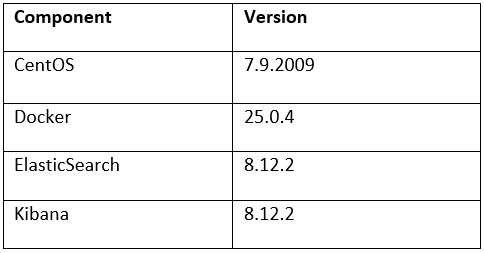
OneFS MetadataIQ has been verified in-house with the following components and versions:
Install Docker on the client system using the Linux distribution’s native package manager.

For example, to install the latest version of Docker using the Yum package manager:
# sudo yum install docker-ce docker-ce-cli containerd.io docker-buildx-plugin docker-compose-plugin
While the above command installs Docker and creates a ‘docker’ group, it does not add any users to the group by default.
Once successfully installed, the Docker container service can be enabled as follows:
# sudo systemctl start docker
If needed, detailed installation and management instructions are available in the Docker installation guide.
OneFS MetadataIQ requires an off-cluster ElasticSearch database for the metadata store.
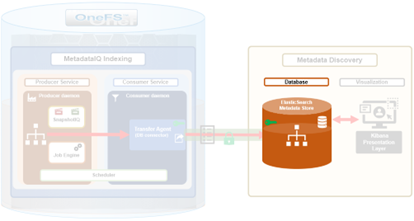
ElasticSearch and can be installed on a Linux client via the following procedure. Note that this procedure assumes that Docker has already been successfully installed on the Linux client.
- First, install ElasticSearch as follows:
# docker network create elastic

# docker run --name es01 --net elastic -p 9200:9200 -e "http.publish_host=<x.x.x.x>" -it docker.elastic.co/elasticsearch/elasticsearch:8.12.2
Where <x.x.x.x> is the Linux client’s IP address.
Note that the ElasticSearch database typically uses TCP port 9200 by default.
Additional instructions and information can be found in the ‘getting started’ section of the ElasticSearch configuration guide.
The next step is to install and configure the Kibana dashboard.
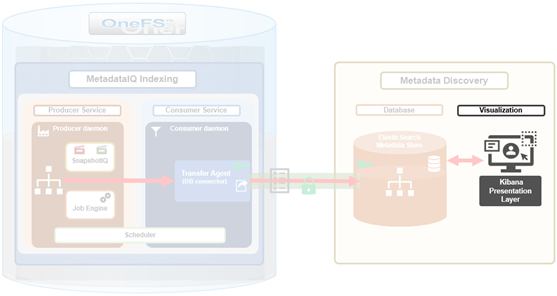
The Kibana binaries can be installed as follows:
# docker pull docker.elastic.co/kibana/kibana:8.12.2

# docker run --name kibana --net elastic -p 5601:5601 docker.elastic.co/kibana/kibana:8.12.2
Note that Kibana typically runs by default on TCP port 5601.
Additional instructions and information can be found in the Kibana installation guide.
Once the ElasticSearch database is up and running, the next step is to generate a new security API token. This can be performed from the Kibana web interface, by navigating to Dev Tools > Console and using the following JSON ‘POST’ syntax:
POST /_security/api_key
{
  "name": "mdidx-api-key",
  "role_descriptors”: {
    "role-a": {
      "cluster": ["all"],
      "indices": [
        {
          "names": ["isi_metadata_index"],
          "privileges": ["all"]
        }
      ]
    }
  },
  "metadata": {
    "application": "my-application",
    "environment": {
       "level": 1,
       "trusted": true,
       "tags": ["dev", "staging"]
    }
  }
}
The JSON request (above) is entered into the left hand pane of the Kibana dev tools console, and the output is displayed in the right hand pane. For example:
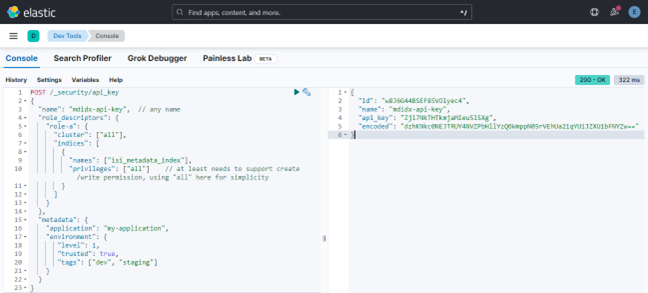
A successful request returns a JSON structure containing the API key, plus its name, ID, and encoding. Output is of the form:
{

  "id": "w8J6G44BSEF85VOlyec4",

  "name": "mdidx-api-key",

  "api_key": "Zji7NkTHTkmjaMIeu5lSXg",

  "encoded": "dzhKNkc0NEJTRUY4NVZPbHllYzQ6WmppN05rVEhUa21qYU1JZXU1bFNYZw=="

}
Instructions describing this API key generation process in detail can be found in the ElasticSearch getting started guide.
The bulk API is used to update the ElasticSearch database. Note that the role does require the following privileges:
- Create
- Index
- Write index
More information on using the ElasticSearch bulk API can be found in the ElasticSearch configuration guide.
An SSL certificate file is required in order for the cluster to securely connect to the ElasticSearch database. This SSL certificate file must be copied from the Linux client to the PowerScale cluster.
On the Linux client, the SSL certificate can be copied from the Docker container to the cluster as follows:
# docker cp es01:/usr/share/elasticsearch/config/certs/http_ca.crt ./

# scp ./http_ca.crt <x.x.x.x>:/ifs
Where <x.x.x.x> is the cluster’s IP address.
Authentication between the ElasticSearch instance and the PowerScale cluster can be verified from OneFS as follows:
# curl --cacert /ifs/http_ca.crt -H "Authorization: ApiKey <encode in api_key response from above>" https://<x.x.x.x>:9200/
Once the file transfer is complete, the certificate can be validated by confirming a matching checksum on the client and cluster using the ‘md5sum’ command for Linux and ‘md5’ command for PowerScale OneFS respectively. For example:
# md5 /ifs/http_ca.crt

MD5 (http_ca.crt) = 8d8f1ffe34812df1011d6c0c3652e9eb
More information on how to configure the database security can be found in the ElasticSearch configuration guide.
In the next article in this series, we’ll examine the process involved for using and managing an ElasticSearch instance and Kibana visualization portal.